Konica Minolta bizhub C3850FS bizhub C3850FS/C3850/C3350 Quick Start Guide
Konica Minolta bizhub C3850FS Manual
 |
View all Konica Minolta bizhub C3850FS manuals
Add to My Manuals
Save this manual to your list of manuals |
Konica Minolta bizhub C3850FS manual content summary:
- Konica Minolta bizhub C3850FS | bizhub C3850FS/C3850/C3350 Quick Start Guide - Page 1
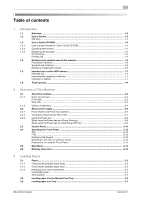
Quick Start Guide INDEX 1. Introduction 2. Overview of This Machine 3. Loading Paper 4. Initial Settings of This Machine 5. Basic Usage 6. Index - Konica Minolta bizhub C3850FS | bizhub C3850FS/C3850/C3350 Quick Start Guide - Page 2
...1-2 User's Guides ...1-3 Manuals...1-3 User's Guide CD-ROM...1-4 User's guides included in User's Guide CD-ROM 1-4 Operating environment ...1-5 Displaying the top page ...1-5 For Windows ...1-5 For Mac OS...1-5 Notations and symbols used in this manual 1-6 Procedural instruction...1-6 Symbols - Konica Minolta bizhub C3850FS | bizhub C3850FS/C3850/C3350 Quick Start Guide - Page 3
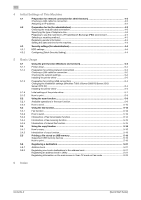
driver...5-2 the printer driver ...5-3 5.1.3 driver ...5-5 Initial settings of the printer driver ...5-7 How to print ...5-8 Using the scan function...5-9 Available operations in the scan USB memory 5-19 Supported USB memory devices Scan TX mode or Fax mode 5-25 6 Index Contents-2 [ - Konica Minolta bizhub C3850FS | bizhub C3850FS/C3850/C3350 Quick Start Guide - Page 4
Chapter 1 1 Introduction - Konica Minolta bizhub C3850FS | bizhub C3850FS/C3850/C3350 Quick Start Guide - Page 5
Introduction Chapter 1 1 Welcome 1.1 1 Introduction 1.1 Welcome Thank you for purchasing this machine. This guide describes basic procedures required to use this machine and how to configure initial settings. For information on detailed functions and operation procedures, refer to the - Konica Minolta bizhub C3850FS | bizhub C3850FS/C3850/C3350 Quick Start Guide - Page 6
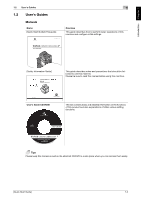
Introduction Chapter 1 1.2 User's Guides 1.2 User's Guides Manuals Name [Quick Start Guide] (This guide) 1 Overview This guide describes how to perform basic operations of this machine and configure initial settings. [Safety Information Guide] KONICA MINOLTA This guide describes notes and - Konica Minolta bizhub C3850FS | bizhub C3850FS/C3850/C3350 Quick Start Guide - Page 7
machine, and perform troubleshooting. This guide describes Utility settings such as [User Settings] and [Administrator Settings] for this machine. This guide describes the special usages of this machine such as how to use Web Connection, manually install the printer driver, configure print settings - Konica Minolta bizhub C3850FS | bizhub C3850FS/C3850/C3350 Quick Start Guide - Page 8
Introduction Chapter 1 1.3 User's Guide CD-ROM 1 1.3.2 Operating environment Item Supported operating systems Supported browsers* Required application Display resolution Description Microsoft Windows Vista (SP2) / Windows 7 (SP1)/ Windows 8/ Windows 8.1 Apple Mac OS X 10.4/10.5/10.6/10.7/10.8/ - Konica Minolta bizhub C3850FS | bizhub C3850FS/C3850/C3350 Quick Start Guide - Page 9
1.4 Notations and symbols used in this manual 1.4 Notations and symbols used in this manual Procedural instruction 0 This check mark symbol shows a guide. This presents a key name, part name, product name, or option name on the Control Panel. Notations of application names This manual describes - Konica Minolta bizhub C3850FS | bizhub C3850FS/C3850/C3350 Quick Start Guide - Page 10
; send scanned documents to network scan destinations such as FTP, WebDAV and Email. The intended use also requires that: - The system is used within the limits of device specifications and specifications of optional components, - All safety instructions in the related user's guides are observed - Konica Minolta bizhub C3850FS | bizhub C3850FS/C3850/C3350 Quick Start Guide - Page 11
Introduction Chapter 1 1 1.6 Target groups 1.6 Target groups The user's guides (refer to page 1-7) are intended for the following users of the system: User Administrator connections. Everyone who uses this system must have read and understood the related user's guides. 1-8 [Quick Start - Konica Minolta bizhub C3850FS | bizhub C3850FS/C3850/C3350 Quick Start Guide - Page 12
Chapter 2 2 Overview of This Machine - Konica Minolta bizhub C3850FS | bizhub C3850FS/C3850/C3350 Quick Start Guide - Page 13
Panel 2 Automatic Document Feeder (ADF) 2-a ADF Feed Cover 2-b Document Guide 2-c Document Feed Tray 2-d Document Output Tray 2-e Document Stopper 3 USB Host Port 4 Manual Feed Tray 5 Tray 1 6 Data Indicator 7 Output Tray (only for bizhub C3850/bizhub C3350) 2-2 [Quick Start - Konica Minolta bizhub C3850FS | bizhub C3850FS/C3850/C3350 Quick Start Guide - Page 14
machine with the optional Fax Kit FK-512 and Mount Kit MK-738 installed. These are provided as standard on bizhub C3850FS/bizhub C3850 models sold in North America. 3 1 4 5 6 2 No. Name 1 Power Switch 2 Power Connection 3 USB Port (Type B) 4 Ethernet (LAN) Port (1000Base-T/100Base-TX - Konica Minolta bizhub C3850FS | bizhub C3850FS/C3850/C3350 Quick Start Guide - Page 15
Authentication Unit AU- Performs user authentication by scanning bizhub C3850FS/bizhub C3850 models sold in North America. 9 Mount Kit MK-P02 Required to have Authentication Unit built in to the main unit. 10 Local Interface Kit EK- Used to add an RS-232C port. P01 2-4 [Quick Start Guide - Konica Minolta bizhub C3850FS | bizhub C3850FS/C3850/C3350 Quick Start Guide - Page 16
-P06 This unit is required to install the Network Interface Card. 18 Staple Kit SK-602 Contains the staples used by the Finisher of bizhub C3850FS. dReference For details on how to register i-Option license kits, refer to Chapter 2 "Registering License Kits" in [User's Guide: Advanced Functions - Konica Minolta bizhub C3850FS | bizhub C3850FS/C3850/C3350 Quick Start Guide - Page 17
key is pressed while this machine is running, the system deletes the currently loaded data or communicating data as well as queued jobs. 2-6 [Quick Start Guide] - Konica Minolta bizhub C3850FS | bizhub C3850FS/C3850/C3350 Quick Start Guide - Page 18
the Power Switch off and on again after 10 or more seconds have elapsed. Not doing so may result in an operation failure. [Quick Start Guide] 2-7 - Konica Minolta bizhub C3850FS | bizhub C3850FS/C3850/C3350 Quick Start Guide - Page 19
sub power is turned off, this machine can receive data or faxes, however, it cannot scan or print an original. If data or faxes are received while the sub power is turned ] - [Power Supply/Power Save Settings] - [Power Consumption in Sleep Mode] (Default: [Enabled]) 2-8 [Quick Start Guide] - Konica Minolta bizhub C3850FS | bizhub C3850FS/C3850/C3350 Quick Start Guide - Page 20
is turned off, this machine can receive data or faxes, however, it cannot scan or print an original. If data or faxes are received while the sub power OFF mode, this machine cannot receive data or faxes, and also it cannot scan or print an original. To enable the machine to return to Normal mode - Konica Minolta bizhub C3850FS | bizhub C3850FS/C3850/C3350 Quick Start Guide - Page 21
Panel 2 [Menu] [Guidance] [Access] [Interrupt] 3 Keypad C (Clear) Voice Guide 4 Reset 5 Stop Displays setting screens and messages. Directly press this panel to carry out key to temporarily stop an active copy, scan, or print job. To restart, press the Start key. 2-10 [Quick Start - Konica Minolta bizhub C3850FS | bizhub C3850FS/C3850/C3350 Quick Start Guide - Page 22
key to start an operation such as copying, scanning, faxing, or printing. • Lights up blue ister Key 3 assigned to a Register key. • The default function assigned to the Register key varies depend- ing on Chapter 7 "Control Panel" in [User's Guide: Introduction]. 8 Power key Press this key - Konica Minolta bizhub C3850FS | bizhub C3850FS/C3850/C3350 Quick Start Guide - Page 23
on the screen. Displaying the Keypad Tap a number or input area on the screen to display the Keypad. Used to enter numerals. 2-12 [Quick Start Guide] - Konica Minolta bizhub C3850FS | bizhub C3850FS/C3850/C3350 Quick Start Guide - Page 24
that generates electrical noises such as an electric generator or air conditioner. Otherwise a malfunction may be caused by an influence of electrical noises. [Quick Start Guide] 2-13 - Konica Minolta bizhub C3850FS | bizhub C3850FS/C3850/C3350 Quick Start Guide - Page 25
Scan to Folder] [Fax] [Document Print/Delete] [Utility] [APP] [Web Browser] [Quick Security] [QR Code Display] Description Tap this button to check active jobs or job logs. If necessary, you can perform job operations such as deleting a standby job. Note A job refers to an individual operation unit - Konica Minolta bizhub C3850FS | bizhub C3850FS/C3850/C3350 Quick Start Guide - Page 26
, fax program, scan program, [Quick Security Setting] and [QR Code Display] shortcut keys can be arranged on the main menu. To configure settings: [Utility] - [Administrator Settings] - [System Settings] - [Main Menu Default Settings] Overview of This Machine Chapter 2 [Quick Start Guide] 2-15 - Konica Minolta bizhub C3850FS | bizhub C3850FS/C3850/C3350 Quick Start Guide - Page 27
the page returns to the previous screen. The character or value you entered is deleted. Define the entered character or numeric values. 2-16 [Quick Start Guide] - Konica Minolta bizhub C3850FS | bizhub C3850FS/C3850/C3350 Quick Start Guide - Page 28
Chapter 3 3 Loading Paper - Konica Minolta bizhub C3850FS | bizhub C3850FS/C3850/C3350 Quick Start Guide - Page 29
) Paper capacity Manual Feed Tray: Manual Feed Tray: 20 sheets Tray 1: 20 sheets Manual Feed Tray: 20 sheets Tray 1: 20 sheets Manual Feed Tray: 20 sheets Tray 1: 20 sheets Manual Feed Tray: 20 sheets Tray 1: 20 sheets Manual Feed Tray: 20 sheets Tray 1: 20 sheets Manual supports or image default - Konica Minolta bizhub C3850FS | bizhub C3850FS/C3850/C3350 Quick Start Guide - Page 30
Chapter 3 3.1 Paper 3 3.1.2 Checking the available paper sizes Paper feed port Manual Feed Tray Tray 1 Allowable sizes A4, A5, A6, B5 (JIS), B6 The page margin setting is determined depending on your application. If the default paper size or margin is selected, there may be some part of the - Konica Minolta bizhub C3850FS | bizhub C3850FS/C3850/C3350 Quick Start Guide - Page 31
reduced print quality, a paper jam, or machine damage. - Paper that has been printed on using a heat-transfer printer or an inkjet printer - Folded, curled, wrinkled, or torn paper - Paper that has been left unwrapped a trial print to check the printing quality in advance. 3-4 [Quick Start Guide] - Konica Minolta bizhub C3850FS | bizhub C3850FS/C3850/C3350 Quick Start Guide - Page 32
For details on the available paper types, refer to page 3-2. 0 For details on the available paper sizes, refer to page 3-3 1 Open the Manual Feed Tray. 2 Spread out the paper guide. 3 Push up the center of the flip-top plate until the lock latches (white) at the right and left are locked. [Quick - Konica Minolta bizhub C3850FS | bizhub C3850FS/C3850/C3350 Quick Start Guide - Page 33
Loading Paper Chapter 3 3 Loading paper into the Manual Feed Tray 3.2 4 With the side to be printed on facing down, insert the paper as far as possible into the feed slot. NOTICE Load paper within the guide indicating the upper limit. If paper is curled, flatten it before loading. 5 Align the - Konica Minolta bizhub C3850FS | bizhub C3850FS/C3850/C3350 Quick Start Guide - Page 34
paper types and sizes, refer to page 3-2. 0 Tray 2/3 is available when the optional Paper Feed Unit is installed. For details on how to load paper into Tray 2/3, refer to Chapter 6 "Loading Paper" in [User's Guide: Introduction]. 1 Pull out Tray 1. 2 Press the flip-top plate down until it is locked - Konica Minolta bizhub C3850FS | bizhub C3850FS/C3850/C3350 Quick Start Guide - Page 35
to the point where the top of the stack is higher than the , mark. If paper is curled, flatten it before loading. 5 Align the paper guide to the paper size. 6 Close Tray 1. 7 Change the paper type and paper size on the Control Panel. % To configure settings: [Utility] - [User Settings] - [Printer - Konica Minolta bizhub C3850FS | bizhub C3850FS/C3850/C3350 Quick Start Guide - Page 36
Chapter 4 4 Initial Settings of This Machine - Konica Minolta bizhub C3850FS | bizhub C3850FS/C3850/C3350 Quick Start Guide - Page 37
the cable connection port, refer to page 2-3. Assigning an IP address If this machine has a fixed IP address, manually enter the IP address, subnet mask, and default gateway address. In the Control Panel, select [Utility] - [Administrator Settings] - [Network Settings] - [TCP/IP Settings] - [IPv4 - Konica Minolta bizhub C3850FS | bizhub C3850FS/C3850/C3350 Quick Start Guide - Page 38
-738 are required. These are provided as standard on bizhub C3850FS/bizhub C3850 models sold in North America. Checking the modular cable receives faxes automatically, and the user receives faxes manually. Set the receiving method to suit your environment & Time Settings] [Quick Start Guide] 4-3 - Konica Minolta bizhub C3850FS | bizhub C3850FS/C3850/C3350 Quick Start Guide - Page 39
5 "Administrator Settings" in [User's Guide: Description of Utility Keys]. 4.3.2 Configuring recommend that you change to an administrator password that satisfies password rules, and configure [Quick Security Setting] [Main Menu Default Setting] Initial Settings of This Machine Chapter 4 4-4 - Konica Minolta bizhub C3850FS | bizhub C3850FS/C3850/C3350 Quick Start Guide - Page 40
Chapter 5 5 Basic Usage - Konica Minolta bizhub C3850FS | bizhub C3850FS/C3850/C3350 Quick Start Guide - Page 41
environment, refer to Chapter 3 "Printing in the Mac OS Environment" in [User's Guide: Print Functions]. For details on how to configure print settings in Linux environment, refer after Windows Vista, this driver supports XML Paper Specification (XPS). This driver has several advantages, including - Konica Minolta bizhub C3850FS | bizhub C3850FS/C3850/C3350 Quick Start Guide - Page 42
Step 2. % If the installer does not start, open the printer driver folder on the CD-ROM, double-click [Set- up.exe], then go in the Windows Environment" in [User's Guide: Print Functions]. % Among the connected printers manually specify the IP address and host name of this machine. [Quick Start - Konica Minolta bizhub C3850FS | bizhub C3850FS/C3850/C3350 Quick Start Guide - Page 43
7 Select the check box of the printer driver you want to install, then click [Next]. % For features of each printer driver, refer to page 5-2. you finish installing the printer driver, configure the default settings of the printer driver. For details, refer ] window appears. 5-4 [Quick Start Guide] - Konica Minolta bizhub C3850FS | bizhub C3850FS/C3850/C3350 Quick Start Guide - Page 44
Make sure that the installer starts, then go to Step 3. % If the installer does not start, open the printer driver folder on the CD-ROM, double-click [Set- up.exe], then go to Step 4. % If the [User Account /MFPs], then click [Next]. USB-connected printers are detected. [Quick Start Guide] 5-5 - Konica Minolta bizhub C3850FS | bizhub C3850FS/C3850/C3350 Quick Start Guide - Page 45
[Next]. 8 Select the check box of the printer driver you want to install, then click [Next]. % For features of each printer driver, refer to page 5-2. 9 installing the printer driver, configure the default settings of the printer driver. For details, refer to page 5-7. 5-6 [Quick Start Guide] - Konica Minolta bizhub C3850FS | bizhub C3850FS/C3850/C3350 Quick Start Guide - Page 46
driver When you use this machine for the first time, configure the printer driver authentication settings have been configured. % By default, [Auto] in [Acquire Settings...] are using a USB connection in Windows Server 2003 environment, manually configure a setting in [Device Option]. Select the item - Konica Minolta bizhub C3850FS | bizhub C3850FS/C3850/C3350 Quick Start Guide - Page 47
printer has been selected. % The [Print] dialog box varies depending on the application software. 3 Specify the default values when you exit the application software. % For details on the print settings of the printer driver, refer to Chapter 2 "Printing in the Windows Environment" in [User's Guide - Konica Minolta bizhub C3850FS | bizhub C3850FS/C3850/C3350 Quick Start Guide - Page 48
device connected to the machine. Imports original data by issuing a scan instruction from a computer without configuring complicated system settings, or sends original data scanned by this machine to a computer. This function is supported by Windows of Vista or later. Converts the original data - Konica Minolta bizhub C3850FS | bizhub C3850FS/C3850/C3350 Quick Start Guide - Page 49
mail]. % To use SMB Send, FTP Send, WebDAV Send, Save to HDD, Save to USB Memory, or WS Scan, tap [Scan to Folder]. 3 Specify the destination. % You can select the desired destination from the pre-registered destination list, or directly enter destination information. For details on how to - Konica Minolta bizhub C3850FS | bizhub C3850FS/C3850/C3350 Quick Start Guide - Page 50
scanned. Before scanning the original, select [Application] - [Basic] - [Scan Size], then specify the original size. If you fail to set the original size correctly, the image If you press the Stop key while scanning the original, scanning stops. To cancel scanning the orig- inal, delete inactive jobs - Konica Minolta bizhub C3850FS | bizhub C3850FS/C3850/C3350 Quick Start Guide - Page 51
scan settings according to the original and to save incoming faxes in memory. The following describes precautions that should be observed when using fax functions. - To use fax functions, optional units must be installed except in certain regions. - For bizhub C3850FS/bizhub C3850 default Guide] - Konica Minolta bizhub C3850FS | bizhub C3850FS/C3850/C3350 Quick Start Guide - Page 52
scanning the original on this machine, you need to specify the size of the original to be scanned. Before scanning the original, select [Application] - [Basic] - [Scan Size], then specify the original size. If you fail to set the original size correctly, the image may be cut off. [Quick Start Guide - Konica Minolta bizhub C3850FS | bizhub C3850FS/C3850/C3350 Quick Start Guide - Page 53
the Stop key while scanning the original, scanning stops. To cancel scanning the orig- inal, User's Guide: Fax Functions]. Function Timer TX Check Dest. & Send F-Code TX Quick Memory TX Password TX specific people using a Confidential RX User Box that requires a registered number and a password - Konica Minolta bizhub C3850FS | bizhub C3850FS/C3850/C3350 Quick Start Guide - Page 54
[User's Guide: Fax (TSI). Forward TX transfers a received fax to specific people using a Confidential RX User Box that requires the registration number and password. Closed Network RX restricts the peers by passwords. Polling RX receives a polling file saved in a sending machine as instructed - Konica Minolta bizhub C3850FS | bizhub C3850FS/C3850/C3350 Quick Start Guide - Page 55
the original on this machine, you need to specify the size of the original to be scanned. Before scanning the original, specify the original size in [Original Size]. If you fail to set the original size correctly, the image may be cut off. % For details on various copy settings, refer to page 5-18 - Konica Minolta bizhub C3850FS | bizhub C3850FS/C3850/C3350 Quick Start Guide - Page 56
copies, tap [C]. 5 Press the Start key. % If necessary, before starting a copy, tap [Check Settings] to check the settings. % If you press the Stop key while scanning the original, scanning stops. To cancel scanning the orig- inal, delete inactive jobs from the Job screen. The original is - Konica Minolta bizhub C3850FS | bizhub C3850FS/C3850/C3350 Quick Start Guide - Page 57
Guide: Copy Functions]. Function [Interrupt] [Proof Copy] [ID Copy] [Color] [Density] [Original Type] [Original Size] [Paper] [Zoom] [Duplex/Combine] [Finishing] [Separate Scan] [Background Removal] [Glossy] [Image . This function is only available when bizhub C3850FS is used. • [Staple]: Feed - Konica Minolta bizhub C3850FS | bizhub C3850FS/C3850/C3350 Quick Start Guide - Page 58
specifications can be connected to this machine. Item Supported media File system File Type Specifications USB memory device (USB 2.0 supported machine. Do not use other USB devices (such as a hard disk unit or USB switching hub). - Do not connect or disconnect the USB memory Start Guide] 5-19 - Konica Minolta bizhub C3850FS | bizhub C3850FS/C3850/C3350 Quick Start Guide - Page 59
[Print]. % Tap [Up] to move upward. % Tap [Open] to open the folder and move downward. 5 If necessary, change print settings, then tap [Print]. Settings [Paper of copies when they are output. This function is only available when bizhub C3850FS is used. Staple each set of printed sheets of paper in - Konica Minolta bizhub C3850FS | bizhub C3850FS/C3850/C3350 Quick Start Guide - Page 60
destination on this machine will save you the trouble of having to enter it each time you send of This Machine" in [User's Guide: Applied Functions]. 5.6.2 Registering one-touch Control Panel. 1 Tap [Utility] - [One-Touch/User Box Registration]. 2 Select the type of destinations you want to - Konica Minolta bizhub C3850FS | bizhub C3850FS/C3850/C3350 Quick Start Guide - Page 61
ECM feature communicate with each other, confirming that the sent data is free of errors. This prevents image blurring caused by telephone line noise. If you send a fax using a telephone line in an searched by name. Register information of the destination computer. 5-22 [Quick Start Guide] - Konica Minolta bizhub C3850FS | bizhub C3850FS/C3850/C3350 Quick Start Guide - Page 62
, "/", between the folder names. • Entry example: "scan/document" When the file path is not specified, only enter the "/". • Entry example: "/" If authentication is required in the destination FTP server, enter the available user name to log in (using up to 63 bytes). Enter the password (using up to - Konica Minolta bizhub C3850FS | bizhub C3850FS/C3850/C3350 Quick Start Guide - Page 63
). • Entry example: "scan" When specifying a folder in the WebDAV folder, insert a symbol, "/", between the folder names. • Entry example: "scan/document" Enter the name of a user who has privileges to access the folder specified in [File Path] (using up to 63 bytes). Enter the password (using up to - Konica Minolta bizhub C3850FS | bizhub C3850FS/C3850/C3350 Quick Start Guide - Page 64
]. Select [Compression Method] and [Resolution] respectively as the specifications of the original data that can be received on the destination on the type of destination you want to register, tap [Scan to E-mail], [Scan to Folder], or [Fax]. 2 Tap [Address Reg.]. Basic Usage Start Guide] 5-25 - Konica Minolta bizhub C3850FS | bizhub C3850FS/C3850/C3350 Quick Start Guide - Page 65
5 Registering a destination 5.6 Basic Usage Chapter 5 5-26 [Quick Start Guide] - Konica Minolta bizhub C3850FS | bizhub C3850FS/C3850/C3350 Quick Start Guide - Page 66
6 Index Chapter 6 - Konica Minolta bizhub C3850FS | bizhub C3850FS/C3850/C3350 Quick Start Guide - Page 67
Function 5-15 K Keypad 2-12 L Loading Paper Manual Feed Tray 3-5 Tray 1 3-7 M Main Menu 2-14 Manual Feed Tray 3-5 N Name of each Part 2-2 How to Print 5-8 Printer Driver 5-2 Initial Settings 5-7 Install (Network Connection 5-2 Install (USB Connection 5-4 S Scan Function 5-9 How to Send - Konica Minolta bizhub C3850FS | bizhub C3850FS/C3850/C3350 Quick Start Guide - Page 68
http://konicaminolta.com A3GN-9612-33 © 2013 Printed in Thailand 2015. 2
-
 1
1 -
 2
2 -
 3
3 -
 4
4 -
 5
5 -
 6
6 -
 7
7 -
8
-
9
-
10
-
11
-
12
-
13
-
14
-
15
-
16
-
17
-
18
-
19
-
20
-
21
-
22
-
23
-
24
-
25
-
26
-
27
-
28
-
29
-
30
-
31
-
32
-
33
-
34
-
35
-
36
-
37
-
38
-
39
-
40
-
41
-
42
-
43
-
44
-
45
-
46
-
47
-
48
-
49
-
50
-
51
-
52
-
53
-
54
-
55
-
56
-
57
-
58
-
59
-
60
-
61
-
62
-
63
-
64
-
65
-
66
-
67
-
68
 |
 |

INDEX
1. Introduction
2. Overview of This Machine
3. Loading Paper
4. Initial Settings of This Machine
5. Basic Usage
6. Index
Quick Start Guide