Kyocera 6035 User Guide - Page 12
Introducing the Kyocera QCP 6035 smartphone - smartphones
 |
UPC - 820361002099
View all Kyocera 6035 manuals
Add to My Manuals
Save this manual to your list of manuals |
Page 12 highlights
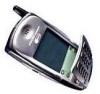
Introducing the Kyocera QCP 6035 smartphone 1 Backlight button and infrared port-Press the button to turn the screen on and off. Press and hold the button to turn the backlight on and off. Point the infrared port at other devices for beaming data. 2 2 Antenna-Extend during calls. 3 3 LED (light-emitting diode) Green = Home area 4 Amber = Roaming Red = No signal 4 Stylus-Slide the stylus out of its slot. Hold it like a pen to write on 5 the screen. NEVER USE A PEN, PENCIL, OR OTHER SHARP OBJECT ON THE SCREEN. 5 Shuttle-Roll the shuttle up or down to scroll through menus. Press it in to make selections. 6 During a call, roll it up or down to adjust the volume. 6 Headset jack-Plug the headset cable in here. 7 Data port-Plug the data cable in here. 8 Power port-Plug the power cable in here to recharge the battery without the sync cradle. 1 78 6 Kyocera QCP 6035 Smartphone User's Guide
-
 1
1 -
2
-
3
-
4
-
5
-
6
-
 7
7 -
 8
8 -
 9
9 -
 10
10 -
 11
11 -
 12
12 -
 13
13 -
 14
14 -
 15
15 -
 16
16 -
 17
17 -
18
-
19
-
20
-
21
-
22
-
23
-
24
-
25
-
26
-
27
-
28
-
29
-
30
-
31
-
32
-
33
-
34
-
35
-
36
-
37
-
38
-
39
-
40
-
41
-
42
-
43
-
44
-
45
-
46
-
47
-
48
-
49
-
50
-
51
-
52
-
53
-
54
-
55
-
56
-
57
-
58
-
59
-
60
-
61
-
62
-
63
-
64
-
65
-
66
-
67
-
68
 |
 |
