Kyocera KM-5530 Print System Q Operators Guide (Setup) - Page 10
Installing the software, Connecting the network cable
 |
View all Kyocera KM-5530 manuals
Add to My Manuals
Save this manual to your list of manuals |
Page 10 highlights
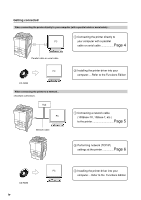
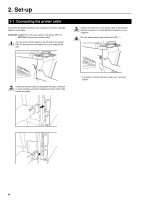
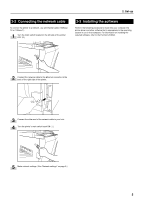
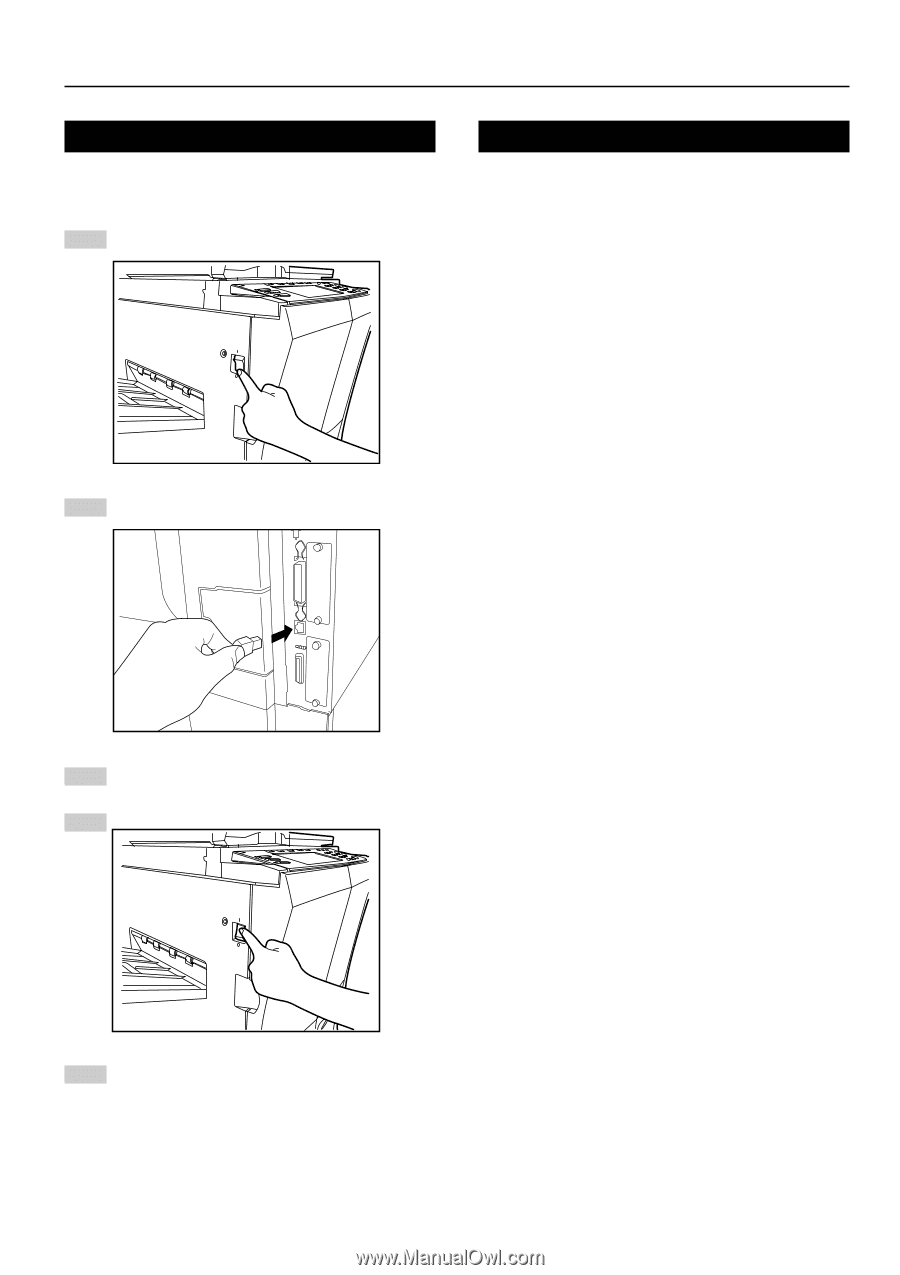
2. Set-up 2-2 Connecting the network cable To connect the printer to a network, use an Ethernet cable (100BaseTX or 10Base-T). 1 Turn the main switch located on the left side of the printer OFF (O). 2-3 Installing the software Perform the following procedure to install into your computer the printer driver and other software that is appropriate to the operating system in use in that computer. For information on installing the required software, refer to the Functions Edition. 2 Connect the network cable to the Ethernet connector at the back of the right side of the printer. 3 Connect the other end of the network cable to your hub. 4 Turn the printer's main switch back ON ( | ). 5 Make network settings. (See "Network settings" on page 6.) 5
-
 1
1 -
2
-
3
-
4
-
 5
5 -
 6
6 -
 7
7 -
 8
8 -
 9
9 -
 10
10 -
 11
11 -
 12
12 -
 13
13 -
 14
14 -
 15
15 -
16
-
17
-
18
-
19
-
20
-
21
-
22
-
23
-
24
-
25
-
26
-
27
-
28
-
29
-
30
-
31
-
32
-
33
-
34
-
35
-
36
-
37
-
38
-
39
-
40
-
41
-
42
-
43
-
44
-
45
-
46
-
47
-
48
-
49
-
50
-
51
-
52
-
53
-
54
-
55
-
56
 |
 |
5
2. Set-up
2-3
Installing the software
Perform the following procedure to install into your computer the
printer driver and other software that is appropriate to the operating
system in use in that computer. For information on installing the
required software, refer to the Functions Edition.
2-2
Connecting the network cable
To connect the printer to a network, use an Ethernet cable (100Base-
TX or 10Base-T).
Turn the main switch located on the left side of the printer
OFF (O).
Connect the network cable to the Ethernet connector at the
back of the right side of the printer.
Connect the other end of the network cable to your hub.
Turn the printer
’
s main switch back ON ( | ).
Make network settings. (See
“
Network settings
”
on page 6.)
1
2
3
4
5