Kyocera KX444 User Guide - Page 28
Editing or erasing a contact, Editing a phone number
 |
View all Kyocera KX444 manuals
Add to My Manuals
Save this manual to your list of manuals |
Page 28 highlights
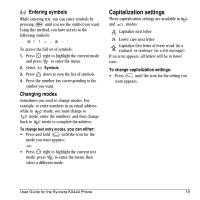
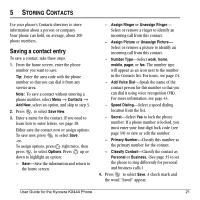
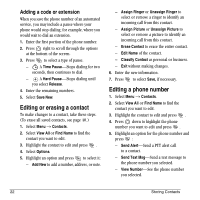
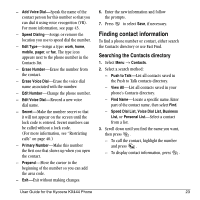
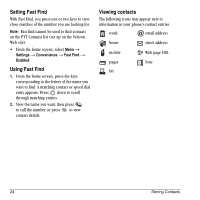
Adding a code or extension When you save the phone number of an automated service, you may include a pause where your phone would stop dialing; for example, where you would wait to dial an extension. 1. Enter the first portion of the phone number. 2. Press right to scroll through the options at the bottom of the screen. 3. Press to select a type of pause. - X A Time Pause-Stops dialing for two seconds, then continues to dial. - A Hard Pause-Stops dialing until you select Release. 4. Enter the remaining numbers. 5. Select Save New. Editing or erasing a contact To make changes to a contact, take these steps. (To erase all saved contacts, see page 40.) 1. Select Menu → Contacts. 2. Select View All or Find Name=to=find the contact you want to edit. 3. Highlight the contact to edit and press . 4. Select Options. 5. Highlight an option and press to select it: - Add New to add a number, address, or note. - Assign Ringer or Unassign Ringer to select or remove a ringer to identify an incoming call from this contact. - Assign Picture or Unassign Picture to select or remove a picture to identify an incoming call from this contact. - Erase Contact to erase the entire contact. - Edit Name of the contact. - Classify Contact as personal or business. - Exit without making changes. 6. Enter the new information. 7. Press to select Save, if necessary. Editing a phone number 1. Select Menu → Contacts. 2. Select View All or Find Name=to=find the contact you want to edit. 3. Highlight the contact to edit and press . 4. Press down to highlight the phone number you want to edit and press . 5. Highlight an option for the phone number and press : - Send Alert-Send a PTT alert call to a contact. - Send Text Msg-Send a text message to the phone number you selected. - View Number-See the phone number you selected. 22 Storing Contacts
-
 1
1 -
2
-
3
-
4
-
5
-
6
-
7
-
8
-
9
-
10
-
11
-
12
-
13
-
14
-
15
-
16
-
17
-
18
-
19
-
20
-
21
-
22
-
 23
23 -
 24
24 -
 25
25 -
 26
26 -
 27
27 -
 28
28 -
 29
29 -
 30
30 -
 31
31 -
 32
32 -
 33
33 -
34
-
35
-
36
-
37
-
38
-
39
-
40
-
41
-
42
-
43
-
44
-
45
-
46
-
47
-
48
-
49
-
50
-
51
-
52
-
53
-
54
-
55
-
56
-
57
-
58
-
59
-
60
-
61
-
62
-
63
-
64
 |
 |
