Lexmark C530DN User's Guide - Page 77
Adjusting Power Saver, Encrypting the printer hard disk, Performing Self Test
 |
UPC - 734646030908
View all Lexmark C530DN manuals
Add to My Manuals
Save this manual to your list of manuals |
Page 77 highlights
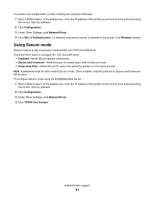
The following factory default settings are restored: • All downloaded resources in the printer memory are deleted. This includes fonts, macros, and symbol sets. • All settings return to the factory default settings except Display Language in the Setup menu and custom settings in the Parallel, Serial, Network, Infrared, LocalTalk, USB, and Fax menus. Adjusting Power Saver 1 Make sure the printer is on and Ready appears. 2 From the control panel, press . 3 Press until Settings appears, and then press . 4 Press until Setup Menu appears, and then press . 5 Press until Power Saver appears, and then press . 6 Using the numeric keypad, enter the number of minutes for the printer to wait before entering the Power Saver mode. Available settings range from 2-240 minutes. If the printer does not have a numeric keypad, press the left and right arrows to change the setting. 7 Press . Submitting Selection appears, followed by Ready. Note: Power Saver settings can also be adjusted by issuing a Printer Job Language (PJL) command. For more information, see the Technical Reference available on the Lexmark Web site at www.lexmark.com/publications. Encrypting the printer hard disk This functionality is only available when a printer hard disk is installed and working properly. Warning: All files and resources on the printer hard disk will be deleted. Resources residing in the printer flash memory or RAM will not be affected. 1 Make sure the printer is turned off. 2 From the control panel, press and hold and while turning the printer on. 3 Release both buttons when Performing Self Test appears. The printer performs its power-on sequence, and then CONFIG MENU appears. 4 Press until Disk Encryption appears, and then press . 5 Press until Enable appears, and then press . Contents will be lost. Continue? appears. 6 Press until Yes appears, and then press . A progress bar appears. Administrative support 77
-
 1
1 -
2
-
3
-
4
-
5
-
6
-
7
-
8
-
9
-
10
-
11
-
12
-
13
-
14
-
15
-
16
-
17
-
18
-
19
-
20
-
21
-
22
-
23
-
24
-
25
-
26
-
27
-
28
-
29
-
30
-
31
-
32
-
33
-
34
-
35
-
36
-
37
-
38
-
39
-
40
-
41
-
42
-
43
-
44
-
45
-
46
-
47
-
48
-
49
-
50
-
51
-
52
-
53
-
54
-
55
-
56
-
57
-
58
-
59
-
60
-
61
-
62
-
63
-
64
-
65
-
66
-
67
-
68
-
69
-
70
-
71
-
 72
72 -
 73
73 -
 74
74 -
 75
75 -
 76
76 -
 77
77 -
 78
78 -
 79
79 -
 80
80 -
 81
81 -
 82
82 -
83
-
84
-
85
-
86
-
87
-
88
-
89
-
90
-
91
-
92
-
93
-
94
-
95
-
96
-
97
-
98
-
99
-
100
-
101
-
102
-
103
-
104
-
105
-
106
-
107
-
108
-
109
-
110
 |
 |