Lexmark Forms Printer 2581 Quick Reference - Page 28
Loading cut forms, Loading a cut form or envelope manually
 |
View all Lexmark Forms Printer 2581 manuals
Add to My Manuals
Save this manual to your list of manuals |
Page 28 highlights
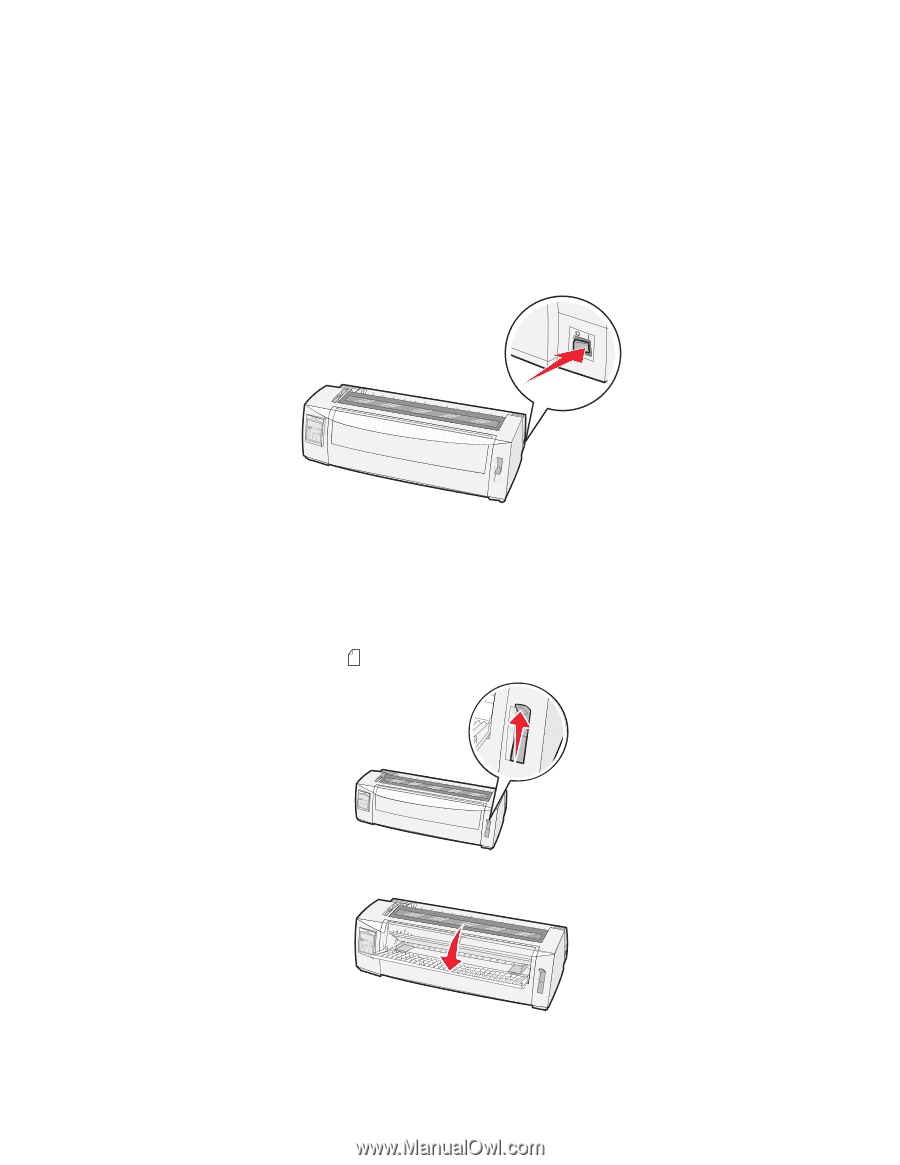
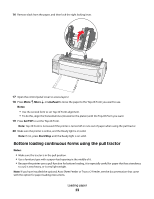
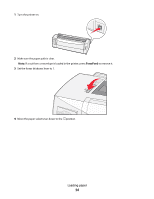
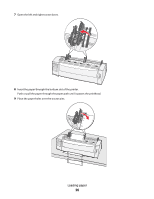
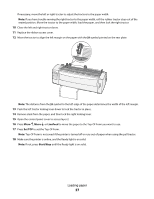
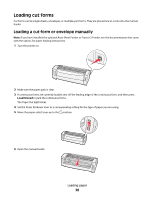
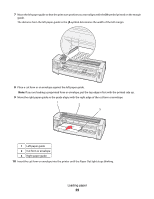
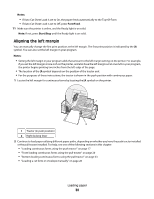
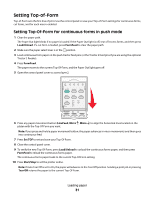
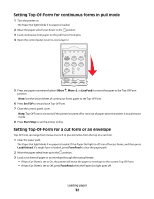
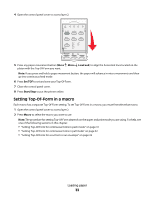
Loading cut forms Cut forms can be single sheets, envelopes, or multiple-part forms. They are placed one at a time into the manual feeder. Loading a cut form or envelope manually Note: If you have installed the optional Auto Sheet Feeder or Tractor 2 Feeder, see the documentation that came with the option, for paper loading instructions. 1 Turn the printer on. 2 Make sure the paper path is clear. 3 If continuous forms are currently loaded, tear off the leading edge of the continuous form, and then press Load/Unload to park the continuous forms. The Paper Out light blinks. 4 Set the forms thickness lever to a corresponding setting for the type of paper you are using. 5 Move the paper select lever up to the position. 6 Open the manual feeder. A Loading paper 28
-
 1
1 -
2
-
3
-
4
-
5
-
6
-
7
-
8
-
9
-
10
-
11
-
12
-
13
-
14
-
15
-
16
-
17
-
18
-
19
-
20
-
21
-
22
-
 23
23 -
 24
24 -
 25
25 -
 26
26 -
 27
27 -
 28
28 -
 29
29 -
 30
30 -
 31
31 -
 32
32 -
 33
33 -
34
-
35
-
36
-
37
-
38
-
39
-
40
-
41
-
42
-
43
-
44
-
45
-
46
-
47
-
48
-
49
 |
 |