Linksys SPA921 Cisco Small Business IP Phone SPA9X1 Administration Guide - Page 51
Using the SPA932 (Sidecar) with the SPA962 - picture
 |
UPC - 745883570799
View all Linksys SPA921 manuals
Add to My Manuals
Save this manual to your list of manuals |
Page 51 highlights
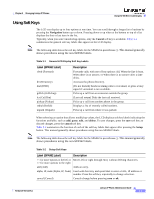
Using the SPA932 (Sidecar) with the SPA962 Figure 3-4 Background Picture Parameters Chapter 3 Managing Linksys IP Phones Step 4 Step 5 Step 6 Choose one of the following options from the Select Logo pull-down selection list to control what displays when the phone is starting: • Default-Uses the default Linksys logo. • BMP Picture-Uses the .bmp file from the URL in the BMP Picture Download URL field. • None-No logo used. Choose one of the following options from the Select Background Picture pull-down selection list to control the background used: • Default-Uses the default Linksys background. • BMP Picture-Uses the .bmp file from the URL in the BMP Picture Download URL field. • Text Logo-Uses the text background in the Text Logo field (SPA942 only). • None-No background used. If you select Text Logo, enter up to 63 characters in in the Text Logo field. If you select BMP Picture, enter the URL to the server where the BMP picture is accessible. For example: tftp://mytftpserver.mydomain.com/pictures/background1.bmp The URL can use HTTP, HTTPS, or TFTP, with a maximum length of 255 characters. Click Submit All Changes. Using the SPA932 (Sidecar) with the SPA962 The SPA932 is a 32-button attendant console for the SPA962. Each SPA932 unit provides 32 programmable speed-dial or direct station select (DSS) buttons, Each lighted button indicates line status (idle, ringing, busy, or null) using a busy lamp field (BLF). Incoming calls can be immediately transferred to the proper location by pushing a button assigned to the extension on the SPA932. Two SPA932 units can be attached to a single SPA962 to monitor a total of 64 separate lines. To configure the server to use the SPA932, configure each extension that will be monitored by the SPA932. The SPA932 is a SIP subscriber in relation to each SIP proxy server, which allows the SPA932 to receive NOTIFY messages from the SIP proxy that indicate the status of each monitored phone. In general, the SIP proxy is identified by its IP address, or possibly through a hostname if DNS is properly configured. The way in which each phone and extension is identified is vendor-specific. To complete the configuration required to use the SPA932, perform the following steps: Step 1 Complete the physical installation of the SPA932 unit, which connects it to the SPA962. For instructions regarding the physical installation of the SPA932 and an introduction to its use, refer to the 32 Button Attendant Console for the SPA962 IP Phone Quick Installation Guide. Linksys IP Phone Administrator Guide 3-8 Firmware Version 5.1
-
 1
1 -
2
-
3
-
4
-
5
-
6
-
7
-
8
-
9
-
10
-
11
-
12
-
13
-
14
-
15
-
16
-
17
-
18
-
19
-
20
-
21
-
22
-
23
-
24
-
25
-
26
-
27
-
28
-
29
-
30
-
31
-
32
-
33
-
34
-
35
-
36
-
37
-
38
-
39
-
40
-
41
-
42
-
43
-
44
-
45
-
 46
46 -
 47
47 -
 48
48 -
 49
49 -
 50
50 -
 51
51 -
 52
52 -
 53
53 -
 54
54 -
 55
55 -
 56
56 -
57
-
58
-
59
-
60
-
61
-
62
-
63
-
64
-
65
-
66
-
67
-
68
-
69
-
70
-
71
-
72
-
73
-
74
-
75
-
76
-
77
-
78
-
79
-
80
-
81
-
82
-
83
-
84
-
85
-
86
-
87
-
88
-
89
-
90
-
91
-
92
-
93
-
94
-
95
-
96
-
97
-
98
-
99
-
100
-
101
-
102
-
103
-
104
-
105
-
106
-
107
-
108
-
109
-
110
-
111
-
112
-
113
-
114
-
115
-
116
-
117
-
118
-
119
-
120
-
121
-
122
-
123
-
124
-
125
-
126
-
127
-
128
-
129
-
130
-
131
-
132
-
133
-
134
-
135
-
136
-
137
-
138
-
139
-
140
-
141
-
142
-
143
-
144
-
145
-
146
-
147
-
148
-
149
-
150
-
151
-
152
-
153
-
154
-
155
-
156
-
157
-
158
-
159
-
160
-
161
-
162
-
163
-
164
-
165
 |
 |
