Linksys SPA922 Cisco Small Business Pro SPA and Wireless IP Phone Administrati - Page 50
Configuring the Phone Name, Configuring Voice Mail
 |
UPC - 745883570836
View all Linksys SPA922 manuals
Add to My Manuals
Save this manual to your list of manuals |
Page 50 highlights
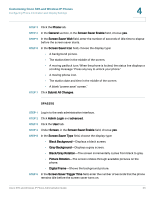
4 Customizing Cisco SPA and Wireless IP Phones Configuring Phone Information and Display Settings Configuring the Phone Name STEP 1 Log in to the web administration interface. STEP 2 Click Admin Login and advanced. STEP 3 Click the Phone tab. STEP 4 Under General, enter the Station Name, or name for the phone. This name shows up in the corporate directory. STEP 5 Click Submit All Changes. The phone reboots. Configuring Voice Mail To configure the phone to connect to voice mail: STEP 1 Log in to the web administration interface. STEP 2 Click Admin Login and advanced. STEP 3 Click the Phone tab. STEP 4 Under General, enter the Voice Mail Number. This is the internal or external phone number or URL to access the voice mail system. If using an external voice-mail service, the number must include any digits required to dial out and any required area code. STEP 5 Click Submit All Changes. The phone reboots. Configuring Internal Voice Mail for Each Extension (When Using SPA400 for Voice Mail) STEP 1 Log in to the web administration interface. STEP 2 Click Admin Login and advanced. STEP 3 Click the Ext tab. STEP 4 Under Call Feature Settings, enter the voice mail line number and phone extension in the Mailbox ID field. For example, 2101 indicates that the SPA400 voice mail server is configured on the SPA9000 Line 2, phone extension 101. 48 Cisco SPA and Wireless IP Phone Administration Guide
-
 1
1 -
2
-
3
-
4
-
5
-
6
-
7
-
8
-
9
-
10
-
11
-
12
-
13
-
14
-
15
-
16
-
17
-
18
-
19
-
20
-
21
-
22
-
23
-
24
-
25
-
26
-
27
-
28
-
29
-
30
-
31
-
32
-
33
-
34
-
35
-
36
-
37
-
38
-
39
-
40
-
41
-
42
-
43
-
44
-
 45
45 -
 46
46 -
 47
47 -
 48
48 -
 49
49 -
 50
50 -
 51
51 -
 52
52 -
 53
53 -
 54
54 -
 55
55 -
56
-
57
-
58
-
59
-
60
-
61
-
62
-
63
-
64
-
65
-
66
-
67
-
68
-
69
-
70
-
71
-
72
-
73
-
74
-
75
-
76
-
77
-
78
-
79
-
80
-
81
-
82
-
83
-
84
-
85
-
86
-
87
-
88
-
89
-
90
-
91
-
92
-
93
-
94
-
95
-
96
-
97
-
98
-
99
-
100
-
101
-
102
-
103
-
104
-
105
-
106
-
107
-
108
-
109
-
110
-
111
-
112
-
113
-
114
-
115
-
116
-
117
-
118
-
119
-
120
-
121
-
122
-
123
-
124
-
125
-
126
-
127
-
128
-
129
-
130
-
131
-
132
-
133
-
134
-
135
-
136
-
137
-
138
-
139
-
140
-
141
-
142
-
143
-
144
-
145
-
146
-
147
-
148
-
149
-
150
-
151
-
152
-
153
-
154
-
155
-
156
-
157
-
158
-
159
-
160
-
161
-
162
-
163
-
164
-
165
-
166
-
167
-
168
-
169
-
170
-
171
-
172
-
173
-
174
-
175
-
176
-
177
-
178
-
179
-
180
-
181
-
182
-
183
-
184
-
185
-
186
-
187
-
188
-
189
-
190
-
191
-
192
-
193
-
194
-
195
-
196
-
197
-
198
-
199
-
200
-
201
-
202
-
203
-
204
-
205
-
206
-
207
-
208
-
209
-
210
-
211
-
212
-
213
-
214
-
215
-
216
-
217
-
218
-
219
-
220
-
221
-
222
-
223
-
224
-
225
-
226
-
227
-
228
-
229
-
230
-
231
-
232
-
233
-
234
-
235
-
236
-
237
-
238
-
239
-
240
-
241
-
242
-
243
-
244
-
245
-
246
-
247
-
248
-
249
-
250
-
251
-
252
-
253
-
254
-
255
-
256
-
257
-
258
-
259
-
260
-
261
-
262
-
263
-
264
-
265
-
266
-
267
-
268
-
269
-
270
-
271
-
272
-
273
-
274
-
275
-
276
-
277
-
278
-
279
-
280
 |
 |
