Magnavox 27MDTR20 User manual, English (US) - Page 22
Setting the Clock cont'd
 |
View all Magnavox 27MDTR20 manuals
Add to My Manuals
Save this manual to your list of manuals |
Page 22 highlights
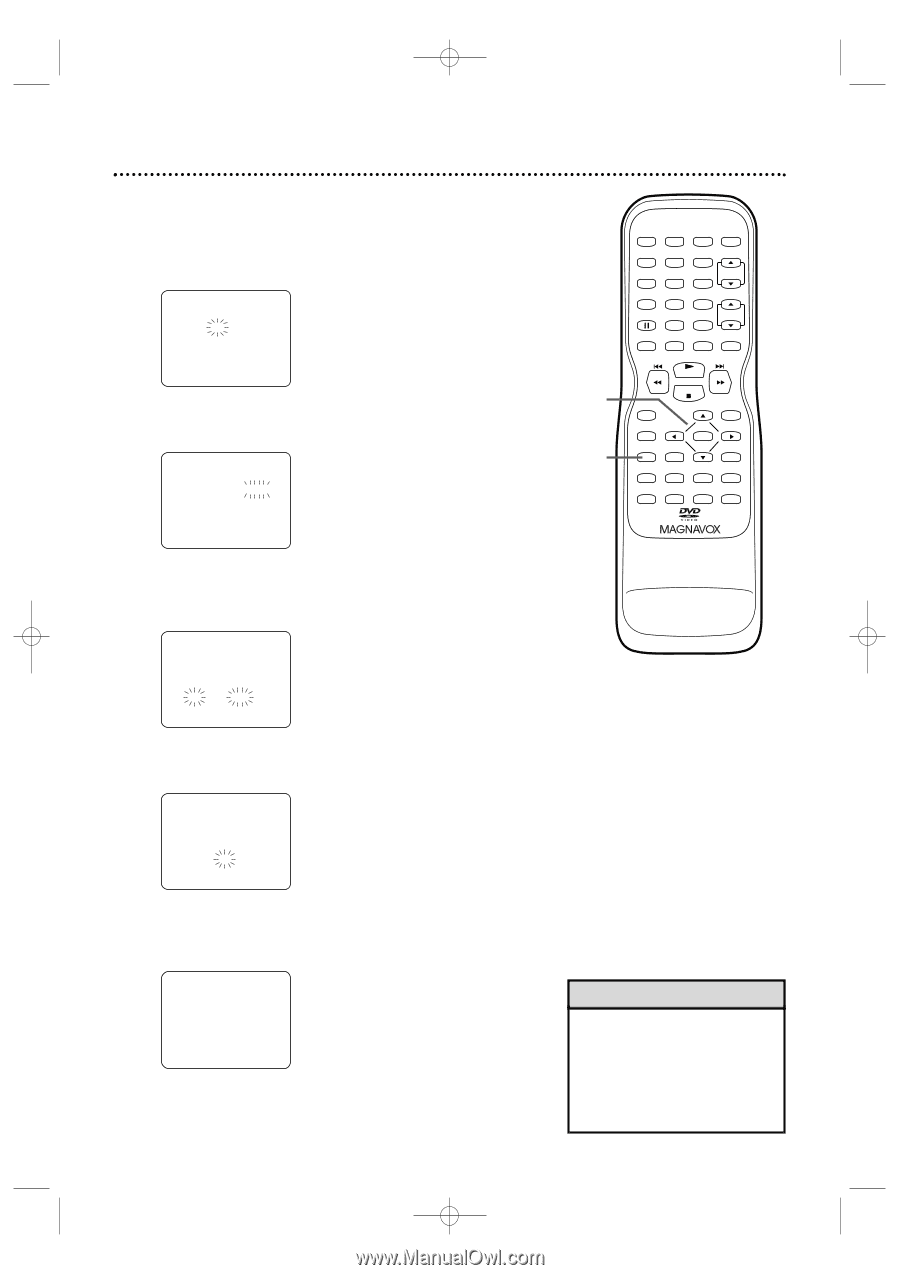
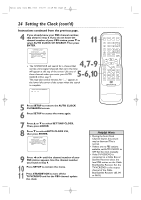
T2132_1102_0102_EN1_0303 3/3/05 10:18 AM Page 22 22 Setting the Clock (cont'd) Instructions continued from the previous page. 5 While the DAY space is flashing, press ▲ or ▼ until the correct day appears.Then, press B. An abbreviation for the selected day of the week will appear. - MANUAL CLOCK SET - MONTH DAY YEAR 05 / 06 HOUR MINUTE -- : -- -- 6 While the YEAR space is flashing, press ▲ or ▼ until the correct year appears.Then, press B. - MANUAL CLOCK SET - MONTH DAY YEAR 05 / 06 FRI 2005 HOUR MINUTE -- : -- -- 5-8 9 STANDBY-ON PICTURE SLEEP SELECT 123 CH. 456 789 +100 0 +10 SPEED C.RESET ZOOM VOL. MUTE RECORD PLAY STOP DISC MENU DISPLAY SETUP TITLE ENTER RETURN CLEAR SEARCH MODE REPEAT REPEAT A-B MODE AUDIO SUBTITLE ANGLE 7 While the HOUR space and AM or PM are flashing, press ▲ or ▼ until the correct hour appears.Then, press B. - MANUAL CLOCK SET - MONTH DAY YEAR 05 / 06 FRI 2005 HOUR MINUTE 05 : - - PM 8 While the MINUTE space is flashing, press ▲ or ▼ until the correct minute appears. - MANUAL CLOCK SET - MONTH DAY YEAR 05 / 06 FRI 2005 HOUR MINUTE 05 : 40 PM 9 Press SETUP. Although seconds are not displayed, they begin counting from 0 when you press SETUP. Use this action to synchronize the clock exactly. 5:40 PM Press DISPLAY to see the current time on the screen. Details are on page 26. Helpful Hint • To adjust the clock later, follow steps 1-3 on page 21. Then press s or B to select the item you want to change. Enter the correct information by pressing ▲ or ▼. Press SETUP when you are finished.
-
 1
1 -
2
-
3
-
4
-
5
-
6
-
7
-
8
-
9
-
10
-
11
-
12
-
13
-
14
-
15
-
16
-
 17
17 -
 18
18 -
 19
19 -
 20
20 -
 21
21 -
 22
22 -
 23
23 -
 24
24 -
 25
25 -
 26
26 -
 27
27 -
28
-
29
-
30
-
31
-
32
-
33
-
34
-
35
-
36
-
37
-
38
-
39
-
40
-
41
-
42
-
43
-
44
-
45
-
46
-
47
-
48
-
49
-
50
-
51
-
52
-
53
-
54
-
55
-
56
-
57
-
58
-
59
-
60
-
61
-
62
-
63
-
64
-
65
-
66
-
67
-
68
-
69
-
70
-
71
-
72
-
73
-
74
-
75
-
76
-
77
-
78
-
79
-
80
-
81
-
82
-
83
-
84
 |
 |