Marantz DV9600 DV9600 User Manual - Page 11
Home theater video connections
 |
View all Marantz DV9600 manuals
Add to My Manuals
Save this manual to your list of manuals |
Page 11 highlights
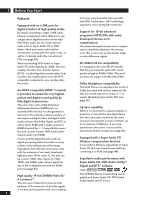
English Connecting Up 2 Home theater video connections This player outputs video in a number of different ways. Choose the one most suitable for your system using the guide below. Important Before making or changing any rear panel connections, make sure that all components are switched off and unplugged from the wall outlet. 1 If your TV has a component video input, we recommend using it to connect directly to the COMPONENT VIDEO OUT of this player. Use the standard 3-jack component video ouput. If your TV and projector have a HDMI terminal for Video and Audio Input, we recommend using it to connect directly to the HDMI out of this player. 2 If a component input is not 3 available to you, connect this player to your TV or AV receiver using either the VIDEO Plug into a standard AC wall outlet. or S-VIDEO jacks. Connecting S-Video cables S-Video cables will only plug in one way, so make sure the plug is correctly lined up with the jack before inserting. Be sure to fully insert for a good connection. S-Video or composite video? S-Video should give a better picture, so if you have an S-Video input, use it. S-Video cables are available from any good audio/ visual dealer. Connecting HDMI cables With an HDMI cable, both uncompressed video data and digital audio data (e.g., LPCM or bit stream data such as Dolby Digital, DTS, MPEG data or DVD Audio Multi channel) can be transmitted with just a single connector. By transmitting DVD image data directly as digital data without it being first converted into analog format, it becomes possible to provide the very finest in image quality (see page 52). Note • The HDMI output of this unit can be connected to a DVI jack on a TV or other device using a conversion adapter. In this case, it is necessary to use a TV or display with an HDCP-compatible DVI input. (see page 52) • There may be no image output if connected to a TV or display that is not compatible with the above format. • Refer to the instruction manual of the TV or display to be connected to this unit for detailed information regarding the HDMI terminal. • When connecting a progressive input TV with the component output of the player, select Progressive in the Components Out setting (see page 47). 11
-
 1
1 -
2
-
3
-
4
-
5
-
 6
6 -
 7
7 -
 8
8 -
 9
9 -
 10
10 -
 11
11 -
 12
12 -
 13
13 -
 14
14 -
 15
15 -
 16
16 -
17
-
18
-
19
-
20
-
21
-
22
-
23
-
24
-
25
-
26
-
27
-
28
-
29
-
30
-
31
-
32
-
33
-
34
-
35
-
36
-
37
-
38
-
39
-
40
-
41
-
42
-
43
-
44
-
45
-
46
-
47
-
48
-
49
-
50
-
51
-
52
-
53
-
54
-
55
-
56
-
57
-
58
-
59
-
60
-
61
-
62
-
63
-
64
-
65
-
66
-
67
-
68
 |
 |
