Netgear EN516 EN516 Installation Guide - Page 19
Installing the Hub on a Flat Surface, Installing the Hub in a Rack
 |
View all Netgear EN516 manuals
Add to My Manuals
Save this manual to your list of manuals |
Page 19 highlights
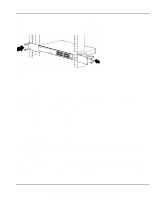
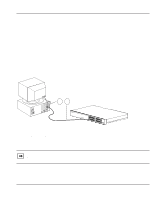
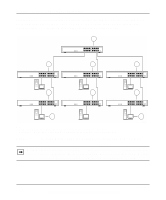
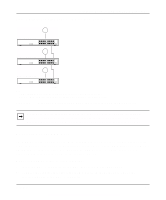
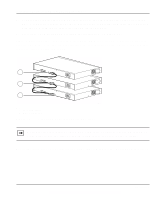
Installation Guide for the Model EN516 Ethernet Hub Installing the Hub on a Flat Surface To install the hub on a flat surface such as a tabletop or shelf, follow these steps: 1. Install self-adhesive pads on the bottom of the hub. Peel off the protective backing from the rubber pads and apply one at each marked location on the bottom of the hub. 2. Set the hub on a tabletop or shelf so that it has at least 2 inches (5 cm) of space on all sides. Restricted air flow could cause overheating. 3. Install any PCs, additional hubs, or other devices in your stack. For information on connecting the hub, refer to "Connecting the Hub" on page 3-4. Installing the Hub in a Rack To install the hub in a rack, follow these steps: 1. Attach the mounting brackets (supplied in the rack mounting kit) to the sides of the hub using the screws provided. Hold a mounting bracket against each side of the hub, as shown in Figure 3-1, and align the countersunk screw holes in the bracket with the bracket mounting holes in the hub. Use a #1 Phillips screwdriver to tighten the screws to secure each bracket. 2. Attach the hub (with the mounting bracket) to the rack using two pan-head screws with nylon washers. Use a #2 Phillips screwdriver and tighten the screws to secure the hub to the rack. 3. Install any PCs, additional hubs, or other devices in your stack. For information on connecting the hub, refer to "Connecting the Hub" on page 3-4. Installation 3-3
-
 1
1 -
2
-
3
-
4
-
5
-
6
-
7
-
8
-
9
-
10
-
11
-
12
-
13
-
 14
14 -
 15
15 -
 16
16 -
 17
17 -
 18
18 -
 19
19 -
 20
20 -
 21
21 -
 22
22 -
 23
23 -
 24
24 -
25
-
26
-
27
-
28
-
29
-
30
-
31
-
32
-
33
-
34
-
35
-
36
-
37
-
38
-
39
-
40
-
41
-
42
-
43
-
44
-
45
-
46
 |
 |
