Netgear RND2150 RND2110 Setup Manual - Page 22
Adding User Accounts, Apply. - review
 |
UPC - 606449056822
View all Netgear RND2150 manuals
Add to My Manuals
Save this manual to your list of manuals |
Page 22 highlights
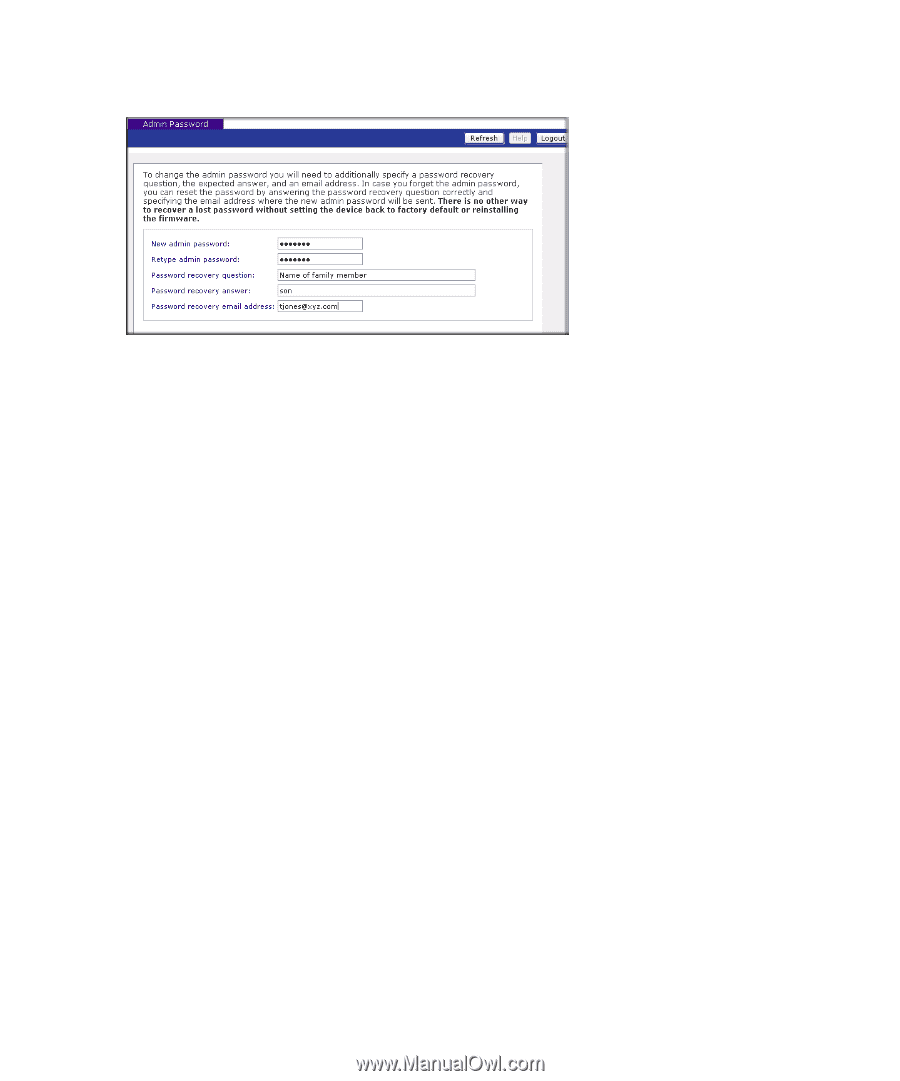
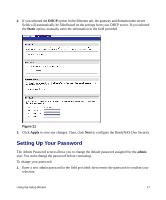
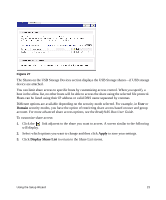
Figure 22 2. Specify a password recovery question and the expected answer, along with your email address in the remaining fields. This information will allow you to reset the password on the ReadyNAS Duo in case the password is lost. See the ReadyNAS Duo User Guide for details on this process, if required. 3. Click Apply. Click Next to display the Standard File Protocols screen. Adding User Accounts In order for ReadyNAS Duo users to access the share folders, security on the ReadyNAS Duo requires that you set up a user account for each user. To set up a user account: 1. Enter a name for the account (a user friendly, recognizable name). 2. Enter the users email address (this is optional) so that the user is informed of any account changes. 3. Enter data in the remaining fields (optional). However, it is recommended that you enter a password for each account. 4. Click Apply for you settings to take affect. In the sample below, we entered two user accounts: Paul and Smithy. You can review and change any data for user accounts by selecting the All tab or by selecting the letter tab that corresponds to the first letter of the user's name. 18 Using the Setup Wizard
-
 1
1 -
2
-
3
-
4
-
5
-
6
-
7
-
8
-
9
-
10
-
11
-
12
-
13
-
14
-
15
-
16
-
 17
17 -
 18
18 -
 19
19 -
 20
20 -
 21
21 -
 22
22 -
 23
23 -
 24
24 -
 25
25 -
 26
26 -
 27
27 -
28
-
29
-
30
-
31
-
32
 |
 |