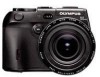
Olympus 8080 C-8080 Wide Zoom Reference Manual (English) - Page 67
Press, while holding down, to select, FLASH, then, Turn on the external flash.
 |
UPC - 050332146105
View all Olympus 8080 manuals
Add to My Manuals
Save this manual to your list of manuals |
Page 67 highlights
External flash (optional) 2 Press e while holding down #. 3 Press ac to select Q FLASH, then press d. g"Menu basics" (P.38) To use the external flash only → Select Q, then press e. FLASH MODE w FLASH SLOW SELECt IN+ SLAVE GO To use the external flash together with the built-in flash, use Olumpus flash bracket and the bracket cable (both optional). → Select IN+Q, then press e. 4 Turn on the external flash. • Set the mode dial to TTL-AUTO. 4 • Be sure to attach the flash to the camera before turning the flash on. Flash 5 Select the flash mode by turning the control dial while holding down #. g"Flash shooting" (P.59) • If close-up pictures are overexposed, try using the built-in flash by itself. • When the built-in flash and the external flash are used together, the built-in Note flash is used as the compensating light source. This means that if the amount of light from the external flash is insufficient (beyond its working range), the resulting pictures may be underexposed. 66
-
 1
1 -
2
-
3
-
4
-
5
-
6
-
7
-
8
-
9
-
10
-
11
-
12
-
13
-
14
-
15
-
16
-
17
-
18
-
19
-
20
-
21
-
22
-
23
-
24
-
25
-
26
-
27
-
28
-
29
-
30
-
31
-
32
-
33
-
34
-
35
-
36
-
37
-
38
-
39
-
40
-
41
-
42
-
43
-
44
-
45
-
46
-
47
-
48
-
49
-
50
-
51
-
52
-
53
-
54
-
55
-
56
-
57
-
58
-
59
-
60
-
61
-
 62
62 -
 63
63 -
 64
64 -
 65
65 -
 66
66 -
 67
67 -
 68
68 -
 69
69 -
 70
70 -
 71
71 -
 72
72 -
73
-
74
-
75
-
76
-
77
-
78
-
79
-
80
-
81
-
82
-
83
-
84
-
85
-
86
-
87
-
88
-
89
-
90
-
91
-
92
-
93
-
94
-
95
-
96
-
97
-
98
-
99
-
100
-
101
-
102
-
103
-
104
-
105
-
106
-
107
-
108
-
109
-
110
-
111
-
112
-
113
-
114
-
115
-
116
-
117
-
118
-
119
-
120
-
121
-
122
-
123
-
124
-
125
-
126
-
127
-
128
-
129
-
130
-
131
-
132
-
133
-
134
-
135
-
136
-
137
-
138
-
139
-
140
-
141
-
142
-
143
-
144
-
145
-
146
-
147
-
148
-
149
-
150
-
151
-
152
-
153
-
154
-
155
-
156
-
157
-
158
-
159
-
160
-
161
-
162
-
163
-
164
-
165
-
166
-
167
-
168
-
169
-
170
-
171
-
172
-
173
-
174
-
175
-
176
-
177
-
178
-
179
-
180
-
181
-
182
-
183
-
184
-
185
-
186
-
187
-
188
-
189
-
190
-
191
-
192
-
193
-
194
-
195
-
196
-
197
-
198
-
199
-
200
-
201
-
202
-
203
-
204
-
205
-
206
-
207
-
208
-
209
-
210
-
211
-
212
-
213
-
214
-
215
-
216
-
217
-
218
-
219
-
220
-
221
-
222
-
223
-
224
-
225
-
226
-
227
-
228
-
229
-
230
-
231
-
232
-
233
-
234
-
235
-
236
-
237
-
238
-
239
-
240
-
241
-
242
-
243
-
244
-
245
-
246
-
247
-
248
-
249
-
250
-
251
-
252
-
253
-
254
-
255
-
256
-
257
-
258
-
259
-
260
-
261
-
262
-
263
 |
 |
