Olympus T-100 T-100 Instruction Manual (English) - Page 12
button to turn on, Insert the supplied CD in a CD-ROM - usb cable
 |
UPC - 050332172791
View all Olympus T-100 manuals
Add to My Manuals
Save this manual to your list of manuals |
Page 12 highlights
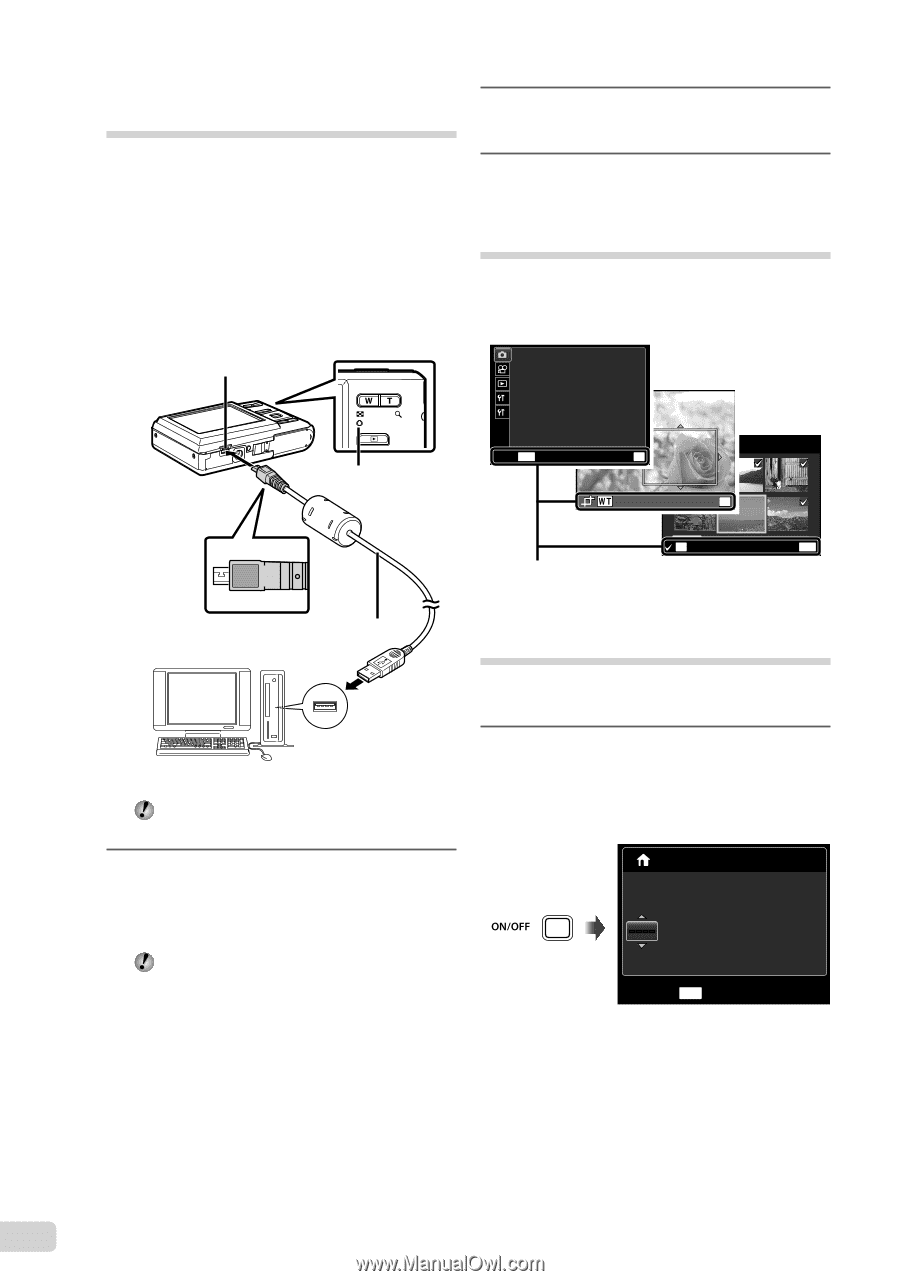
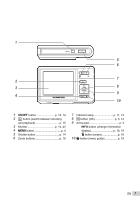
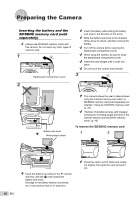
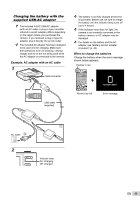
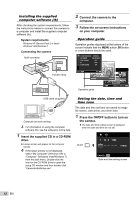
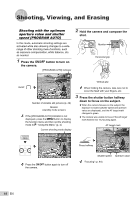
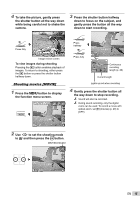
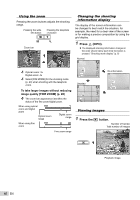
Installing the supplied computer software (ib) After checking the system requirements, follow the instructions below to connect the camera to a computer and install the supplied computer software (ib). System requirements Windows XP (Service Pack 2 or later)/ Windows Vista/Windows 7 Connecting the camera Multi-connector Indicator lamp 2 Connect the camera to the computer. 3 Follow the on-screen instructions on your computer. Operation guide Operation guides displayed at the bottom of the screen indicate that the m button, H button, or zoom buttons should be used. COMPRESSION NORMAL AF MODE FACE/iESP FINE ZOOM 1R OFF OFF 2 ICON GUIDE ON EXIT MENU SET OK SEL. IMAGE SET OK Operation guide OK ERASE/CANCEL MENU USB cable (supplied) Computer (on and running) For information on using the computer software (ib), see the software's online help. 1 Insert the supplied CD in a CD-ROM drive. ● A setup screen will appear on the computer monitor. If the setup window is not displayed, select "My Computer" (Windows XP) or "Computer" (Windows Vista/Windows 7) from the start menu. Double-click the icon for the CD-ROM drive to open the setup CD window and then double-click "CameraInitialSetup.exe". Setting the date, time and time zone The date and time set here are saved to image file names, date prints, and other data. 1 Press the n button to turn on the camera. ● The date and time setting screen is displayed when the date and time are not set. X Y M D TIME Y/M/D CANCEL MENU Date and time setting screen 12 EN
-
 1
1 -
2
-
3
-
4
-
5
-
6
-
 7
7 -
 8
8 -
 9
9 -
 10
10 -
 11
11 -
 12
12 -
 13
13 -
 14
14 -
 15
15 -
 16
16 -
 17
17 -
18
-
19
-
20
-
21
-
22
-
23
-
24
-
25
-
26
-
27
-
28
-
29
-
30
-
31
-
32
-
33
-
34
-
35
-
36
-
37
-
38
-
39
-
40
-
41
-
42
-
43
-
44
-
45
-
46
-
47
-
48
-
49
-
50
-
51
-
52
-
53
-
54
-
55
-
56
-
57
-
58
-
59
-
60
-
61
 |
 |