Olympus T-100 T-100 Instruction Manual (English) - Page 35
Switching between home and travel destination time zones [WORLD TIME] - country
 |
UPC - 050332172791
View all Olympus T-100 manuals
Add to My Manuals
Save this manual to your list of manuals |
Page 35 highlights
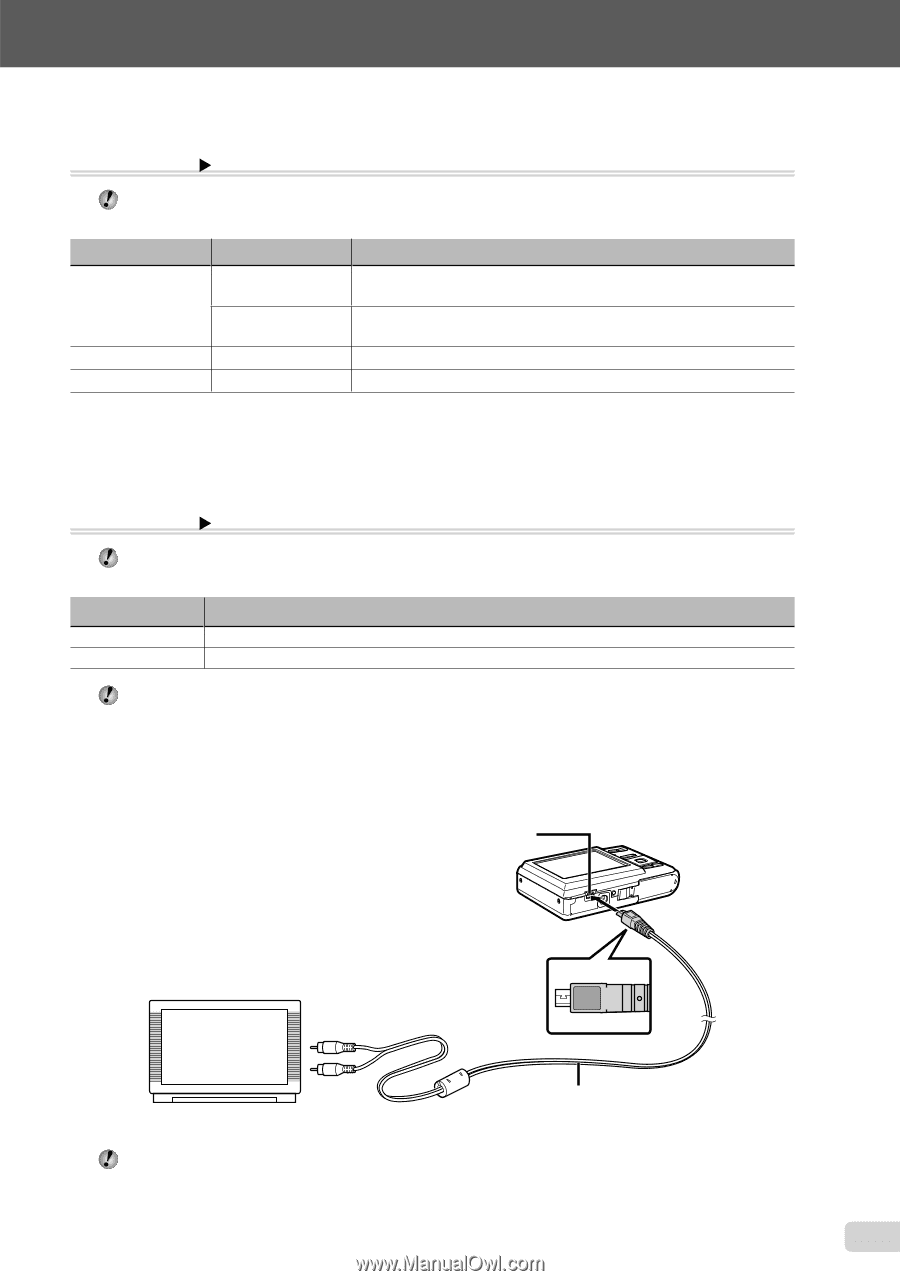
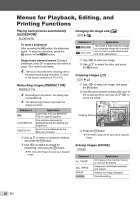
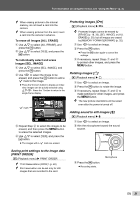
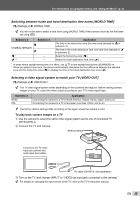
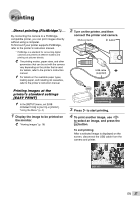
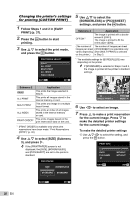
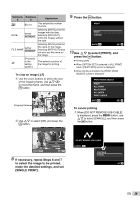
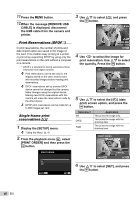
For information on using the menus, see "Using the Menu" (p. 4). Switching between home and travel destination time zones [WORLD TIME] s (Settings 2) X WORLD TIME You will not be able to select a time zone using [WORLD TIME] if the camera clock has not first been set using [X]. Submenu 2 Submenu 3 x HOME/ALTERNATE y x*1 - y*1, 2 - Application The time in the home time zone (the time zone selected for x in submenu 2). The time in the travel destination time zone (the time selected for y in submenu 2). Select the home time zone (x). Select the travel destination time zone (y). *1 In areas where daylight saving time is in effect, use FG to turn daylight saving time ([SUMMER]) on. *2 When you select a time zone, the camera automatically calculates the time difference between the selected zone and the home time zone (x) to display the time in the travel destination time zone (y). Selecting a video signal system to match your TV [VIDEO OUT] s (Settings 2) X VIDEO OUT The TV video signal system varies depending on the countries and regions. Before viewing camera images on your TV, select the video output according to your TV's video signal type. Submenu 2 NTSC PAL Application Connecting the camera to a TV in North America, Taiwan, Korea, Japan, and so on. Connecting the camera to a TV in European countries, China, and so on. The factory default settings differ according to the region where the camera is sold. To play back camera images on a TV 1 Use the camera to select the same video signal system as the one of connected TV ([NTSC]/[PAL]). 2 Connect the TV and camera. Multi-connector Connect to the TV video input jack (yellow) and audio input jack (white). AV cable (CB-AVC5: sold separately) 3 Turn on the TV, and change "INPUT" to "VIDEO (an input jack connected to the camera)." For details on changing the input source of the TV, refer to the TV's instruction manual. EN 35
-
 1
1 -
2
-
3
-
4
-
5
-
6
-
7
-
8
-
9
-
10
-
11
-
12
-
13
-
14
-
15
-
16
-
17
-
18
-
19
-
20
-
21
-
22
-
23
-
24
-
25
-
26
-
27
-
28
-
29
-
 30
30 -
 31
31 -
 32
32 -
 33
33 -
 34
34 -
 35
35 -
 36
36 -
 37
37 -
 38
38 -
 39
39 -
 40
40 -
41
-
42
-
43
-
44
-
45
-
46
-
47
-
48
-
49
-
50
-
51
-
52
-
53
-
54
-
55
-
56
-
57
-
58
-
59
-
60
-
61
 |
 |