Optoma EP774 User Manual
Optoma EP774 Manual
 |
View all Optoma EP774 manuals
Add to My Manuals
Save this manual to your list of manuals |
Optoma EP774 manual content summary:
- Optoma EP774 | User Manual - Page 1
Projector ...7 Remote Control...13 Remote Control Operating Range ...15 Projector and Remote Control Buttons...15 Inserting the Remote Lamp ...39 Resetting the Lamp ...42 Cleaning the Projector...43 Using the Kensington® Lock ...43 Common problems and solutions...44 Tips for Troubleshooting - Optoma EP774 | User Manual - Page 2
Error Messages ...45 Image Problems ...46 Lamp Problems...46 Remote Control Problems...47 Audio Problems ...47 Having the Projector Serviced...48 Specifications...49 Projection Distance V.S. Projection Size...49 Timing Mode Table...50 Projector Dimensions ...51 Projector Dimensions ...51 Regulatory - Optoma EP774 | User Manual - Page 3
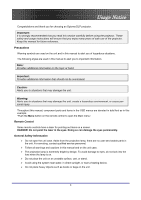
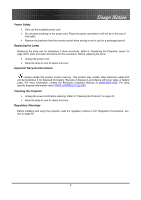
for choosing an Optoma DLP projector. Usage Notice Usage Notice Important: It is strongly recommended that you read this section carefully before using the projector. These safety and usage instructions will ensure that you enjoy many years of safe use of the projector. Keep this manual for future - Optoma EP774 | User Manual - Page 4
. Remove the batteries from the remote control when storing or not in use for a prolonged period. Replacing the Lamp Replacing the lamp can be hazardous if done incorrectly. Refer to "Replacing the Projection Lamp" on page 39 for clear and safe instructions for this procedure. Before replacing - Optoma EP774 | User Manual - Page 5
A high brightness rating allows for presentations in daylight or in lit rooms • Supports resolutions up to SXGA at 16.7 million colors to deliver crisp, clear images About this manual This manual is intended for end users and describes how to install and operate the DLP projector. Wherever possible - Optoma EP774 | User Manual - Page 6
and check that the following items are included: DLP PROJECTOR REMOTE CONTROL (WITH TWO AAA BATTERIES) POWER CORD USB CABLE (USB TYPE A TO B USB) VIDEO CABLE (RCA X 1TO RCA X 1) Documents: User's Guide Quick Start Card Warranty Card COMPUTER CABLE (DB15 - DB15) CARRYING CASE Contact - Optoma EP774 | User Manual - Page 7
LABEL DESCRIPTION Focus Focuses the projected image Lens zoom Enlarges the projected image Screws Holds lamp to projector See "Top view-OSD buttons and LEDs" IR receiver Receiver for IR signal from remote control Lens Remove lens cap before use Lens cover Slide across to protect lens - Optoma EP774 | User Manual - Page 8
VOL-/ Left cursor Decreases volume Navigates and changes settings in the OSD SEE PAGE: 24 24 Lamp LED Keystone/ UP cursor Power LED Orange Lamp ready-you can safely turn on or off the projector Flashing Lamp not ready-do not press the power button Corrects image-trapezoid (wider top) effect - Optoma EP774 | User Manual - Page 9
ITEM 6. 7. 8. 9. LABEL RE-SYNC Menu Source Power Introduction DESCRIPTION Optimizes image size, position, and resolution Opens and exits the OSD Detects the input device Turns the projector on or off SEE PAGE: 19 25 19 9 - Optoma EP774 | User Manual - Page 10
. 11. 12. 13. LABEL DESCRIPTION SEE PAGE: Rear IR Receiver Receiver for IR signal from remote control. DVI-D Connect the computer cable from a computer. Both DVI-I and DVI-D are supported. VGA IN Connect a VGA cable (supplied) from a computer VGA OUT Connect to a monitor S-video Connect - Optoma EP774 | User Manual - Page 11
ITEM 14. 15. 16. LABEL Power switch Power Security Lock Introduction DESCRIPTION SEE PAGE: Turns the power on and off 43 Connect the supplied power cord 43 Secure to permanent object with a Kensington® Lock system Note: If your video equipment has both S-video and RCA jacks (composite video) - Optoma EP774 | User Manual - Page 12
Bottom view Introduction ITEM 1. 2. 3. 4. LABEL DESCRIPTION SEE PAGE: Ceiling support holes. Contact your dealer for information on mounting your projector on the ceiling. Height adjuster but- Push to release height adjuster ton 23 Height adjuster Adjuster drops down when adjuster button - Optoma EP774 | User Manual - Page 13
signal off certain reflective surfaces such as projector screens. 3. The buttons and keys on the projector have the same functions as the corresponding buttons on the remote control. This user's manual describes the functions based on the remote control. ITEM 1. 2. LABEL IR transmitter Status LED - Optoma EP774 | User Manual - Page 14
ITEM 3. 4. 5. 6. 7. 8. 9. 10. 11. 12. 13. 14. 15. 16. 17. 18. 19. 20. 21. 22. 23. 24. LABEL Laser Up Right Down Page Down Up cursor Right cursor Down cursor Volume +/Zoom S-Video Composite VGA AV mute DVI Re-Sync Menu Freeze Keystone top/bottom Left cursor Enter Page Up Introduction DESCRIPTION - Optoma EP774 | User Manual - Page 15
DESCRIPTION SEE PAGE: Left arrow when connected through USB to a PC Enter key when connected through USB to a PC Turns the projector on or off Use as on-screen pointer. DO NOT POINT IN EYES. The remote control can only interface with a computer when connected to the computer through a USB - Optoma EP774 | User Manual - Page 16
Inserting the Remote Control Batteries 1. Remove the battery compartment cover by sliding the cover in the direction of the arrow. 2. is better). 2. Dispose of used batteries according to local ordinance regulations. 3. Remove the batteries when not using the projector for prolonged periods. 16 - Optoma EP774 | User Manual - Page 17
Check the user manual of the connecting device to confirm it has the appropriate output connector. ITEM A B C D E F G H I LABEL DESCRIPTION Rear IR Receiver for IR signal from remote control. Receiver DVI-D Connect the computer cable from a computer. Both DVI-I and DVI-D are supported. VGA in - Optoma EP774 | User Manual - Page 18
connected, the screen automatically adjusts vertically to match the screen aspect ratio. Reserved for installation control. Warning: As a safety precaution, disconnect all power to the projector and connecting devices before making connections. 18 - Optoma EP774 | User Manual - Page 19
keys on the computer keyboard to switch the display output to the projector. (Check the user manual of the PC to determine the appropriate Fn key HDTV are supported through the VGA connector.) Setup and Operation 6. To turn off the projector, press the Power button. The projector prepares for - Optoma EP774 | User Manual - Page 20
7. When the "Power Off? / Press Power again" message appears, press the Power button. The projector will turn off. 8. Turn off the main Power switch when the Lamp LED stops flashing. Setup and Operation Caution: Do not unplug the power cord until the Ready LED stops flashing, indicating the - Optoma EP774 | User Manual - Page 21
26 for help on using OSD menus.) Important: Keep the password in a safe place. Without the password, you will not be able to use the projector. If you lose the password, contact your reseller for information on clearing the password. 1. Press the Menu button to open the 1.OSD menu. 2. Press the - Optoma EP774 | User Manual - Page 22
6. Every time you start the projector, a password dialog box appears. Enter the password in the order you set it on step 5. (Press the Menu button to cancel if you enter the wrong password.) Setup and Operation 22 - Optoma EP774 | User Manual - Page 23
it is perpendicular to the screen. • Be sure cables are not in the way or can cause the projector to be knocked over. A D B C 1. To raise the level of the projector, lift the projector [A] and press the heightadjuster button [B]. The height adjuster drops down [C]. 2. To lower the level of the - Optoma EP774 | User Manual - Page 24
Image-focus control (on the projector only) to sharpen the projected image. A 3. Press the Keystone button on the remote control. The keystone control distortion. Adjusting the Volume 1. Press the Volume +/button on the remote control. The volume control appears on the display. 2. Use the Volume - Optoma EP774 | User Manual - Page 25
to navigate and make changes to the OSD. The following illustration shows the corresponding buttons on the remote control and on the projector. 2 5 6 41 6 5 1 4 2 3 3 1. To open the OSD, press the Menu button. 2. There are six menus. Press the cursor button to move through the menus. 3. Press - Optoma EP774 | User Manual - Page 26
Setup and Operation Setting the OSD Language You may want to reference the OSD on your projector while reading this section. Set the OSD language to your preference before continuing. (The default language is English.) 1. Press the Menu button. The Image menu - Optoma EP774 | User Manual - Page 27
Menu Setting OSD Menu Overview Menu Setting Use the following illustration* to quickly find a setting or determine the range for a setting. * Represents the default settings on the projector. 27 - Optoma EP774 | User Manual - Page 28
obscure white detail. If you prefer a stronger image, adjust toward the maximum setting. For a smoother, more natural image, adjust toward the minimum setting. Data source: 10 Video source: 2 Press to adjust the value of white peaking. (Range: 0 - 10) Press the cursor button to adjust the video - Optoma EP774 | User Manual - Page 29
to adjust the color temperature Temperature (Range: Cool/Normal/Warm) *Note: Menu represents the default settings on the projector. DEFAULT 3 Normal Image Menu Functions Available for Connected Source Function RGB Display Mode O Brightness O Contrast O White Peaking O Saturation - Optoma EP774 | User Manual - Page 30
Menu Setting Display Menu Press the Menu button to open the OSD menu. Press the cursor button to move to the Display menu. Press the cursor button to move up and down in the Display menu. Press to change values for settings, and then press Enter or to confirm the new setting. ITEM H. Image Shift V. - Optoma EP774 | User Manual - Page 31
ITEM Digital Zoom Menu Setting DESCRIPTION DEFAULT Digital operation for zoom and pan adjustment. Press Enter or . The - Zoom menu appears. Press to zoom in; press to zoom out. Press Enter or to open the Pan menu. (You must zoom in before you can open the Pan menu.) Use the cursor buttons to - Optoma EP774 | User Manual - Page 32
cursor button to select the video standard (Range: Auto - NTSC - PAL - SECAM) Press the cursor channels. button to toggle between PC and Video input Auto Data Source: PC Video Source: Video 32 - Optoma EP774 | User Manual - Page 33
mode. Range: Eco , Normal and Bright. Eco mode uses less power and extends lamp life, but decreases lamp brightness. Bright mode uses more power and reduces lamp life, but increases lamp brightness. Fan Mode Press the cursor button to change fan mode; recommend turning into high speed in high - Optoma EP774 | User Manual - Page 34
O Video Type Audio Input O Volume O Source Lock O Auto Power Off O Direct Power On O Lamp Mode O Fan Mode O O = available video source DVI Component Video Composite Video O O O O O O O O O O O O O O O O O O O O O O O O O S-Video O O O O O O O O O 34 - Optoma EP774 | User Manual - Page 35
Menu Setting Color setting Menu Press the Menu button to open the OSD menu. Press the cursor button to move to the Color setting menu. Press the cursor button to move up and down in the Color setting menu. Press to change values for settings, and then press Enter or to confirm the new setting. ITEM - Optoma EP774 | User Manual - Page 36
Menu Setting Language Menu Press the Menu button to open the Main menu. Press the cursor button to move to the Language menu. Press the cursor button to move up and down in the Language menu. Press to change values for settings, and then press Enter or to confirm the new setting. ITEM English Franç - Optoma EP774 | User Manual - Page 37
Menu Setting Management Menu Press the Menu button to open the Main menu. Press the cursor button to move to the Management menu. Press the cursor button to move up and down in the Management menu. Press to change values for settings, and then press Enter or to confirm the new setting. ITEM Menu - Optoma EP774 | User Manual - Page 38
is enabled, it must be entered every time after you power on the projector. See "Setting an Access Password (Security Lock)" on page 21 for can see Lamp Hours , Video Information , Active Source and Reset Lamp Hour in Status menu. See "Resetting the Lamp" on page 42. Press Enter or to reset all - Optoma EP774 | User Manual - Page 39
which you can order from your local dealer. Important: 1. The lamp contains a certain amount of mercury and should be disposed of according to new lamp-doing so may shorten its operation life. Warning: Be sure to turn off and unplug the projector at least an hour before replacing the lamp. Failure - Optoma EP774 | User Manual - Page 40
2. Open the lamp compartment cover (B). Appendices B 3. Remove the two screws from the lamp module (C). C D 4. Lift the module handle up (D). 40 - Optoma EP774 | User Manual - Page 41
5. Pull firmly on the module handle to remove the lamp module D (D) Appendices 6. Reverse steps 1 to 5 to install the new lamp module. 41 - Optoma EP774 | User Manual - Page 42
button to move down to Status. 4. Press the cursor or Enter button to enter Status menu 5. Press the cursor button to move down to Lamp Hour Reset. Press the cursor or Enter button. A message screen appears. 6. Press the cursor buttons in this order: ; ; ; . The Status menu appears again showing the - Optoma EP774 | User Manual - Page 43
dust and grime will help ensure trouble-free operation. Warning: 1. Be sure to turn off and unplug the projector at least an hour before cleaning. . 4. If a lot of water gets into the projector interior when cleaning, have the projector serviced. Cleaning the Lens You can purchase optic lens cleaner - Optoma EP774 | User Manual - Page 44
parts. For example, if you replace batteries and the problem remains, put the original batteries back and go to the next step. Keep a record of the steps you take when troubleshooting-the information may be useful when calling for technical support or for passing on to service personnel. 44 - Optoma EP774 | User Manual - Page 45
error Thermal break status error T1 temperature over temperature T1 sensor status fail Lamp lit error Ballast SCI error Ballast UART error Fan1 error (Lamp) Fan2 error (Ballast) Fan3 error (Burner) Fan4 error (Power) Lamp door sensor detect high DMD error Color wheel error Appendices POWER LED - Optoma EP774 | User Manual - Page 46
LED is green. 4. If you have replaced the lamp recently, try resetting the lamp connections. 5. Replace the lamp module. 6. Put the old lamp back in the projector and have the projector serviced. Problem: The lamp goes off 1. Power surges can cause the lamp to turn off. Press the power button twice - Optoma EP774 | User Manual - Page 47
: There is no sound 1. Adjust the volume on the remote control. 2. Adjust the volume of the audio source. 3. Check the audio cable connection. 4. Test the source audio output with other speakers. 5. Have the projector serviced. Problem: The sound is distorted 1. Check the audio cable connection - Optoma EP774 | User Manual - Page 48
should have the projector serviced. Pack the projector in the original carton. Include a description of the problem and a checklist of the steps you took when trying to fix the problem--the information may be useful to service personnel. Optoma Global Offices For service or support, please contact - Optoma EP774 | User Manual - Page 49
Projection Distance V.S. Projection Size Anchura de pantalla A B D C Specifications Specifications Altura de pantalla L PDrisotjaencctiioandeDpisrtoaynecceción Max. Screen Size 1.8 Projection Distance L Diagonal Width A Height C 1.00 m 3 ' 1.50 m 4 ' 2.40 m 7 ' 2.80 m 9 ' 3.20 m 10 ' 3.60 - Optoma EP774 | User Manual - Page 50
table outlines the resolutions that can be displayed by the projector. Signal Resolution Frequency H. Frequency V. (KHz) (Hz) -- Ο 720 x 480 31.5 60.0 -- -- Ο Ο: Frequency supported --: Frequency not supported The native resolution is 1024 x 768. Resolution other than native mode - Optoma EP774 | User Manual - Page 51
Projector Dimensions 300 mm (11.8") Specifications 108 mm (4.3") 244 mm (9.6") 51 - Optoma EP774 | User Manual - Page 52
equipment has been tested and found to installed and used in accordance with the instruction manual, may cause harmful interference to radio domestic environment, it may cause radio interference, in which case the user may be required to take adequate measures. The typical use is in a - Optoma EP774 | User Manual - Page 53
This publication, including all photographs, illustrations and software, is protected under international copyright laws, with all rights reserved. Neither this manual, nor any of the material contained herein, may be reproduced without written consent of the author. © Copyright September, 2006
-
 1
1 -
 2
2 -
 3
3 -
 4
4 -
 5
5 -
 6
6 -
 7
7 -
8
-
9
-
10
-
11
-
12
-
13
-
14
-
15
-
16
-
17
-
18
-
19
-
20
-
21
-
22
-
23
-
24
-
25
-
26
-
27
-
28
-
29
-
30
-
31
-
32
-
33
-
34
-
35
-
36
-
37
-
38
-
39
-
40
-
41
-
42
-
43
-
44
-
45
-
46
-
47
-
48
-
49
-
50
-
51
-
52
-
53
 |
 |

Table of Contents
1
Table of Contents
Table of Contents
..........................................................................................................................................................
1
Usage Notice
..................................................................................................................................................................
3
Introduction
...................................................................................................................................................................
6
Packing Checklist
.......................................................................................................................................................
6
Views of Projector
......................................................................................................................................................
7
Remote Control
.........................................................................................................................................................
13
Remote Control Operating Range
............................................................................................................................
15
Projector and Remote Control Buttons
.....................................................................................................................
15
Inserting the Remote Control Batteries
....................................................................................................................
16
Setup and Operation
...................................................................................................................................................
17
Connecting Input Devices
.........................................................................................................................................
17
Starting and Shutting down the Projector
................................................................................................................
19
Setting an Access Password (Security Lock)
............................................................................................................
21
Adjusting the Projector Level
...................................................................................................................................
23
Adjusting the Zoom, Focus and Keystone
.................................................................................................................
24
Adjusting the Volume
................................................................................................................................................
24
OSD Menu Controls
.................................................................................................................................................
25
Setting the OSD Language
........................................................................................................................................
26
Menu Setting
...............................................................................................................................................................
27
OSD Menu Overview
................................................................................................................................................
27
Image Menu
..............................................................................................................................................................
28
Display Menu
............................................................................................................................................................
30
Setup Menu
...............................................................................................................................................................
32
Color setting Menu
...................................................................................................................................................
35
Language Menu
........................................................................................................................................................
36
Management Menu
...................................................................................................................................................
37
Appendices
...................................................................................................................................................................
39
Replacing the Projection Lamp
................................................................................................................................
39
Resetting the Lamp
...................................................................................................................................................
42
Cleaning the Projector
..............................................................................................................................................
43
Using the Kensington® Lock
....................................................................................................................................
43
Common problems and solutions
..............................................................................................................................
44
Tips for Troubleshooting
..........................................................................................................................................
44