Optoma EP774 User Manual - Page 10
Rear view, Rear IR Re - remote
 |
View all Optoma EP774 manuals
Add to My Manuals
Save this manual to your list of manuals |
Page 10 highlights
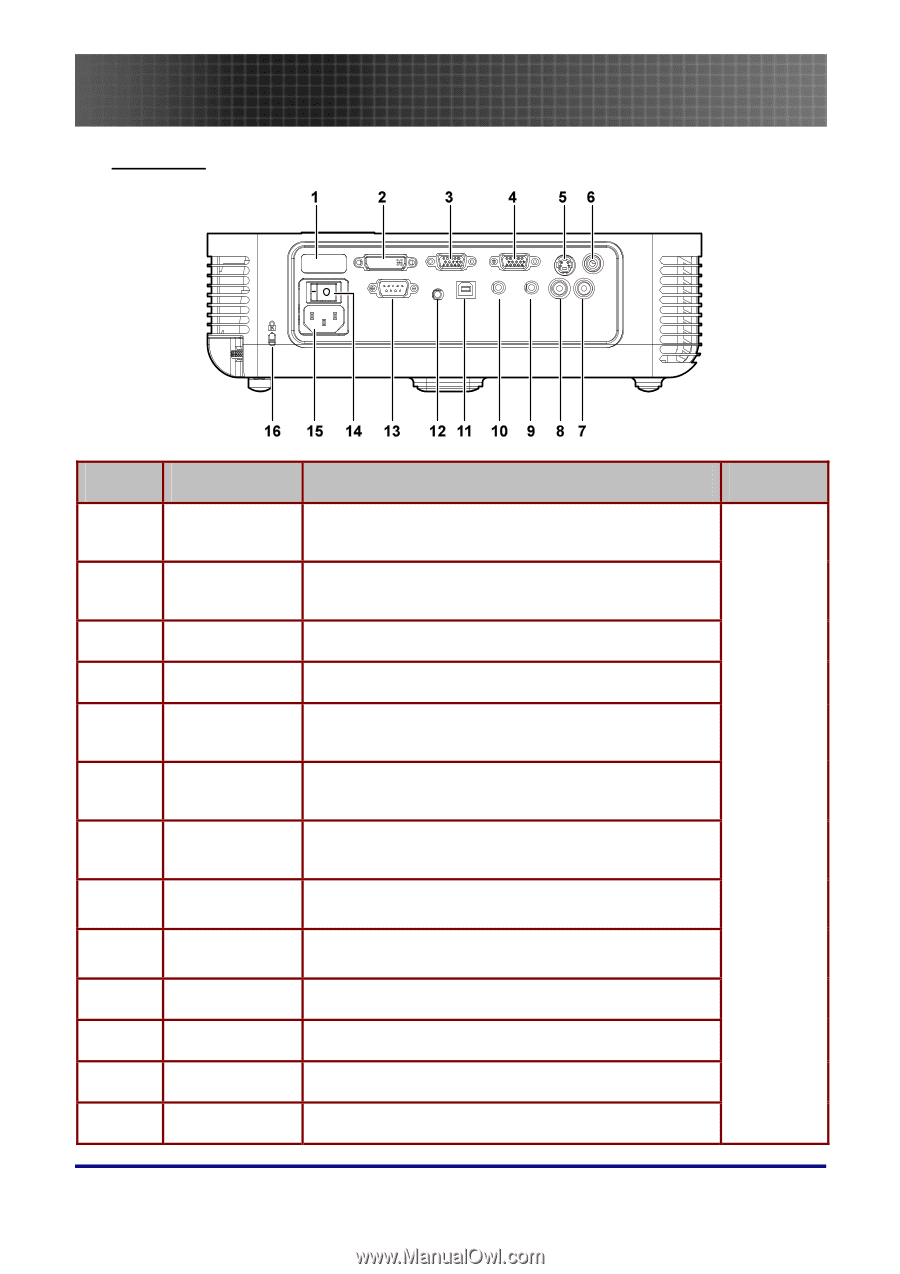
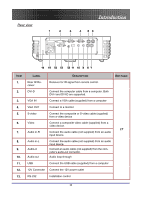
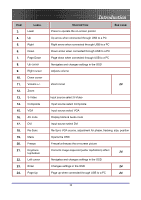
Rear view Introduction ITEM 1. 2. 3. 4. 5. 6. 7. 8. 9. 10. 11. 12. 13. LABEL DESCRIPTION SEE PAGE: Rear IR Receiver Receiver for IR signal from remote control. DVI-D Connect the computer cable from a computer. Both DVI-I and DVI-D are supported. VGA IN Connect a VGA cable (supplied) from a computer VGA OUT Connect to a monitor S-video Connect the composite or S-video cable (supplied) from a video device Video Audio in-R Connect a composite video cable (supplied) from a video device. 17 Connect the audio cable (not supplied) from an audio input device. Audio in-L Audio-in Audio-out Connect the audio cable (not supplied) from an audio input device. Connect an audio cable (not supplied) from the computer's audio-out connector. Audio loop-through USB Connect the USB cable (supplied) from a computer 12V Connector Connect the 12V power outlet RS-232 Installation control 10
-
 1
1 -
2
-
3
-
4
-
 5
5 -
 6
6 -
 7
7 -
 8
8 -
 9
9 -
 10
10 -
 11
11 -
 12
12 -
 13
13 -
 14
14 -
 15
15 -
16
-
17
-
18
-
19
-
20
-
21
-
22
-
23
-
24
-
25
-
26
-
27
-
28
-
29
-
30
-
31
-
32
-
33
-
34
-
35
-
36
-
37
-
38
-
39
-
40
-
41
-
42
-
43
-
44
-
45
-
46
-
47
-
48
-
49
-
50
-
51
-
52
-
53
 |
 |