Panasonic KXFPG372 KXFPG372 User Guide
Panasonic KXFPG372 - FAX W/2.4GHZ PHONE Manual
 |
View all Panasonic KXFPG372 manuals
Add to My Manuals
Save this manual to your list of manuals |
Panasonic KXFPG372 manual content summary:
- Panasonic KXFPG372 | KXFPG372 User Guide - Page 1
and Answering System Operating Instructions Model No. KX-FPG372 General Information FOR FAX ADVANTAGE ASSISTANCE: - (VOICE) CALL 1-800-HELP-FAX (1-800-435-7329) - E-MAIL TO [email protected] for customers in the U.S.A. or Puerto Rico - REFER TO www.panasonic.com for customers in - Panasonic KXFPG372 | KXFPG372 User Guide - Page 2
charges exceed local or long-distance transmission charges.) In order to program this information into your fax machine, you should complete the instructions As an ENERGY STAR® Partner, Panasonic has determined that this product meets . Copyright: L This manual is copyrighted by Kyushu Matsushita - Panasonic KXFPG372 | KXFPG372 User Guide - Page 3
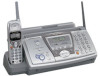
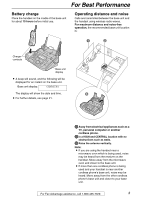
For Best Performance Battery charge For Best Performance Place the handset on the cradle of the base unit for about 15 hours before initial use. Operating distance and noise Calls are transmitted between the base unit and the handset using wireless radio waves. For maximum distance and noise-free - Panasonic KXFPG372 | KXFPG372 User Guide - Page 4
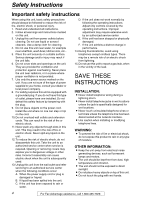
normally by following the operating instructions. Adjust only controls covered by the operating instructions. Improper adjustment may require extensive work by an authorized service center E. If the unit Do not touch the plug with wet hands. 4 For Fax Advantage assistance, call 1-800-435-7329. - Panasonic KXFPG372 | KXFPG372 User Guide - Page 5
special disposal instructions. L Do not open or mutilate the battery(ies). Charge the battery(ies) provided with or identified for use with this product only in accordance with the instructions and limitations specified in this manual any regulations posted in the area instruct you not to do so. - Panasonic KXFPG372 | KXFPG372 User Guide - Page 6
guide 17 Recording paper 18 Belt clip and headset 19 Selecting the way to use your fax machine 20 Case 1: Using the fax machine only 22 Case 2: Using the fax machine with an extension telephone 24 Case 3: Using the fax machine with a computer 26 Help function 28 Adjusting handset ID service - Panasonic KXFPG372 | KXFPG372 User Guide - Page 7
Fax Sending Faxes Receiving Faxes Distinctive Ring Sending a fax manually 55 Documents you can send 57 Sending a fax using the navigator directory 58 Broadcast transmission 59 Receiving a fax manually 62 Receiving a fax to recorded messages using the handset 76 Operating from a remote - Panasonic KXFPG372 | KXFPG372 User Guide - Page 8
jams - sending 106 Replacing the handset battery 107 Document feeder 108 Thermal head 109 service for the Caller IQ feature 112 Technical data about this product 119 FCC and Other Information 121 Limited Warranty 123 Customer Services directory 125 Program index 126 Index 127 8 For Fax - Panasonic KXFPG372 | KXFPG372 User Guide - Page 9
Part No. PFUS1385Z Operating instructions .......... 1 Part No. PFZMFC175AL Quick start sheet 1 - prints about 150 letter size pages. Part No. PFQX1792Z Part No. PFQW1867Z * The cordless handset is shown as the KX-FPG371R on the label, but it can be also used for this model, KX-FPG372. L If any - Panasonic KXFPG372 | KXFPG372 User Guide - Page 10
meter (164') replacement roll for use in your unit. Please use genuine Panasonic replacement film. The ink film is not reusable. Do not rewind and battery for the cordless handset. For a hands-free telephone conversation. L To place an order: Telephone: Call 1-800-332-5368. Fax: Send a fax - Panasonic KXFPG372 | KXFPG372 User Guide - Page 11
NAVIGATOR PRE V NE X T HELP COPY CALLER ID LOCATOR / INTERCOM MIC STOP FAX /START SET L MN OP QR S T U A {TONE} L To Caller ID service (page 51, 54). K {LOCATOR/INTERCOM} L To page or locate the handset (page 39, 40). L {FLASH}{CALL WAIT} L To access special telephone services such as - Panasonic KXFPG372 | KXFPG372 User Guide - Page 12
the Controls (Base Unit) Overview Front view A B CDEFG A Document guides B Paper tray C Metal recording paper guide D Recording paper entrance E Recording paper exit F Tension plate G A Power inlet B Telephone line jack C Speaker A B C 12 For Fax Advantage assistance, call 1-800-435-7329. - Panasonic KXFPG372 | KXFPG372 User Guide - Page 13
during dialing when your line has rotary pulse services. G {FLASH}{CALL WAIT/PLAYBACK} L To access special telephone services such as Call Waiting (page 49) or the last number dialed from the handset. L To insert a pause during dialing. For Fax Advantage assistance, call 1-800-435-7329. 13 - Panasonic KXFPG372 | KXFPG372 User Guide - Page 14
on your hands like carbon paper. "T" shaped gear (blue) Rear ink film roll Right slot 2 3 Left slot 1 Front ink film roll Blue core 14 For Fax Advantage assistance, call 1-800-435-7329. - Panasonic KXFPG372 | KXFPG372 User Guide - Page 15
least once. Correct Front cover Back cover Blue core Incorrect 1 turn Tight The ink film is not wrapped around the blue core. Slack Reverse For Fax Advantage assistance, call 1-800-435-7329. 15 - Panasonic KXFPG372 | KXFPG372 User Guide - Page 16
To use legal size paper L Please purchase a legal paper tray, Model No. KX-FA51 (page 10) and install it. Slot Note: L Do not place the the A4 paper guide into the lower slot. 2. Press the guide into the upper slot. A4 paper guide Upper slot Bottom tab Lower slot 16 For Fax Advantage assistance, - Panasonic KXFPG372 | KXFPG372 User Guide - Page 17
the recording paper exit. Metal recording paper guide Slots L The recording paper will be ejected from the top of the unit after printing. The metal recording paper guide prevents the printed paper from curling. Metal recording paper guide Printed paper For Fax Advantage assistance, call 1-800-435 - Panasonic KXFPG372 | KXFPG372 User Guide - Page 18
over the tab. L If the paper is not inserted correctly, readjust the paper, or the paper may jam. Correct Incorrect Stack of paper 18 For Fax Advantage assistance, call 1-800-435-7329. - Panasonic KXFPG372 | KXFPG372 User Guide - Page 19
the headset into the handset allows a hands-free telephone conversation. Please use the Panasonic headset Model No. KX-TCA88 or KX-TCA90. See page 10 for accessory information. To connect the headset To remove the belt clip The pictured headset is KX-TCA88. For Fax Advantage assistance, call - Panasonic KXFPG372 | KXFPG372 User Guide - Page 20
on your situation, select the way you prefer to use your fax machine. - Case 1: Using the fax machine only (page 22) - Case 2: Using the fax machine with an extension telephone (page 24) - Case 3: Using the fax machine with a computer (page 26) Connecting to a telephone line jack and power - Panasonic KXFPG372 | KXFPG372 User Guide - Page 21
strength You can check the battery strength on the handset display. Handset display Battery strength 12223 Fully charged 1 223 Medium 1 23 Low 01 234 (flashing) Needs to be recharged. Battery life If your Panasonic battery is fully charged; - the battery life will last up to 5 hours - Panasonic KXFPG372 | KXFPG372 User Guide - Page 22
ON TEL MODE OFF How to receive calls with the base unit 1 When the fax machine rings, press {DIGITAL SP-PHONE} on the base unit, or lift the handset and press {TALK} or {SPPHONE} on the handset. 2 If document reception is required, a fax calling tone (slow beep) is heard, or no sound is heard, press - Panasonic KXFPG372 | KXFPG372 User Guide - Page 23
heard, or no sound is heard, press {*}{#}{9} (preselected fax activation code) firmly. L A single beep will be heard. L The fax machine will start fax reception. Note: L To receive fax documents using the handset, you must set the remote fax activation to on (feature #41, page 90) beforehand. L You - Panasonic KXFPG372 | KXFPG372 User Guide - Page 24
image in house or office When you are IN the house or office {AUTO ANSWER} Room Room Single telephone line Extension Fax machine telephone Connections {+}{-} {FAX/START} {SET} {DIGITAL SP-PHONE} Telephone line cord Power cord {TALK} {SP-PHONE} To a single telephone line jack To a power - Panasonic KXFPG372 | KXFPG372 User Guide - Page 25
) is heard, or no sound is heard, press {FAX/START}. L The fax machine will start fax reception. How to receive calls with the handset 1 When the fax machine rings, lift the handset and press {TALK} or {SPPHONE}. 2 When document reception is required, a fax calling tone (slow beep) is heard, or no - Panasonic KXFPG372 | KXFPG372 User Guide - Page 26
hear interference noise during telephone conversation. A filter to prevent this is provided from your service company. Please attach the filter to the telephone line cord of the fax machine. Fax machine Computer Connections Filter Telephone line cord To a single telephone line jack When you are - Panasonic KXFPG372 | KXFPG372 User Guide - Page 27
) is heard, or no sound is heard, press {FAX/START}. L The fax machine will start fax reception. How to receive calls with the handset 1 When the fax machine rings, lift the handset and press {TALK} or {SPPHONE}. 2 When document reception is required, a fax calling tone (slow beep) is heard, or no - Panasonic KXFPG372 | KXFPG372 User Guide - Page 28
the Caller ID service. 3 Press {SET}. CALLER ID PRESS SET PRINTING SEND GUIDE PRESS SET 2. How to set the date, time, your logo and fax number. QUICK Help with problems operating the answering device. TAD OPERATION PRESS SET 6. Help with problems sending/receiving faxes. FAX SND/RCV PRESS - Panasonic KXFPG372 | KXFPG372 User Guide - Page 29
desired ringer pattern. 5. Press {>}. 6. Press {OFF}. Handset receiver volume 3 levels (high/middle/low) are available. }, press {e} or {v}. Note: L When you replace the battery, the selected volume setting will return to the default setting. For Fax Advantage assistance, call 1-800-435-7329. 29 - Panasonic KXFPG372 | KXFPG372 User Guide - Page 30
voice guidance volume 9 levels (high to off) are available. While listening to the fax voice guidance, press {+} or {-}. {+}{-} {SET} Answering device volume 9 levels (high to off) are available. While listening to the recorded messages, press {+} or {-}. Ringer volume 4 levels ( - Panasonic KXFPG372 | KXFPG372 User Guide - Page 31
and time, your logo and fax number You should program the date and time, your logo and fax number. This information will be to the incorrect number, and make the correction. If you have registered with openLCR service The date and time will be automatically set. Do not change the date and time - Panasonic KXFPG372 | KXFPG372 User Guide - Page 32
to the position to the right of where you want to insert the character. 2. Press {MUTE} to insert a space and enter the character. 32 For Fax Advantage assistance, call 1-800-435-7329. - Panasonic KXFPG372 | KXFPG372 User Guide - Page 33
step 1 is inserted. 3. Return to step 1 to enter the next character. Display order of characters Capital alphabet Number Symbol : Pressing {+} : Pressing {-} Lower-case alphabet For Fax Advantage assistance, call 1-800-435-7329. 33 - Panasonic KXFPG372 | KXFPG372 User Guide - Page 34
to 20 digits, using the dial keypad. Example: NO.=1234567 5 Press {SET}. L The next feature will be displayed. 6 Press {MENU}. Note: L You can enter your fax number by pressing {+} or {-} in step 4. In this case, press {>} to move the cursor. L The {*} button replaces the digit with a "+" and the - Panasonic KXFPG372 | KXFPG372 User Guide - Page 35
Lift the handset and press { place the handset on the base unit. Note or - place the handset on the base unit. a conversation using the handset, the call can be {TALK} or {SPPHONE} on the handset or {DIGITAL SPPHONE} on the base dialed with the handset are stored in 1. Lift the handset and press {SP-PHONE - Panasonic KXFPG372 | KXFPG372 User Guide - Page 36
unit, press {TALK} or {SP-PHONE}. - If on the base unit, just lift up. Speakerphone operation L Use the speaker in a quiet room. L Adjust the handset speakerphone volume using {e} or {v}. L Adjust the base unit speaker volume using {+} or {-}. 36 For Fax Advantage assistance, call 1-800-435-7329. - Panasonic KXFPG372 | KXFPG372 User Guide - Page 37
Caller ID service, and want to view the caller's information on the handset display handset on the base unit. With the base unit Microphone {DIGITAL SP-PHONE} 1 When the unit rings, press {DIGITAL SP- PHONE} and talk into the microphone. 2 When finished talking, press {DIGITAL SP- PHONE}. For Fax - Panasonic KXFPG372 | KXFPG372 User Guide - Page 38
00-01-12 12223 2 Base unit: Answer through the microphone. Base unit display: PAGING u INTERCOM 3 Handset: When finished talking, press {OFF} or lay the handset on the base unit. Base unit: When finished talking, press {LOCATOR/INTERCOM}. 38 For Fax Advantage assistance, call 1-800-435-7329. - Panasonic KXFPG372 | KXFPG372 User Guide - Page 39
(Example) 00-01-12 12223 3 Base unit: Speak into the microphone. Base unit display: INTERCOM 4 Base unit: When finished talking, press {LOCATOR/INTERCOM}. Handset: When finished talking, press {OFF} or place the handset on the base unit. For Fax Advantage assistance, call 1-800-435-7329. 39 - Panasonic KXFPG372 | KXFPG372 User Guide - Page 40
If there is no answer on the base unit, press {TALK} or {SP-PHONE} to return to the outside call. 2 Base unit: Talk with the handset user through the microphone. 3 Base unit: To answer the outside call, press {DIGITAL SP-PHONE}. {LOCATOR/INTERCOM} {INTERCOM} {DIGITAL SP-PHONE} {SP-PHONE} 1 Base - Panasonic KXFPG372 | KXFPG372 User Guide - Page 41
directory. You can store the names and telephone numbers using both the handset and base unit up to 50 entries in total. First program the Helpful hint: L For your convenience, HELP-FAX (1-800- 435-7329) has been pre-programmed. If you cannot solve a problem, call using this entry (page 47). If - Panasonic KXFPG372 | KXFPG372 User Guide - Page 42
is displayed. 2 Press {*}. DIRECTORY SET NAVI.=@ BROAD=# NAME= STORE:PRESS SET 3 Enter the name, up to 10 characters (see page 33 for instructions). Example: NAME=ALICE STORE:PRESS SET L Pressing the {#} key will change to capital or lower-case alternatively. 4 Press {SET}. NO.= 5 Enter the - Panasonic KXFPG372 | KXFPG372 User Guide - Page 43
are for common use and can be edited from both the handset and the base unit. Using the handset 7 Press {v}. Example: Jane 6789453 ^=Edit )=Save 8 edit the name, skip to step 5. 4 Edit the name (see page 41 for instructions). 5 Press {v}. Example: 1234567 () V=Next L If you do not need to - Panasonic KXFPG372 | KXFPG372 User Guide - Page 44
Navigator Directory 5 Edit the name (see page 33, 42 for instructions). 6 Press {SET}. Example: NO.=0123456 L If you do not need to edit the telephone number, skip to step 8. 7 Edit the telephone number. For further details, see page 42. 8 Press {SET}. REGISTERED 44 - Panasonic KXFPG372 | KXFPG372 User Guide - Page 45
Navigator Directory Erasing a stored entry Once erased, an entry cannot be accessed from either the handset or the base unit. Using the handset Using the base unit {ERASE} {STOP} {}{e}{v} {OFF} {CLEAR} 1 Press {}. Directory list V^ )=Caller's list 2 Press {e} or {v} until the - Panasonic KXFPG372 | KXFPG372 User Guide - Page 46
Navigator Directory Another method to erase a stored entry 1. Press {>}. L Confirm that there are no documents in the document entrance. 2. Press {+} or {-} until the desired entry is displayed. 3. Press {ERASE}. 4. Press {SET}. 46 - Panasonic KXFPG372 | KXFPG372 User Guide - Page 47
. Example: LISA 2233445 b LISA EDIT:PRESS MENU L If the desired name has not been stored, press {STOP} and dial the number manually. 3 Press {DIGITAL SP-PHONE} on the base unit, or lift the handset and press {TALK} or {SP-PHONE} on the handset. L The unit will start dialing automatically. 47 - Panasonic KXFPG372 | KXFPG372 User Guide - Page 48
Navigator Directory To search for a name by initial Example: "LISA" Using the handset 1. Press {>}. L Confirm that there are no documents in the document entrance. 2. Press {e} or {v} to enter the directory. 3. Press {5} repeatedly until any name with the initial "L" - Panasonic KXFPG372 | KXFPG372 User Guide - Page 49
service. Change the following ring setting to 2 or more rings beforehand. - TAD ring setting and FAX service: Base unit display: OUT OF AREA Handset manually, see page 111. - To print automatically after every 30 new calls, activate feature #26 (page 89). Visual Call Waiting (Call Waiting ID) Service - Panasonic KXFPG372 | KXFPG372 User Guide - Page 50
cases: - The telephone number includes data other than numbers (i.e. * or #). - The caller information does not include a telephone number. Using the handset {TALK} {>}{e}{v} {SP-PHONE} {OFF} To edit the telephone number for calling back Press {>} repeatedly after step 2. Each time you press - Panasonic KXFPG372 | KXFPG372 User Guide - Page 51
oldest caller information. 3 Press {DIGITAL SP-PHONE}, or lift the handset and press {TALK} or {SPPHONE} to call back the displayed party. L The unit will start dialing automatically. L To send a fax insert the document FACE DOWN and press {FAX/START}. Caller ID To change the display of the caller - Panasonic KXFPG372 | KXFPG372 User Guide - Page 52
points to "All clear". Exit )All clear V^ )=Yes L To cancel erasing, press {OFF}. 4 Press {>} or {CLEAR}. All clear 1 Lift the handset and press {e} or {v}. Example: 2 new calls V^ )=Directory 2 Press {e} or {v} repeatedly until the desired entry is displayed. Example: CINDY TURNER 1-234 - Panasonic KXFPG372 | KXFPG372 User Guide - Page 53
Erasing all caller information using the base unit {STOP} Caller ID Erasing specific caller information using the base unit {ERASE} {CALLER ID} {MENU} {SET} 1 Press {MENU} repeatedly until the following is displayed. 2 Press {SET}. 3 Press {SET}. CALLER SET UP PRESS SET CALL LIST ERASE PRESS - Panasonic KXFPG372 | KXFPG372 User Guide - Page 54
than numbers (i.e. * or #). - The caller information does not include a telephone number. Into the handset Into the base unit {CALLER ID} {>}{e}{v} {OFF} Make sure the handset is idle. 1 Lift the handset and press {e} or {v}. Example: 3 new calls V^ )=Directory 2 Press {e} or {v} until the - Panasonic KXFPG372 | KXFPG372 User Guide - Page 55
fax manually Document guides FACE DOWN {+}{-} {HELP} {STOP} {DIGITAL SP-PHONE} {REDIAL} {FAX/START} {SET} 1 Adjust the width of the document guides to small printing. This setting only works with other compatible fax machines. - "PHOTO": For originals containing photographs, shaded drawings - Panasonic KXFPG372 | KXFPG372 User Guide - Page 56
canceled and this feature will be turned off automatically. Transmit the entire document manually. L This feature cannot be used if {DIGITAL SPPHONE}, {TALK} or {SP-PHONE} is pressed. To stop transmission Press {STOP}. Sending a fax with the voice guide You can send documents by following the voice - Panasonic KXFPG372 | KXFPG372 User Guide - Page 57
documents: (Use copies for fax transmission.) - Chemically treated paper such as carbon or carbonless duplicating paper - Electrostatically charged paper - Badly curled, 216 mm), we recommend using a copy machine to copy the original document onto letter-sized paper, then transmitting the copied - Panasonic KXFPG372 | KXFPG372 User Guide - Page 58
(page 41). Document guides Fax auto redial If the line {STOP} {FAX/START} If your unit does not send a fax L Confirm party's machine (feature #76, page 92). 1 Adjust the width of the document guides to {-} to display the desired entry and press {FAX/START}. L If the desired name has not - Panasonic KXFPG372 | KXFPG372 User Guide - Page 59
Sending Faxes Broadcast transmission This feature is useful for sending the same document to more than one party (up to 20 entries). First program the entries, then - Panasonic KXFPG372 | KXFPG372 User Guide - Page 60
Sending Faxes Adding a new entry into the broadcast memory {STOP} Erasing a stored entry in the broadcast memory {STOP} {MENU} {SET} {>}{+}{-} 1 Press {>}. L Confirm that there are no documents - Panasonic KXFPG372 | KXFPG372 User Guide - Page 61
not answer, it will be skipped. All skipped entries will be redialed up to 2 times after all of the other entries have been called. Sending Faxes To send the same document to more than one party only once You can also select the parties for each transmission. 1. Insert the document. 2. Press - Panasonic KXFPG372 | KXFPG372 User Guide - Page 62
Receiving Faxes Receiving a fax manually ReceivingFaxes Activating TEL mode How to receive calls using the base unit 1 When the fax machine rings, press {DIGITAL SP-PHONE} or lift the handset and press {TALK} or {SP-PHONE} to answer the call. 2 When document reception is required, a fax calling - Panasonic KXFPG372 | KXFPG372 User Guide - Page 63
, or no sound is heard, press {*}{#}{9} (pre-selected fax activation code) firmly. 3. Replace the handset. L The fax machine will start reception. Note: L To receive fax documents using the extension telephone, you must set the remote fax activation to on (feature #41, page 90) beforehand. L You - Panasonic KXFPG372 | KXFPG372 User Guide - Page 64
OFF L The unit will play the pre-recorded greeting message. L The display will show the number of rings before the unit answers a call in TAD/FAX mode. L If you wish to change the ring setting, press {+} or {-} until the desired setting is displayed, and press {SET}. L You can adjust the speaker - Panasonic KXFPG372 | KXFPG372 User Guide - Page 65
machine will record a voice message automatically. L If a fax calling tone is detected, the fax machine will receive a fax automatically. Ring setting in TAD/FAX mode 4th ring, there are no new recorded messages. To save the toll charges for the call, hang up immediately when you hear the 3rd ring - Panasonic KXFPG372 | KXFPG372 User Guide - Page 66
is one which is assigned for a fax, the fax machine will automatically start fax reception. This service is convenient if you wish to have a different number for fax in a single telephone line. To use this service, you must subscribe to the Distinctive Ring service offered by your local telephone - Panasonic KXFPG372 | KXFPG372 User Guide - Page 67
ring Personal 012 5678 Double ring Business 012 9876 Triple ring Fax To use one phone number for the fax, program the ring pattern assigned for the fax in feature #32. In the example, the ring pattern assigned for fax is triple ring, so you should program "C" (triple ring). Ring pattern - Panasonic KXFPG372 | KXFPG372 User Guide - Page 68
FACE DOWN {COPY} {>}{+}{-} {STOP} {START} 1 Adjust the width of the document guides to the size of the document. L Confirm that there is enough recording paper in the recording paper entrance. 2 Insert the document (up to 10 pages) - Panasonic KXFPG372 | KXFPG372 User Guide - Page 69
Convenient way of copying To enlarge a document 1. Press {>} after step 4 on page 68. ZOOM 100% [+ -] ) 2. Press {+} to select "150%" or "200%", then press {START}. L The unit will only enlarge the centermost part of the document, printing it on two pages. Example: 150% enlarged copy - Panasonic KXFPG372 | KXFPG372 User Guide - Page 70
Copying To collate multiple copies The unit can collate multiple copies in the same order as the original document pages. 1. After step 4 on page 68, press {>} 2 times. COLLATE OFF[+ -] ) 2. Press {+} or {-} repeatedly until the following is displayed. COLLATE ON [+ -] ) 3. - Panasonic KXFPG372 | KXFPG372 User Guide - Page 71
receiving a call, the pre-recorded greeting message will be played. {RECORD} {+}{-} {STOP} {SET} Microphone {AUTO ANSWER} 1 Set feature #77 to "TAD/FAX" (page 92) beforehand. 2 Press {RECORD} until the following is displayed. TAD GREETING PRESS SET 3 Press {SET}. L A long beep will sound. 4 Speak - Panasonic KXFPG372 | KXFPG372 User Guide - Page 72
Greeting Erasing your own recorded greeting message {ERASE} {SET} {STOP} 1 Set feature #77 to "TAD/FAX" (page 92) beforehand. 2 Press {ERASE} until the following is displayed. 3 Press {SET}. TAD GREETING PRESS SET ERASE GREETING? YES:SET/NO:STOP L To cancel erasing, - Panasonic KXFPG372 | KXFPG372 User Guide - Page 73
Memo Message Leaving MemoMessage a message for others or yourself To leave a private message for yourself or someone else, you can record a voice memo. This memo can be played back later, either directly or remotely. {RECORD} {SET} Microphone {STOP} 1 Press {RECORD}. MEMO MESSAGE PRESS SET 2 Press { - Panasonic KXFPG372 | KXFPG372 User Guide - Page 74
Incoming Messages Listening IncomingMessages to recorded messages using the base unit When the unit has recorded new voice messages: - The PLAY MESSAGES indicator will flash. - The display will show the total number of recorded messages. Example: 02 - Slow beeps will sound if the message alert - Panasonic KXFPG372 | KXFPG372 User Guide - Page 75
Erasing recorded messages To erase a specific message Press {ERASE} while listening to the message you want to erase. To erase all the messages Check that you have listened to all of the recorded messages. 1. Press {ERASE}. ALL MESSAGES PRESS SET 2. Press {SET}. ERASE MESSAGES? YES:SET/NO:STOP 3. - Panasonic KXFPG372 | KXFPG372 User Guide - Page 76
handset When there are no new messages Voice guide: "No new messages." Wait for 4 seconds or press {5} to listen to all the messages. {OFF} {PLAYBACK} 1 Press {PLAYBACK}. Remote operation 12223 The voice guide want to erase. Voice guide: "The message has messages. Voice guide: "All messages have been - Panasonic KXFPG372 | KXFPG372 User Guide - Page 77
remote operation ID beforehand (feature #11, page 88). L Set the unit to TAD/FAX mode before going out (page 64). L Use a touch tone telephone for remote ID during the TAD/FAX greeting message. 3 Start remote operations. When there are new recorded messages The voice guide will tell you the - Panasonic KXFPG372 | KXFPG372 User Guide - Page 78
not programmed, you cannot turn this feature on. Voice guide example: "Pager number is not set." Changing the receive mode Press {8}{0} to change the receive mode from TAD/FAX to TEL. L You cannot return to TAD/FAX mode in the same call. To return to TAD/FAX mode, see the following. Setting to TAD - Panasonic KXFPG372 | KXFPG372 User Guide - Page 79
mode (page 64). How incoming messages are recorded in a mailbox 1 Call your unit from a remote touch tone telephone. L The TAD/FAX greeting message will be played. 2 Press {*} and the desired mailbox number ({1} or {2}). L A mailbox greeting message will be played. 3 After the beep, leave a message - Panasonic KXFPG372 | KXFPG372 User Guide - Page 80
Voice Mailbox Recording your own mailbox greeting messages The recording time is limited to 16 seconds for each mailbox. Suggested message:"This is (personal name). Please leave your name and message after the beep." {STOP} To check the mailbox greeting message 1. For mailbox 1, press {MENU}, - Panasonic KXFPG372 | KXFPG372 User Guide - Page 81
Voice Mailbox Listening to recorded messages using the base unit {ERASE} Note: L The following features can be used during playback. See page 74, 75 for details. - To repeat a message - To skip a message - To stop playback - To change the playback speed - To erase a specific message {RECORD - Panasonic KXFPG372 | KXFPG372 User Guide - Page 82
Voice Mailbox Listening to recorded messages using the handset {PLAYBACK} {OFF} Note: L The following features can be password (default setting "555"). The voice guide will tell you the number of new messages and they will be played automatically. Voice guide example: "3 new messages." To repeat - Panasonic KXFPG372 | KXFPG372 User Guide - Page 83
messages from a remote location 1 Call your unit from a remote touch tone telephone. 2 Press {*} and the desired mailbox number ({1} or {2}) during TAD/FAX greeting playback. L If you have recorded your own mailbox greeting message, it will be played. 3 Enter the mailbox password (default setting - Panasonic KXFPG372 | KXFPG372 User Guide - Page 84
the remote operation. Important: L To use this feature, program the transfer telephone number first (feature #60, page 91) and set the unit to TAD/FAX mode. How this feature works 1 An incoming voice message is recorded in your unit. 2 Your unit calls the transfer telephone number. 3 Answer the - Panasonic KXFPG372 | KXFPG372 User Guide - Page 85
stored number. 10. Check that your pager received the pager test call. 11. Press {DIGITAL SP-PHONE}. Note: L If you have subscribed to a Caller ID service, instead of the message you entered in step 8, your pager will display the caller's telephone number. 85 - Panasonic KXFPG372 | KXFPG372 User Guide - Page 86
Features Summary Programming Programmable Features The unit provides various programming features. Programming method for basic features {MENU} {SET 1 Press {MENU}. SYSTEM SET UP PRESS NAVI.[( )] 2 Select the feature you wish to program. Press {} until the desired feature is displayed. L - Panasonic KXFPG372 | KXFPG372 User Guide - Page 87
Programming method for advanced features {MENU} {SET 1 Press {MENU}. SYSTEM SET UP PRESS NAVI.[( )] 2 Press {} until the following is displayed: 3 Press {SET}. ADVANCED MODE PRESS SET 4 Select the feature you wish to program. Press {} until the desired feature is displayed. L - Panasonic KXFPG372 | KXFPG372 User Guide - Page 88
LOGO PRESS SET See page 32 for details. Code #03: Setting your fax number YOUR FAX NO. PRESS SET See page 34 for details. Code #04: Printing the setting depending on your telephone line service. TONE (default): For tone dial service. PULSE: For rotary pulse dial service. Code #16: Setting the - Panasonic KXFPG372 | KXFPG372 User Guide - Page 89
speed is slowed down. L This feature is not available for broadcast transmission. L The calling charge may be higher. NEXT FAX: This setting is effective only for the next attempted fax transmission. After transmission, the unit will return to the previous setting. ERROR (default): When the - Panasonic KXFPG372 | KXFPG372 User Guide - Page 90
alert RECEIVE ALERT MODE=ON [±] To alert you with a beeping sound when a received fax document is stored into memory due to some existing problem. If you are alerted by a slow beeping sound, clear the printing problem and make sure the unit is supplied with enough paper to print the stored - Panasonic KXFPG372 | KXFPG372 User Guide - Page 91
this feature. ERROR: To hear the voice guidance only when fax transmission/reception fails. Code #51: Setting the mailbox 1 {SET}. 5. Press {MENU}. Code #54: Changing the recording time for your own TAD/FAX greeting message GREETING TIME MODE=16s [±] 16s (default): Up to 16 seconds. 60s: Up - Panasonic KXFPG372 | KXFPG372 User Guide - Page 92
the connecting tone CONNECTING TONE MODE=ON [±] If you often have trouble when sending a fax, this feature allows you to hear connecting tones; fax tone, ring back tone and busy tone. You can confirm the status of the other party's machine. L If the ring back tone continues, the other party - Panasonic KXFPG372 | KXFPG372 User Guide - Page 93
or reception error occurred because of a problem with the other party's fax machine. Check with the other party. fax machine rings too many times. Send the fax manually (page 55). L The other party's machine is not a fax machine. Check with the other party. L The number you dialed is not in service - Panasonic KXFPG372 | KXFPG372 User Guide - Page 94
problem, one or more of the following messages will appear on the display. Base unit CALL SERVICE CALL SERVICE2 L There is something wrong with the unit. Contact our service FAX IN MEMORY L The unit has a document in memory. See the other displayed message instructions to print out the document. FAX - Panasonic KXFPG372 | KXFPG372 User Guide - Page 95
something wrong with the modem circuit. Contact our service personnel. J NO FAX REPLY L The other party's fax machine is busy or has run out of recording and try again. L The handset has lost communication with the base unit. Move closer and try again. L Place the handset on the base unit and try - Panasonic KXFPG372 | KXFPG372 User Guide - Page 96
Tell the other party the number is only used for faxes. L Change to TEL mode or TAD/FAX mode by pressing {AUTO ANSWER}. L If you use a Distinctive Ring service, turn AUTO ANSWER off so that the fax machine is in TEL mode. L If you use a Distinctive Ring service, make sure you have set the same ring - Panasonic KXFPG372 | KXFPG372 User Guide - Page 97
following is still displayed: Recharge 01 234 L Clean the charge contacts and charge again (page 21). L It is time to replace the battery (page 107). I cannot receive documents by pressing *#9 on the handset. L You must set the remote fax activation to on (feature #41, page 90) beforehand. L Press - Panasonic KXFPG372 | KXFPG372 User Guide - Page 98
party's machine is not a fax machine. Check with the other party. L The other party's fax machine rings too many times. Send the fax manually (page 55). The other party complains that letters on their received document are distorted or not clear. L If your line has special telephone services such - Panasonic KXFPG372 | KXFPG372 User Guide - Page 99
printing. I cannot receive documents by pressing *#9 on the handset. L You must set the remote fax activation to on (feature #41, page 90) beforehand use genuine Panasonic replacement film. Refer to page 10 for further details. Original ABC Copy L Some paper has instructions recommending which - Panasonic KXFPG372 | KXFPG372 User Guide - Page 100
messages (page 75, 76, 81). While operating the answering device from the handset, the remote operation stops and the unit starts to ring. L Someone is calling . Alternative arrangements should be made for access to emergency services. L Fax transmission and reception will be interrupted. L If the - Panasonic KXFPG372 | KXFPG372 User Guide - Page 101
Replacement Ink film Replacement Replacement film Model No. KX-FA53 (1 roll), KX-FA55 (2 rolls) or KX-FA55D (4 rolls): Each roll prints about 150 letter-sized pages. ink film roll Right slot 2 3 Left slot 1 Front ink film roll For Fax Advantage assistance, call 1-800-435-7329. Blue core 101 - Panasonic KXFPG372 | KXFPG372 User Guide - Page 102
on your hands like carbon paper. Blue core Incorrect 1 turn Tight The ink film is not wrapped around the blue core. Slack 102 Reverse For Fax Advantage assistance, call 1-800-435-7329. - Panasonic KXFPG372 | KXFPG372 User Guide - Page 103
the back cover by pushing the back cover open lever (green) in the unit. Back cover open lever (green) Back cover open button (green) For Fax Advantage assistance, call 1-800-435-7329. 103 - Panasonic KXFPG372 | KXFPG372 User Guide - Page 104
while inserting the paper. Blue core Incorrect 1 turn Tight Tension plate The ink film is not wrapped around the blue core. Slack 104 Reverse For Fax Advantage assistance, call 1-800-435-7329. - Panasonic KXFPG372 | KXFPG372 User Guide - Page 105
paper and straighten. Pull the tension plate forward and hold open while inserting paper. Press {SET} to clear the message. {SET} Tension plate Jams For Fax Advantage assistance, call 1-800-435-7329. 105 - Panasonic KXFPG372 | KXFPG372 User Guide - Page 106
Jammed document 2 Close the front cover securely. Front cover Note: L Do not pull out the jammed paper forcibly before opening the front cover. 106 For Fax Advantage assistance, call 1-800-435-7329. - Panasonic KXFPG372 | KXFPG372 User Guide - Page 107
Battery Replacing Battery the handset battery Replace the battery with a new Panasonic rechargeable battery Model No. P-P511. See page 10 for accessory information. 1 Press the notch on the handset cover firmly and slide it as indicated by the arrow. 3 Close the cover. Make sure you charge the - Panasonic KXFPG372 | KXFPG372 User Guide - Page 108
or tissues. Document Rubber flap feeder rollers Front cover 6 Connect the power cord and the telephone line cord. Power cord Telephone line cord 108 For Fax Advantage assistance, call 1-800-435-7329. - Panasonic KXFPG372 | KXFPG372 User Guide - Page 109
not use a dry cloth and do not touch the thermal head directly. Thermal head Back cover open lever (green) Back cover open button (green) For Fax Advantage assistance, call 1-800-435-7329. 109 - Panasonic KXFPG372 | KXFPG372 User Guide - Page 110
. Correct Power cord Telephone line cord Blue core Incorrect 1 turn Tight The ink film is not wrapped around the blue core. Slack 110 Reverse For Fax Advantage assistance, call 1-800-435-7329. - Panasonic KXFPG372 | KXFPG372 User Guide - Page 111
: keeps records of fax transmission and reception. This report will be printed automatically after every 30 fax communications (feature #22 keeps records of the last 30 callers after subscribing to a Caller ID service. This report will be printed automatically after every 30 callers (feature #26 - Panasonic KXFPG372 | KXFPG372 User Guide - Page 112
you subscribe to openLCR service, the unit will start the first download of the rate table to your fax machine and the Caller IQ feature Before subscribing to openLCR service, you cannot change the following settings. To turn the Caller IQ feature from ON to OFF using the handset 4 Press {#}. - Panasonic KXFPG372 | KXFPG372 User Guide - Page 113
from ON to OFF using the base unit OFF Caller IQ Feature To turn the Caller IQ feature from OFF to ON using the handset {CALLER IQ} {OFF} {} {SET} {CALLER IQ} 1 Press {CALLER IQ}. CALLER IQ PRESS NAVI.[( )] 2 Press {} until the following is displayed or press {0}. 3 Press {3}. TO - Panasonic KXFPG372 | KXFPG372 User Guide - Page 114
the rate table) If you register through openLCR web site or move to another area, you have to download the rate table manually. Using the handset {} {SET} {CALLER IQ} 1 Press {CALLER IQ}. CALLER IQ PRESS NAVI.[( )] 2 Press {} until the following is displayed or press {0}. 3 Press - Panasonic KXFPG372 | KXFPG372 User Guide - Page 115
L If the display shows the following, the unit was unable to download from openLCR. Download incomplete. Try again. Try downloading manually again. L If the display shows the following, the unit was unable to download an entry in the directory, because the directory memory is full. Download - Panasonic KXFPG372 | KXFPG372 User Guide - Page 116
. Try downloading manually again. Automatic download The fax machine will automatically download the latest rate table when: - the rate table in the fax machine reaches expiry date; usually between 60-90 days after last update, - the fax machine is being polled by openLCR service center. To stop - Panasonic KXFPG372 | KXFPG372 User Guide - Page 117
L After downloading starts, the handset must be off-hook. DO NOT PLACE the handset on the base unit (placing the handset on the base unit will telephone or fax machine on the same phone line is in use. L While the unit is downloading the data from openLCR, the Call Waiting Service cannot be - Panasonic KXFPG372 | KXFPG372 User Guide - Page 118
F PartlyCldy 4 Find more information by pressing {v} or {e}. Example: H 90 L 70 F UV 2 Dew 64 F Humidity 42% 5 When finished, press {OFF} or place the handset on the base unit. [Caller IQ on] 12223 {CALLER IQ} {} {SET} 1 Press {CALLER IQ}. CALLER IQ PRESS NAVI.[( )] 2 Press {} until the - Panasonic KXFPG372 | KXFPG372 User Guide - Page 119
Power supply: 120 V AC, 60 Hz Fax memory capacity: Approx. 25 pages of memory time including greeting messages Handset Operating environment: Dimensions Approx. 228 g (0.5 lb.) Nickel cadmium battery (3.6 V, 850 mAh) 2,402 MHz-2,480 of the other party's machine. *2 Transmission speed is based - Panasonic KXFPG372 | KXFPG372 User Guide - Page 120
you are ready to use the paper. Store unused paper in the original packaging, in a cool and dry location. Note: L Any details given in these instructions are subject to change without notice. L The pictures and illustrations in these - Panasonic KXFPG372 | KXFPG372 User Guide - Page 121
. If trouble is experienced with this equipment, for repair or warranty information, please contact a Factory Servicenter or other Authorized Servicer. If the equipment is causing harm to the telephone network, the telephone company may request that you disconnect the equipment until the problem is - Panasonic KXFPG372 | KXFPG372 User Guide - Page 122
and, if not installed and used in accordance with the instructions, may cause harmful interference to radio communications. However, there 20 cm or more from persons and handset should be carried with the specific belt-clip provided for the handset to ensure compliance. Other nontested belt-clips - Panasonic KXFPG372 | KXFPG372 User Guide - Page 123
original purchase date is required for warranty service. Carry-In or Mail-In Service For Carry-In or Mail-In Service in the United States call 1-800-HELP-FAX (1-800-435-7329) For assistance in Puerto Rico call Panasonic Sales Company (787)-750-4300 or fax (787)-768-2910. Limited Warranty Limits And - Panasonic KXFPG372 | KXFPG372 User Guide - Page 124
expired, please contact our Continued Services Technical Support Line at 1-900-555-PANA (1-900-555-7262) for support on a fee basis. When you ship the product • Carefully pack your unit, preferably in the original carton. • Attach a letter, detailing the symptom or problem, to the outside of the - Panasonic KXFPG372 | KXFPG372 User Guide - Page 125
contact:1-800-HELP-FAX (1-800-435-7329), Monday-Friday 9am-8pm EST. To obtain support or service after the warranty has expired, please contact: 1-900-555-PANA (1-900-555-7262) for support on a fee basis. For hearing or speech impaired TTY users, TTY: 1-866-741-6422 Web Site: www.panasonic.com (for - Panasonic KXFPG372 | KXFPG372 User Guide - Page 126
68, 89 #36 Receiving reduction 90 #39 Display contrast 90 #41 Fax activation code 25, 90 #42 Message alert 90 #43 Recording time alert 90 # 44 Memory reception alert 90 #46 Friendly reception 90 #47 Fax voice guidance 91 #51 Mailbox 1 password 91 #52 Mailbox 2 password 91 # - Panasonic KXFPG372 | KXFPG372 User Guide - Page 127
tray 16 Metal recording paper guide 17 Paper tray 16 Auto talk feature 37 Advanced features 89 Alert Memory reception (Feature #44)...........90 Message (Feature #42 90 Recording time (Feature #43 90 Auto answer setting (Feature #77 92 B Basic features 88 Battery Charging 3, 21 Life 21 - Panasonic KXFPG372 | KXFPG372 User Guide - Page 128
alert (Feature #43) ..........90 Recording time for TAD/FAX greeting message (Feature #54 91 Remote operation card 129 handset 29 Ring pattern for Distinctive Ring (Feature #32 89 Ring setting FAX ONLY (Feature #06 88 TAD/FAX (Feature #06 88 S Sending Broadcast 61 From memory 56 Manually - Panasonic KXFPG372 | KXFPG372 User Guide - Page 129
transfer Key Remote command {8}{2} Turns off message transfer {0} Skips the greeting message {8}{3} Turns on pager call {1} Repeats a message {8}{4} Turns off pager call {2} Skips a message {*}{9} Activates fax function 129 - Panasonic KXFPG372 | KXFPG372 User Guide - Page 130
130 - Panasonic KXFPG372 | KXFPG372 User Guide - Page 131
131 - Panasonic KXFPG372 | KXFPG372 User Guide - Page 132
KX-FPG372 Proof of Purchase Panasonic FAX ADVANTAGE PROGRAM Free peace of mind, direct from Panasonic NO EXTRA COST FAX ADVANTAGE PROGRAM I 6-month limited warranty 1: parts, labor, and toll-free help line 2 I Free replacement 3 and repair program The Panasonic Fax Advantage Consumer Service
-
 1
1 -
 2
2 -
 3
3 -
 4
4 -
 5
5 -
 6
6 -
 7
7 -
8
-
9
-
10
-
11
-
12
-
13
-
14
-
15
-
16
-
17
-
18
-
19
-
20
-
21
-
22
-
23
-
24
-
25
-
26
-
27
-
28
-
29
-
30
-
31
-
32
-
33
-
34
-
35
-
36
-
37
-
38
-
39
-
40
-
41
-
42
-
43
-
44
-
45
-
46
-
47
-
48
-
49
-
50
-
51
-
52
-
53
-
54
-
55
-
56
-
57
-
58
-
59
-
60
-
61
-
62
-
63
-
64
-
65
-
66
-
67
-
68
-
69
-
70
-
71
-
72
-
73
-
74
-
75
-
76
-
77
-
78
-
79
-
80
-
81
-
82
-
83
-
84
-
85
-
86
-
87
-
88
-
89
-
90
-
91
-
92
-
93
-
94
-
95
-
96
-
97
-
98
-
99
-
100
-
101
-
102
-
103
-
104
-
105
-
106
-
107
-
108
-
109
-
110
-
111
-
112
-
113
-
114
-
115
-
116
-
117
-
118
-
119
-
120
-
121
-
122
-
123
-
124
-
125
-
126
-
127
-
128
-
129
-
130
-
131
-
132
 |
 |
Operating Instructions
Compact Plain Paper Fax
with 2.4 GHz Cordless
and Answering System
Model No.
KX-FPG372
General Information
FOR FAX ADVANTAGE ASSISTANCE:
– (VOICE) CALL
1-800-HELP-FAX (1-800-435-7329)
–
E-MAIL TO
for customers in the U.S.A. or Puerto
Rico
–
REFER TO
www.panasonic.com
for customers in the U.S.A. or Puerto
Rico
Please read these Operating
Instructions before using the unit
and save for future reference.
This model is designed to be
used only in the U.S.A.