Panasonic KXFPG372 KXFPG372 User Guide - Page 51
Using the base unit, To change the display of the caller, information, Display while viewing
 |
View all Panasonic KXFPG372 manuals
Add to My Manuals
Save this manual to your list of manuals |
Page 51 highlights
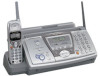
Using the base unit FACE DOWN {+}{-} {STOP} {DIGITAL SP-PHONE} {CALLER ID} {FAX/START} {TALK} {SP-PHONE} 1 Press {CALLER ID}. Example: 2 NEW CALLS PRESS NAVI.[+ -] 2 Press {+} to search from the most recent caller information. Press {-} to search from the oldest caller information. 3 Press {DIGITAL SP-PHONE}, or lift the handset and press {TALK} or {SPPHONE} to call back the displayed party. L The unit will start dialing automatically. L To send a fax insert the document FACE DOWN and press {FAX/START}. Caller ID To change the display of the caller information Press {CALLER ID} repeatedly after step 2. Example: SAM LEE 11:20AM Jul 20 , b 1345678901 11:20AM Jul 20 , L Check mark (,) on the display means the call has already been viewed or answered. Display while viewing When the unit could not receive a name: NO NAME RCVD When no calls have been received: NO CALLER DATA To edit the telephone number for calling back Press {*} repeatedly after step 2. Each time you press {*}, the telephone number will be changed as follows: 1. 1 - Area code - Local telephone number ("1" added) 2. Local telephone number (area code omitted) 3. Area code - Local telephone number 4. 1 - Local telephone number ("1" added and area code omitted) To stop viewing Press {STOP} after step 2. 51
-
 1
1 -
2
-
3
-
4
-
5
-
6
-
7
-
8
-
9
-
10
-
11
-
12
-
13
-
14
-
15
-
16
-
17
-
18
-
19
-
20
-
21
-
22
-
23
-
24
-
25
-
26
-
27
-
28
-
29
-
30
-
31
-
32
-
33
-
34
-
35
-
36
-
37
-
38
-
39
-
40
-
41
-
42
-
43
-
44
-
45
-
 46
46 -
 47
47 -
 48
48 -
 49
49 -
 50
50 -
 51
51 -
 52
52 -
 53
53 -
 54
54 -
 55
55 -
 56
56 -
57
-
58
-
59
-
60
-
61
-
62
-
63
-
64
-
65
-
66
-
67
-
68
-
69
-
70
-
71
-
72
-
73
-
74
-
75
-
76
-
77
-
78
-
79
-
80
-
81
-
82
-
83
-
84
-
85
-
86
-
87
-
88
-
89
-
90
-
91
-
92
-
93
-
94
-
95
-
96
-
97
-
98
-
99
-
100
-
101
-
102
-
103
-
104
-
105
-
106
-
107
-
108
-
109
-
110
-
111
-
112
-
113
-
114
-
115
-
116
-
117
-
118
-
119
-
120
-
121
-
122
-
123
-
124
-
125
-
126
-
127
-
128
-
129
-
130
-
131
-
132
 |
 |
