Panasonic PVDV401D PVDV201 User Guide
Panasonic PVDV401D - DIGITAL VIDEO CAMCOR Manual
 |
View all Panasonic PVDV401D manuals
Add to My Manuals
Save this manual to your list of manuals |
Panasonic PVDV401D manual content summary:
- Panasonic PVDV401D | PVDV201 User Guide - Page 1
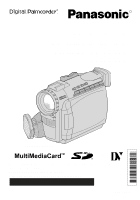
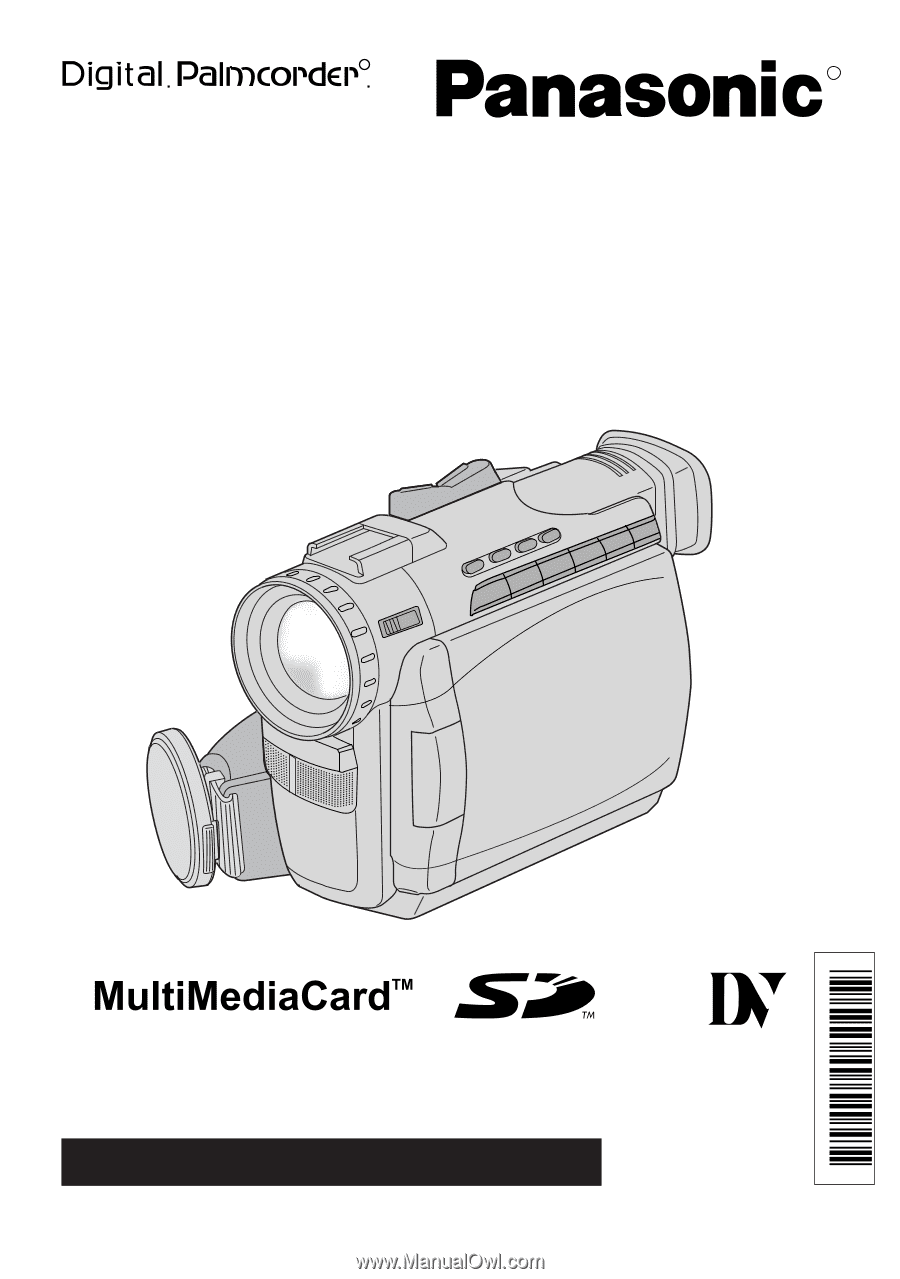
R R Digital Video Camcorder Operating Instructions Models No. PV-DV201/ PV-DV401 [ PV-DV401 shown ] Mini *0364A* Before attempting to connect, operate or adjust this product, please read these instructions thoroughly. Spanish Quick Use Guide is included. Guía para rápida consulta en español está - Panasonic PVDV401D | PVDV201 User Guide - Page 2
Panasonic Palmcorder. Be sure to retain this manual as your convenient Palmcorder USER-SERVICEABLE PARTS INSIDE REFER SERVICING TO QUALIFIED SERVICE PERSONNEL in order to avoid any problems. The above markings are cable when connecting digital video camera to computer in accordance with instruction - Panasonic PVDV401D | PVDV201 User Guide - Page 3
instructions supporting structure, grounding of the lead-in wire to an antenna discharge unit, size of grounding conductors, location of antenna discharge unit, connection to grounding electrodes, and requirements for the grounding electrode. ANTENNA LEAD IN WIRE GROUND CLAMP ELECTRIC SERVICE - Panasonic PVDV401D | PVDV201 User Guide - Page 4
following the operating instructions. Adjust only those controls that are covered by the operating instructions, as an serviceable parts inside. Unplug your Palmcorder from the power supply before cleaning. DO NOT AIM YOUR PALMCORDER AT THE SUN OR OTHER BRIGHT OBJECTS DO NOT LEAVE THE PALMCORDER - Panasonic PVDV401D | PVDV201 User Guide - Page 5
MAGICVU/0LUX (PV-DV401 only 42 Palmcorder Accessory System 64 Palmcorder Accessory Order Form 66 Notes On Operations ...67 Specifications ...68 Before Requesting Service 69 Request for Service Notice 71 Index of Controls ...72 Limited Warranty ...76 Servicenter List ...77 Spanish Quick Use Guide - Panasonic PVDV401D | PVDV201 User Guide - Page 6
) with AC Cable and DC Cable 1 pc. Battery Pack (PV-DBP8A) 1 pc. 8 MB MultiMediaCard (LSFT0198A) 1 pc. A/V Cable (LSJA0280) 1 pc. Lens Cap (LSYF0478) 1 pc. USB Cable (LSJA0354) 1 pc. Shoulder Strap (LSFC0013) 1 pc. CD-ROM of Driver Software for Windows 98/Me / Palmcorder USB Device Driver for - Panasonic PVDV401D | PVDV201 User Guide - Page 7
by holding the Enhancement Light. • If light bulb needs to be replaced, take Light to your nearest authorized servicenter. Before you begin • Connect the Palmcorder to a power source. (See pages 11, 12.) • Set POWER to CAMERA or M-CARD. 1 Slide Light into the Built-in Light Mount. Be sure it - Panasonic PVDV401D | PVDV201 User Guide - Page 8
Lens Cap Cord. Reattach the Hand Strap. LIGHT RELEASE Button Light Holder 8 For assistance, please call : 1-800-211-PANA(7262) or send e -mail to : [email protected] - Panasonic PVDV401D | PVDV201 User Guide - Page 9
GGeettttiinngg SSttaarrtteedd QQuuiicck Guide Insert the Battery Pack 2 1 43 Before you begin • Charge the Battery. (See page 11.) 1 Slide the Viewfinder backward to its fully expanded position and then tilt it upward. (For model PV-DV201, tilt Viewfinder upward.) Insert Cassette 2 Insert the - Panasonic PVDV401D | PVDV201 User Guide - Page 10
Guide Insert Memory Card* Before you begin • Charge the Battery. (See page 11.) *Memory Card: MultiMediaCard or SD Memory Card (See page 64.) • Be sure to insert the Memory Card before using the Card PhotoShot. (See page 32.) Below is a list of memory cards which can be used in this Palmcorder - Panasonic PVDV401D | PVDV201 User Guide - Page 11
the Power Cord as shown. • POWER Lamp will light. • Remove the DC Cable, if attached, from the adaptor. 2Attach the Battery as shown to charge. • CHARGE to its fully extended position and then tilt it upward. (For model PV-DV201, tilt 2 Viewfinder upward.) Insert the Battery Pack and slide it down - Panasonic PVDV401D | PVDV201 User Guide - Page 12
Palmcorder or on the AC Adaptor, the Battery will no longer be rechargeable. • Keep the Battery terminals clean. 1 Slide the Battery upward while sliding the BATTERY RELEASE Switch to remove the Battery Pack. (See page 11.) 2 Insert the DC Cable ) or send e -mail to : [email protected] - Panasonic PVDV401D | PVDV201 User Guide - Page 13
date and time is calculated, including leap year, up to DEC 31 2089. 2, 3, 4JOG KEY 1MENU Button Setting the Clock Before you begin • Connect the Palmcorder to a power source. (See pages 11, 12). • Set POWER to CAMERA or VCR. 1 Press MENU to display the Camera or VCR mode menu screen. (See - Panasonic PVDV401D | PVDV201 User Guide - Page 14
to select a menu • During playback, the Menu screen can be item. displayed. Before you begin • Connect the Palmcorder to a power Setting the MENU Items (EX. VCR Mode menu) source. (See pages 11, 12.) • Set POWER call : 1-800-211-PANA(7262) or send e -mail to : [email protected] - Panasonic PVDV401D | PVDV201 User Guide - Page 15
Camera Mode Menu Screen 1 2 3 4 5 6 7 8 9 10 MMEENNUU OOSSDD 1 DIGITAL FUNCTION (See page 44.) To select one of the 10 digital functions. Setting to OFF cancels the previously selected digital function. 2 PROG. AE (See page 43.) To select one of the 5 Program AE modes. Setting to OFF cancels the - Panasonic PVDV401D | PVDV201 User Guide - Page 16
conditions occur. To cancel the beep, set to OFF. Palmcorder will beep: Once when you start recording Twice when you stop Repeatedly when warning of unusual conditions. (See page 21.) 13 MAGICVU (PV-DV401 only) (See page 42.) To select one of the 3 MAGICVU to : [email protected] - Panasonic PVDV401D | PVDV201 User Guide - Page 17
GGeettttiinngg SSttaarrtteedd VCR Mode Menu Screen 1 2 3 4 5 6 7 MENU OSD 1 DIGITAL FUNCTION (See page 44.) To select one of the 6 digital functions. Setting to OFF cancels the previously selected digital function. 2 D. EFFECT (See page 44.) To select one of the 2 digital picture effects for - Panasonic PVDV401D | PVDV201 User Guide - Page 18
34.) Select to OFF to cancel DCF No. on the screen. 18 For assistance, please call : 1-800-211-PANA(7262) or send e -mail to : [email protected] - Panasonic PVDV401D | PVDV201 User Guide - Page 19
is selected in VCR menu. e Tape Speed Indication (See page 15.) Indicates the tape speed (SP or LP). Time Code Memory Counter M 0:00:00 The Palmcorder will stop whenever it reaches the point where the counter was previously set to M 0:00:00 during audio dub, fast forward, or rewind. Time Code - Panasonic PVDV401D | PVDV201 User Guide - Page 20
each time DATE/TIME is selected from the Palmcorder's MENU (see pages 16, 18) or n Zoom Magnification Level (See page 40.) o Manual Focus Indication (See page 47.) p White Balance Shutter Mode indication (See page 48.) k MAGICVU (PV-DV401 only) (See page 16.) This display appears when - Panasonic PVDV401D | PVDV201 User Guide - Page 21
will appear. When a still image is transferred from a tape to an already full Memory Card, "NO SPACE LEFT" appears. If the Palmcorder is in M-CARD mode or Photo Title (CAMERA mode) and the DV Interface Cable (i.LINK) is connected, "DISCONNECT DV CABLE" appears. In this case, remove the DV Interface - Panasonic PVDV401D | PVDV201 User Guide - Page 22
reduce microphone wind noise, set the WIND-CUT to ON. (See WIND- CUT on page 15.) • When the Palmcorder is aimed at excessively bright objects, or bright lights, a vertical bar may appear in the picture. This is a call : 1-800-211-PANA(7262) or send e -mail to : [email protected] - Panasonic PVDV401D | PVDV201 User Guide - Page 23
Camera Recording Using the LCD Monitor The LCD (Liquid Crystal Display) monitor can be used while recording. Before you begin • Connect the Palmcorder to a power source. (See pages 11, 12.) • Insert a cassette with record tab closed. (See page 6.) 1LCD-OPEN Button 180° 90° 90° To - Panasonic PVDV401D | PVDV201 User Guide - Page 24
PAUSE mode. briefly in the The [CHK] indication appears. After checking, the Palmcorder returns to the REC/PAUSE mode. • For Recording Check, the Palmcorder must be in the same mode (SP or LP) as was used for , please call : 1-800-211-PANA(7262) or send e -mail to : [email protected] - Panasonic PVDV401D | PVDV201 User Guide - Page 25
, page 64) You can operate the major functions of your Palmcorder from up to approximately 16 feet (5 m) away (indoors). Aim the IR Remote Control toward the front of the Palmcorder and press the desired buttons (Remote Sensor is located under the lens). - Panasonic PVDV401D | PVDV201 User Guide - Page 26
Palmcorders to VCR 2. On the remote, press VCR 1 or VCR 2 to control the desired Palmcorder. Optional For VCR 2 : Press these buttons at the same time. CAMCORDER the polarity. + 3Insert the Battery Tray. Replace battery with Panasonic PART NO. VSBW0004 (CR2025) only. Use of another battery may - Panasonic PVDV401D | PVDV201 User Guide - Page 27
playback. • When the tape reaches its beginning during rewind or rewind search, it will stop automatically. • If you press PLAY for more than 5 seconds, the Palmcorder will go into Repeat Playback mode when the tape reaches its end. The letter "R " will appear in the EVF and LCD monitor. To exit the - Panasonic PVDV401D | PVDV201 User Guide - Page 28
is normal during this mode. Optional REWIND/ SEARCH Button SLOW/ F.ADV Button CAMCORDER CAMERA DISPLAY ON TV DATE / TIME PHOTO SHOT COUNTER / A.DUB TC , time code indication may not change regularly.) Note • Palmcorder will automatically STOP when in slow motion for more than 10 panasonic.com - Panasonic PVDV401D | PVDV201 User Guide - Page 29
special effects. PAUSE Button PLAY Button 3JOG KEY Optional SLOW/ F.ADV Button CAMCORDER CAMERA DISPLAY ON TV DATE / TIME PHOTO SHOT COUNTER / A.DUB TC Variable Speed Search, sound is muted. Jog Frame by Frame Search (Palmcorder only) During Still mode, rotate JOG KEY to advance or reverse the - Panasonic PVDV401D | PVDV201 User Guide - Page 30
of each recording. 2MENU Button Optional 1POWER Switch - SPKR VOL + CAMCORDER CAMERA DISPLAY ON TV DATE / TIME PHOTO SHOT COUNTER / A.DUB more menu to SCENE. (See page 17.) than 2 seconds, the Palmcorder will scan (Ex., if you press the button three times, for scenes @panasonic.com - Panasonic PVDV401D | PVDV201 User Guide - Page 31
instructions for further information. 3 Start playback or begin a recording. Note • Make sure the Palmcorder and TV are turned off while connecting. • Please connect the A/V Cable again to remove the indications. DISPLAY ON TV Button CAMCORDER CAMERA DISPLAY ON TV DATE / TIME PHOTO SHOT COUNTER - Panasonic PVDV401D | PVDV201 User Guide - Page 32
begin • Connect the Palmcorder to a power source. (See pages 11, 12.) • Set POWER to OFF before inserting a Warning Memory Card. (See page 10.) • Memory Card will not work when DV interface Cable (i.LINK) is call : 1-800-211-PANA(7262) or send e -mail to : [email protected] - Panasonic PVDV401D | PVDV201 User Guide - Page 33
images from a cassette tape to a Memory Card. Warning • Memory Card will not work when DV interface Cable (i.LINK) is connected. 4PHOTOSHOT JOG KEY Button MENU Button Before you begin • Connect the Palmcorder to a power source. (See pages 11, 12.) • Set POWER to OFF before inserting a Memory Card - Panasonic PVDV401D | PVDV201 User Guide - Page 34
No. on the screen. Note • If the file number is changed, the Palmcorder cannot read the file data. • This product is compliant with DCF (Design Warning • While "PLEASE WAIT" is displayed, DO NOT turn off the Palmcorder or unplug the AC Adaptor (supplied) because this will cause irreversible damage - Panasonic PVDV401D | PVDV201 User Guide - Page 35
specific images from a page. DELETE ALL Delete all images. (See page 36.) FORMAT Delete all data. (See page 37.) Before you begin • Connect the Palmcorder to a power source. (See pages 11, 12.) • Set POWER to OFF before inserting a recorded Memory Card. (See pages 32, 33.) 1 Slide the M-CARD Lock - Panasonic PVDV401D | PVDV201 User Guide - Page 36
deleted, images cannot be restored. 2, 3JOG KEY Before you begin • Connect the Palmcorder to a power source. (See pages 11, 12.) • Set POWER to OFF before 32.) Warning • While deleting image, DO NOT turn off the Palmcorder or unplug the AC Adaptor (supplied) because this will cause irreversible - Panasonic PVDV401D | PVDV201 User Guide - Page 37
this operation. Warning: Formatting permanently removes all image data. 2, 3JOG KEY POWER Switch M-STOP Button 2M-DEL Button Before you begin • Connect the Palmcorder to a power source. (See pages 11, 12.) • Set POWER to OFF before inserting a recorded Memory Card. (See pages 32, 33.) 1 Do steps - Panasonic PVDV401D | PVDV201 User Guide - Page 38
WIPE : The Photo title is replaced with the current scene in a wiping motion. Before you begin • Connect the Palmcorder to a power source. (See pages 11, 12.) • Set POWER to OFF before inserting a recorded Memory Card. call : 1-800-211-PANA(7262) or send e -mail to : [email protected] - Panasonic PVDV401D | PVDV201 User Guide - Page 39
recording. 4 Press EIS again to cancel. • Be sure that D.E.I.S. is turned off when not needed. D.E.I.S. may not function when... • Palmcorder movement is too extreme. • Recording a subject with distinct horizontal or vertical stripes. • Recording in low light situations. • Recording a subject under - Panasonic PVDV401D | PVDV201 User Guide - Page 40
image doubles in size. D Press D.ZOOM again for normal image size. 40 For assistance, please call : 1-800-211-PANA(7262) or send e -mail to : [email protected] - Panasonic PVDV401D | PVDV201 User Guide - Page 41
7 seconds to process. After that, the Camera mode screen will be displayed. Index Search (Photo/Scene) Optional Remote Control Only (See page 64) Optional CAMCORDER CAMERA A Set POWER to VCR. DISPLAY ON TV DATE / TIME PHOTO SHOT REC / PAUSE T • The POWER lamp lights red. • Be sure POWER is - Panasonic PVDV401D | PVDV201 User Guide - Page 42
using Digital Functions, etc., you may get better results using the manual adjustment. 3, 4JOG KEY 2MENU Button 1 Set POWER to CAMERA The camera will resume recording real-time pictures. MAGICVU/0LUX (PV-DV401 only) 1 Set POWER to CAMERA. • The POWER e -mail to : [email protected] - Panasonic PVDV401D | PVDV201 User Guide - Page 43
Special Features SSppeecciiaall FFeeaattuurreess Program AE The Auto Exposure feature can be used to make quality recordings in a variety of scene situations. Note • When MAGICVU is ON, Program AE and H.S.S. cannot be set in the menu. 3, 4JOG KEY 2MENU Button 1 Set POWER to CAMERA. • The POWER - Panasonic PVDV401D | PVDV201 User Guide - Page 44
is expanded horizontally. GAIN UP (Not available during playback) Picture sensitivity is increased. • Only Manual Focus is available. WIPE Successive scenes are separated in a way which simulates the drawing of a please call : 1-800-211-PANA(7262) or send e -mail to : [email protected] - Panasonic PVDV401D | PVDV201 User Guide - Page 45
Special Features Picture in Picture (PinP) Before you begin You can display a PinP (still image) screen on the Main Picture. • Connect the Palmcorder to a power source. (See pages 11, 12.) Note • PinP position is fixed at the bottom right of the screen. Main Picture 1 Set POWER to CAMERA. • - Panasonic PVDV401D | PVDV201 User Guide - Page 46
or Digital Still Image terminal. • A Multi screen will have slightly lower image quality. Before you begin • Connect the Palmcorder to a power source. (See pages 11, 12.) 1 Set POWER to VCR. • The POWER lamp lights red call : 1-800-211-PANA(7262) or send e -mail to : [email protected] - Panasonic PVDV401D | PVDV201 User Guide - Page 47
automatically adjusts the focus over the entire zoom range. Manual Focus 1 Use Manual Focus (MF) when recording ... • a subject through glass. • a scene where the subject is far from the Palmcorder and there are objects in the foreground. • a subject with distinct horizontal stripes. 2 • a subject - Panasonic PVDV401D | PVDV201 User Guide - Page 48
the AUTO mode (no indication in the EVF and LCD monitor), the Palmcorder will automatically adjust the shutter speed (up to 1/350). • AUTO using the High Speed Shutter. • When PROG.AE is ON, you cannot manually select the shutter speed. • When MAGICVU is ON, Program AE and H.S.S. @panasonic.com - Panasonic PVDV401D | PVDV201 User Guide - Page 49
Palmcorder microphone or an external microphone (PV-DV401 only). External Microphone with M3 connector (not supplied) External Microphone Jack (PV 64) to put the Palmcorder in the Audio Dub mode. • "A.DUB" flashes in the EVF or the LCD monitor. Optional 3A.DUB Button CAMCORDER CAMERA DISPLAY ON TV - Panasonic PVDV401D | PVDV201 User Guide - Page 50
to start Audio Dubbing. • Connect the Palmcorder to the TV in order to monitor the an automatic Dubbing stop point. - SPKR VOL + Optional DRESET Button AMENU Button CAMCORDER CAMERA DISPLAY ON TV DATE / TIME PHOTO SHOT COUNTER / A.DUB TC RESET REC e -mail to : [email protected] - Panasonic PVDV401D | PVDV201 User Guide - Page 51
TV (To View) S-Video Cable (not supplied) VHF Connecting Cable (not supplied) Audio In Video In 2 Press PLAY on the Palmcorder. When the tape reaches the point you want to start dubbing, press PAUSE. 3 Place the VCR into REC/PAUSE mode. (See VCR manual.) SSppeecciiaall FFeeaattuurreess To Audio - Panasonic PVDV401D | PVDV201 User Guide - Page 52
(i.LINK) is not supplied). Source (Playing) Palmcorder DV Input/Output Connector Recording Palmcorder 6STOP Button DV Interface Cable (i.LINK) (optional) 3, 4 3, 4, 5 PAUSE Button PLAY Button 4REC Button Optional 3, 4, 5 PAUSE Button CAMCORDER CAMERA DISPLAY ON TV DATE / TIME PHOTO SHOT - Panasonic PVDV401D | PVDV201 User Guide - Page 53
in the future on our website at www.panasonic.com/video. Software Installation (Windows 98/Me) Caution • Please install Palmcorder USB Device Driver first before connecting the Palmcorder and your PC using USB Cable. Once Palmcorder USB Device Driver is installed, you must restart your computer - Panasonic PVDV401D | PVDV201 User Guide - Page 54
the Palmcorder POWER to VCR. 3 Connect the Palmcorder to your PC (Windows) using the USB Cable (supplied). Note • For extended use, it is recommended to use the AC Adaptor as a power source. 54 For assistance, please call : 1-800-211-PANA(7262) or send e -mail to : consumerproducts@panasonic - Panasonic PVDV401D | PVDV201 User Guide - Page 55
Set Palmcorder POWER to CAMERA or slide M-CARD Lock Switch to unlock and set to M-CARD. 2 (See pages 9, 10.) Connect the Palmcorder to your PC (Windows) using the USB Cable on Start, "Programs," "Panasonic," "Palmcorder," then "CARD LINK (for USB)." 3 "CARD LINK (for USB)" is opened. Note Refer - Panasonic PVDV401D | PVDV201 User Guide - Page 56
-PC connections. (See page 54.) • Turn your PC on. (See page 54.) • Set Palmcorder POWER to M-CARD. (See page 10.) • Repeat steps 1 and 2 to run the CARD LINK (for USB). (See "Running the CARD LINK (for USB)" on page 55.) 1 Select the image data you want to transfer to your PC. • The selected - Panasonic PVDV401D | PVDV201 User Guide - Page 57
begin • Insert a recorded tape. (See page 9.) 1 Set Palmcorder POWER to VCR. 2 Connect the Palmcorder to your PC using the USB Cable (supplied) or DV interface Cable (i.LINK). (See pages 54, 62.) 3 Click on "Start," "Programs," "Panasonic," "Palmcorder," then "Movie Messenger." 4 "PHOTOVU LINK/Movie - Panasonic PVDV401D | PVDV201 User Guide - Page 58
Palmcorder POWER to VCR. 1Repeat steps 1~4 on page 57 to run the PHOTOVU LINK/Movie Messenger. Note • When the USB Cable is connected, the input display will automatically become USB. If it is not USB, please confirm the connection. Then, close 2 and restart the software @panasonic.com - Panasonic PVDV401D | PVDV201 User Guide - Page 59
display the Still image list. 4Double Click on the desired image to open it. Note • If the image cannot be opened, please refer to the software Help menu. SSppeecciiaall FFeeaattuurreess 59 - Panasonic PVDV401D | PVDV201 User Guide - Page 60
If the e-mail software does not support MAPI, clicking on [E-mail] of Movie Messenger will not automatically run the e-mail software. Please run the e-mail software before doing step 1 above. 60 For assistance, please call : 1-800-211-PANA(7262) or send e -mail to : [email protected] - Panasonic PVDV401D | PVDV201 User Guide - Page 61
tape. (See page 9.) • Make Palmcorder-PC connections. (See page 54.) • Turn your PC on. (See page 54.) • Set Palmcorder POWER to VCR. 1Repeat steps 1~4 with Windows 95, 98, or Me only. • If your e-mail software is not supported by MAPI, pressing the [E-Mail] button will automatically open the folder - Panasonic PVDV401D | PVDV201 User Guide - Page 62
Cable (i.LINK) (not supplied) using products and software from a number of editing software regarding editing software products from these During Palmcorder playback, do not disconnect the DV Interface Cable (i.LINK) or turn the Palmcorder off this case, use the software included with the board - Panasonic PVDV401D | PVDV201 User Guide - Page 63
Before you begin • Insert a recorded Tape. (See page 9.) • Make Palmcorder-PC connections. (See page 62.) • Turn your PC on. • Set Palmcorder POWER to VCR. • Run the Software after the DV Interface Cable (i.LINK) has been connected to the Palmcorder. 1Repeat steps 1~4 on page 57 to run the PHOTOVU - Panasonic PVDV401D | PVDV201 User Guide - Page 64
Palmcorder Accessory System Accessory # Figure Description Price PV-DAC11 CGR-D08A/1B (Replaces CGRD120A/1B) CGR-D16A (Replaces CGRD220A/1B) CGP-D28A1B CGR-D53A/1K (Replaces CGRD815A/1B) PV-DDC9 PV-DLT9 PV-DRC9 AC Adaptor with AC Cable and $120.00 DC Cable 800mAH / 1 h 30 min, Battery Pack $ - Panasonic PVDV401D | PVDV201 User Guide - Page 65
Palmcorder Accessory System Concerning the MultiMediaCard and SD Memory Card MultiMediaCard The MultiMediaCard is a compact, lightweight and removable external memory card. A great many fun-filed titles ( - Panasonic PVDV401D | PVDV201 User Guide - Page 66
TO OBTAIN ANY OF OUR PALMCORDER ACCESSORIES YOU CAN DO ANY OF THE FOLLOWING: VISIT YOUR LOCAL PANASONIC DEALER OR CALL PANASONIC'S ACCESSORY ORDER LINE AT 1- 10:30 AM SAT, PACIFIC TIME] OR MAIL THIS ORDER TO: PANASONIC SERVICES COMPANY ACCESSORY ORDER OFFICE 20421 84th Avenue South Kent, WA. 98032 - Panasonic PVDV401D | PVDV201 User Guide - Page 67
OOnn OOppeerraattiioonnss Cleaning EVF (Electronic Viewfinder) [ PV-DV201 ] [ PV-DV401 ] 1 Turn the Eyepiece counterclockwise 1/8 of lx). The table below shows the color temperature for reference. PALMCORDER SETTINGS NATURAL LIGHT CONDITIONS KELVIN COLOR ARTIFICIAL LIGHT SOURCE COLOR TINT - Panasonic PVDV401D | PVDV201 User Guide - Page 68
V Power Consumption: Palmcorder: 7.2 V DC 6.5 W (Max. 9.5 W) AC Adaptor: 18 W 1 W (when not in use.) Digital Interface USB/i.Link (IEEE1394) 104 °F (0 °C~40 °C) Operating Humidity: 10 %~75 % Weight: Palmcorder: (PV-DV201) (PV-DV401) AC Adaptor: 1.50 Ibs. 0.68 kg 1.45 Ibs. panasonic.com - Panasonic PVDV401D | PVDV201 User Guide - Page 69
service technician. Please contact your nearest Panasonic Servicenter. An alternate solution is to obtain a head cleaning cassette. Please use Panasonic cleaning cassette (AY-DVMCL). Be sure to follow the cleaning instructions appear on-screen, the Palmcorder may need service. Do not remove the - Panasonic PVDV401D | PVDV201 User Guide - Page 70
Requesting Service If you have a problem with your Palmcorder, it . (p. 21) • Make sure the Battery is fully charged. (p. 11) • Make sure all necessary cables are connected correctly and firmly. (p. 12) • Make sure the Lens Cap is removed. (p. 22) • e -mail to : [email protected] - Panasonic PVDV401D | PVDV201 User Guide - Page 71
it is exhibiting. Mail this completed form and your Proof of Purchase along with your unit to: Panasonic Services Company 1705 N. Randall Road Elgin, IL. 60123-7847 Attn: Camcorder Repair Please write the displayed Self Diagnostic number here. (See page 69.) 71 FFoorrYYoouurr IInnffoorrmmaattiioonn - Panasonic PVDV401D | PVDV201 User Guide - Page 72
See page 39. TRANSFER Button See page 55. MAGICVU/0LUX Switch (PV-DV401 only) See page 42. Lens Built-in Twin Capsule 2-Way . DV Input/Output (i.LINK " ") Connector See pages 52, 62. External Microphone Jack (PV-DV401 only) See page 49. A/V Output Connector See pages 31, 51. S-VIDEO Output - Panasonic PVDV401D | PVDV201 User Guide - Page 73
pages 9, 10. M-CARD Door See page 10. Built-in Speaker See page 27. DC IN Terminal See page 12. CARD EJECT Switch See page 10. USB Terminal See page 54. 73 FFoorrYYoouurr IInnffoorrmmaattiioonn - Panasonic PVDV401D | PVDV201 User Guide - Page 74
power plug adaptor (VJSS0070) in an area which has special AC outlets. For assistance, please call : 1-800-211-PANA(7262) or send e -mail to : [email protected] - Panasonic PVDV401D | PVDV201 User Guide - Page 75
25, 28, 29. REVERSE INDEX SEARCH Button See pages 25, 30, 41. STOP Button See pages 25, 27. SET Button See pages 13, 14, 25. CAMCORDER CAMERA DISPLAY ON TV DATE / TIME PHOTO SHOT COUNTER / A.DUB TC RESET REC REC / PAUSE T W MENU REW / PLAY FF / SLOW / PAUSE / SLOW / F.ADV SEL F.ADV - Panasonic PVDV401D | PVDV201 User Guide - Page 76
the date of the original purchase): PRODUCT PARTS LABOR SERVICE CONTACT NUMBER CAMCORDER ONE (1) YEAR, EXCEPT CCD IMAGE SENSOR CCD IMAGE problem is not handled to your satisfaction, then write to the Consumer Affairs Department at the Panasonic Consumer Electronics Company address above. SERVICE - Panasonic PVDV401D | PVDV201 User Guide - Page 77
You can purchase parts, accessories or locate your nearest servicenter by visiting our Web Site. Accessory Purchases: 1-800-332-5368 (Customer Orders Only) Panasonic Services Company 20421 84th Avenue South, Kent, WA 98032 (6 am to 5 pm Monday - Friday; 6 am to 10:30 am Saturday; PST) (Visa, Master - Panasonic PVDV401D | PVDV201 User Guide - Page 78
Guide/Guía Para Uso Rápido Inserte de la batería 2 1 43 Antes de comenzar • Cargue la battería. (Página 11.) 1 Deslice el visor hacia atrás, haste la posición de totalmente extendido, y luego inclínelo hacia arriba. (PV-DV201 1-800-211-PANA(7262) or send e -mail to : [email protected] - Panasonic PVDV401D | PVDV201 User Guide - Page 79
SSppaanniisshh QQuuiicckk UUssee GGuuiiddee//GGuuííaa PPara Uso Rápido Introducir la Tarjeta de memoria* Antes de comenzar • Cargue la battería. (Pàgina 11.) *Tarjeta de Memoria: Tarjeta MultiMedia o Tarjeta de Memoria SD (Pàgina 64.) • Asegúrese de introducir la Tarjeta de memoria antes de - Panasonic PVDV401D | PVDV201 User Guide - Page 80
MAGICVU/0LUX Switch 42 Manual Focus 47 Memory Counter 19 MENU OSD 14, 15, 16, 17, 18 Memory Card 6, 10, 64 M-CARD Door 10 P PC Cable 6, 54 PC VHF Connecting Cable 51 Volume Display 27 W White Balance 42 Z Zoom In/Out 40 Panasonic Consumer Electronics Panasonic Sales Company
-
 1
1 -
 2
2 -
 3
3 -
 4
4 -
 5
5 -
 6
6 -
 7
7 -
8
-
9
-
10
-
11
-
12
-
13
-
14
-
15
-
16
-
17
-
18
-
19
-
20
-
21
-
22
-
23
-
24
-
25
-
26
-
27
-
28
-
29
-
30
-
31
-
32
-
33
-
34
-
35
-
36
-
37
-
38
-
39
-
40
-
41
-
42
-
43
-
44
-
45
-
46
-
47
-
48
-
49
-
50
-
51
-
52
-
53
-
54
-
55
-
56
-
57
-
58
-
59
-
60
-
61
-
62
-
63
-
64
-
65
-
66
-
67
-
68
-
69
-
70
-
71
-
72
-
73
-
74
-
75
-
76
-
77
-
78
-
79
-
80
 |
 |
Before attempting to connect, operate or adjust this product, please read these
instructions thoroughly.
Spanish Quick Use Guide is included.
Guía para rápida consulta en español está incluida.
R
LSQT0364A
Models No.
PV-DV201/
PV-DV401
Digital Video Camcorder
Operating Instructions
Mini
For assistance,
please call :
1-800-211-PANA(7262) or
send e-mail to : [email protected]
R
[ PV-DV401 shown ]
*0364A*