Panasonic PVL751 PVL751 User Guide - Page 42
Pc Connection
 |
View all Panasonic PVL751 manuals
Add to My Manuals
Save this manual to your list of manuals |
Page 42 highlights
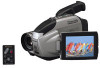
PC Connection Digital PhotoShot Software A live or captured image can be transferred to your PC (Personal Computer). Before you begin... • Turn your PC off. • Set Camcorder POWER to OFF. System Requirements for Digital PhotoShot • IBM PC/AT or compatible. • Intel® Pentium® Processor. • Microsoft® Windows®95 or Windows®98 or Windows®Me. • RAM: 16 MB or more. • 2 MB of available hard-disk space. • 256 color monitor (full color recommended). • 3.5 inch 1.44 MB floppy disk drive (for installation). • RS-232C serial port (D-Sub 9-pin). An adaptor (D-Sub 9-pin male to a D-Sub female) is required for a D-Sub 25-pin. • Mouse or other pointing device. PC-Camcorder Connection Connect Camcorder PC jack to the serial port on your PC (Personal Computer) using the supplied PC connector cable. Refer to PC or Windows manual to identify which COM port to be used for connection. Note: • Be sure to turn PC off before connection for proper image transfer. • After Camcorder and PC are connected by starting up the software included, video recording is not possible. RS-232C Serial Port (Default is COM1) (D-Sub 9-pin) Software Installation (Windows 95/98/Me) PC Connector PC Connector cable (supplied) Before you begin... • Your PC is in the power on mode. 1 Turn on PC (Personal Computer) and start up Windows. 2 Insert Digital PhotoShot disk (Windows 95/98/Me) into a floppy disk drive. 3 Click on Start, then "Run..." 4 Type in "a:\setup.exe" and click OK. • If your 3.5 inch floppy disk drive is not "A", use appropriate letter. 5 Follow instructions as they appear on PC screen until the installation is complete. • Setup window will disappear when the installation is complete. Note: • Please look for Windows 2000 version of driver software on our website at http://www.panasonic.com/video. 42 For assistance, please call : 1-800-211-PANA(7262) or send e-mail to : [email protected]
-
 1
1 -
2
-
3
-
4
-
5
-
6
-
7
-
8
-
9
-
10
-
11
-
12
-
13
-
14
-
15
-
16
-
17
-
18
-
19
-
20
-
21
-
22
-
23
-
24
-
25
-
26
-
27
-
28
-
29
-
30
-
31
-
32
-
33
-
34
-
35
-
36
-
 37
37 -
 38
38 -
 39
39 -
 40
40 -
 41
41 -
 42
42 -
 43
43 -
 44
44 -
 45
45 -
 46
46 -
 47
47 -
48
-
49
-
50
-
51
-
52
-
53
-
54
-
55
-
56
-
57
-
58
-
59
-
60
 |
 |
