Pfaff creative 2.0 Owner's Manual - Page 50
Embroidery stitch-out - software
 |
View all Pfaff creative 2.0 manuals
Add to My Manuals
Save this manual to your list of manuals |
Page 50 highlights
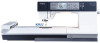
Embroidery stitch-out Load a design 1. To load a design, press the load button with the USB embroidery stick and the embroidery unit connected. Your machine can load .vp3 embroidery Àles and .vf3 embroidery font Àles. 2. Use the arrow buttons to select a folder and then press OK to open it. To go back to the previous folder, press the left arrow button. 3. Select the design you want to load and press OK to conÀrm. It will be loaded onto the embroidery Àeld in embroidery stitch-out. Note: If you have already loaded a design onto the embroidery Àeld, the next design you load will automatically replace the Àrst one. When saving designs on the USB embroidery stick, make sure not to create too many levels of subfolders as this may create a Àle path that is too long. Also make sure to keep the Àle name short. When trying to open such a Àle or folder, an alarm sound will be heard and the Àle or folder will not open. Load a font Text can be created with embroidery fonts. On your USB embroidery stick there is one embroidery font upon delivery. 1. Press the load button with the USB embroidery stick connected. 2. Select the font Àle you want to load and press OK to conÀrm. The font will load into the embroidery text editor. Note: Font Àles are indicated with this symbol. You can create more font Àles using the 5D™ QuickFont software. See page 2:10. 1 4 Embroidery text editor view 1. Font Àle name 2. Text Àeld 3. Alphabet 2 5 3 6 4. Text length information 7 5. Text height information 6. Character set (upper case/lower case, normal/special, symbols) 7. Toggle to embroidery stitch-out Embroidering 6:2
-
 1
1 -
2
-
3
-
4
-
5
-
6
-
7
-
8
-
9
-
10
-
11
-
12
-
13
-
14
-
15
-
16
-
17
-
18
-
19
-
20
-
21
-
22
-
23
-
24
-
25
-
26
-
27
-
28
-
29
-
30
-
31
-
32
-
33
-
34
-
35
-
36
-
37
-
38
-
39
-
40
-
41
-
42
-
43
-
44
-
 45
45 -
 46
46 -
 47
47 -
 48
48 -
 49
49 -
 50
50 -
 51
51 -
 52
52 -
 53
53 -
 54
54 -
 55
55 -
56
-
57
-
58
-
59
-
60
-
61
-
62
-
63
-
64
-
65
-
66
-
67
-
68
 |
 |
