Pfaff creative 2.0 Owner's Manual - Page 54
Getting started embroidering
 |
View all Pfaff creative 2.0 manuals
Add to My Manuals
Save this manual to your list of manuals |
Page 54 highlights
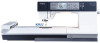
Getting started embroidering 1. Attaching the embroidery unit, the machine automatically switches to embroidery mode and opens the load menu. 2. Make sure that the USB embroidery stick is connected. Select a design from the USB embroidery stick and press OK to load to embroidery stitch-out. 3. The design is placed in the center of the hoop. 4. Make sure the IDT is disengaged and snap on the embroidery foot. Insert a bobbin with lightweight bobbin thread. 5. Hoop a piece of fabric and stabilizer, and slide on the hoop. 6. Thread the machine with the Àrst color in the color list. 7. Clear sufÀcient space to accommodate movement of the embroidery arm and the hoop. Hold the needle thread and press the start/stop button or the foot control. The machine starts embroidering and jump stitches will automatically be cut. Note: Cut jump stitches is activated by default. Open the settings menu to deactivate this setting. 8. When the Àrst color is completed, your machine stops. A pop-up appears asking you to change color. Re-thread with the next color and continue embroidering by pressing start/ stop. Each color segment is tied off at the end and the needle thread is cut. 9. When the embroidery is completed, your machine cuts the needle and bobbin thread and stops. The needle and presser foot raise automatically for easy removal of the hoop. A pop-up informs you that your embroidery is Ànished. 6:6 Embroidering
-
 1
1 -
2
-
3
-
4
-
5
-
6
-
7
-
8
-
9
-
10
-
11
-
12
-
13
-
14
-
15
-
16
-
17
-
18
-
19
-
20
-
21
-
22
-
23
-
24
-
25
-
26
-
27
-
28
-
29
-
30
-
31
-
32
-
33
-
34
-
35
-
36
-
37
-
38
-
39
-
40
-
41
-
42
-
43
-
44
-
45
-
46
-
47
-
48
-
 49
49 -
 50
50 -
 51
51 -
 52
52 -
 53
53 -
 54
54 -
 55
55 -
 56
56 -
 57
57 -
 58
58 -
 59
59 -
60
-
61
-
62
-
63
-
64
-
65
-
66
-
67
-
68
 |
 |
