Pfaff hobbymatic 955 Owner's Manual - Page 48
ihfuB,halter
 |
View all Pfaff hobbymatic 955 manuals
Add to My Manuals
Save this manual to your list of manuals |
Page 48 highlights
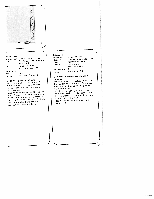
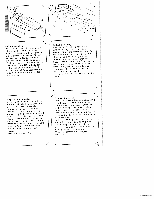
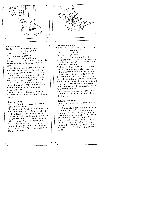
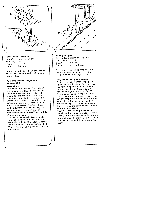
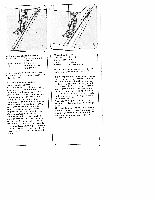
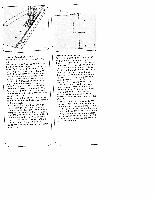
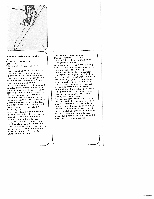
Knopf annähen Nih tuB, ohne NähfuB oder mit KlarsichtfuIf Stich: Taste E Transporteur: versenken Garn: feines Nähgarn Drehen Sie das Handrad auf sich 7U, his die Nadel in linker Stichiage abwdrts eht. Legen Sie nun den Knopf auf die zuvor markierte Stete. Vorsichtig Stoff mit Knopf unter den Nahfufhaiter schieben. N ihfuB,halter senken und die Nadel in die linke Knoptbohrung einstechen as sen. Handrad weiter drehen, bis die Nadel in die rechte Knopfbohrung em sticht. Dabei am Knopf ovtl, eine Kor rektur vornehmen. 6-8 lJberstiche nahen (Abb. N). Taste B tippen, loslassen und einige Steppstiche in der (inken Knopfbohrung ndhen. Knopf mit Stiel GroBe KnOpfe in schweren Stoften be nOtigen einen Stiel, Die Nadel in die inke Knopfbohrimng cm stechen assen. Bevor Sic den NahfuIf, senken, legen Sic eiilen Maschinen nadelkoiben oder em Streichholz auf die Knopfmitte lAbb. 0). Einige Uberstiche nähen und ca. 15 cm Fadenlänge ste Len assen. Oher- und Unterfaden lurchfädeln lAhb. P1 und den Stiel urn wickein (Abb. 0). Die Fadenenden von Hand verknoten. Sewing on buttons Sewing foot: Clear view foot or without sewing foot Stitch: Button E Feed dog: Lowered Thread: Fine sewing thread Mnve the needle to its eft position, anc turn the hand wheel towards you until the needle descends. Position the button on the previously marked material: Carefully place mate rial and button under the sewmng foot holder. Lower the sewing foot holder nd ct the needle stitch into the left hoe of the button Turn the hand whee further until the needle stitches into the rignt hole of the button. If necessary, alter the position of the button. Sew 6 to 8 zigzag stitches Fig. NI. Press button B, release it again, and sew a few stitches in the left hole of the button. Buttons with stem Large buttons in heavy materals requirt a stem, Let the needle stitch into the left hole of the button. Before lowering the sewing foot pUce a sewing machine needle shank or a match on the middle of the button (Fig. 01. Sew a few zigzag stitches and nave a thread end, about 1 5 cm long. Pull needle and bobbin threads out (Fig. P and wrap the stern (Fig. 01. Tie off the thread ends.
-
 1
1 -
2
-
3
-
4
-
5
-
6
-
7
-
8
-
9
-
10
-
11
-
12
-
13
-
14
-
15
-
16
-
17
-
18
-
19
-
20
-
21
-
22
-
23
-
24
-
25
-
26
-
27
-
28
-
29
-
30
-
31
-
32
-
33
-
34
-
35
-
36
-
37
-
38
-
39
-
40
-
41
-
42
-
 43
43 -
 44
44 -
 45
45 -
 46
46 -
 47
47 -
 48
48 -
 49
49 -
 50
50 -
 51
51 -
 52
52 -
 53
53 -
54
-
55
-
56
-
57
-
58
-
59
-
60
-
61
-
62
-
63
-
64
-
65
-
66
-
67
-
68
-
69
-
70
-
71
-
72
-
73
-
74
-
75
-
76
-
77
-
78
-
79
-
80
-
81
-
82
-
83
-
84
-
85
-
86
-
87
-
88
-
89
-
90
-
91
-
92
 |
 |
