Pfaff hobbymatic 955 Owner's Manual - Page 54
Pfaff hobbymatic 955 Manual
 |
View all Pfaff hobbymatic 955 manuals
Add to My Manuals
Save this manual to your list of manuals |
Page 54 highlights
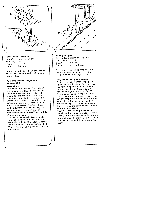
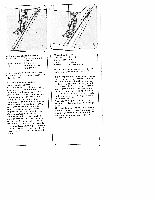
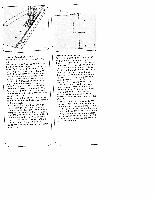
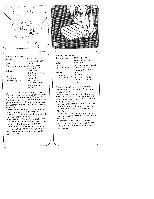
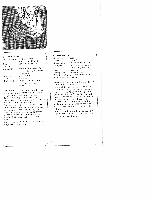
Stopfen mit Geradstich NähfuB: Stopffu1. SonderzubehOrl Stich: Taste G Oberfadenspannung: etwas leichter Garn: feines Maschinen stickgarn Nadel: Transporteur: Stopfanschlag 121: Stärke 70 versenkt nach hinten schieben Stoff drückerhebel sen ken StopffuI anbringen Die Nadel hochstellen: Den Bügel P nach hinten drücken und festhalten, Den Stift des Fuses in die Bohrung N einführen, die Gabel R greift dabei urn die Stoffdruckerstange, und den Ful' bis zum Anschlag einsetzen. Den Bugel P loslassen, wobei er sich auf die Halte schraube Q egt. Die Schraube 0 fest drehen. Unterfaden nach oben holen, Beide Fdden bei Nähbeginn festhalten. Zuerst einige Stiche irn Stoff nähen. Spannen Sie die Fäden dicht nebeneinander und überstopfen Sie die schadhafte Stelle. Jeweils am Nahtende in runden Bogen stopten (Fig. SI. Sobald die Stopfsteile gleichmalMg bedeckt st. drehen Sie den Stoff urn 90 Grad und stopfen über die zuvor gespannten Fäden, bis die Stopf stelle geschlossen ist (Fig. Ti. Die Stichlange bestimmen Sie bei dieser Arbeit selbst, indem Sie das Nahgut hin und herbewegen. N Darning with straight stitch Sewing foot: Darning foot (special accessoryl Stitch: Tension: Button G Ease needle thread tension Thread: Fine machine embroidery thread Needle: Size 70 Feed dog: Lowered Darning stop 121: push backwards, lower presser bar lifter Attaching the darning foot Position the needle up. Push bar P to the back and hold it there. Fit the pin of the foot in hole N (at the same time, fork R engages the presser barl and push the toot fully in. Let go of bar P. which then rests on retaining screw Q. Tighten screw 0. Draw up the bobbin thread. Hold both threads until the machine has made a few stitches. First sew a few stitches over the damaged spot from one side to the other in serpentine fashion, placing the lines of stitching close together (Fig. SI. When the damaged spot has been covered completely, turn the workpiece through 90 and darn at right angles to the preceding row of stitches (see Fig. TI. You determine the length of the darning stitches by the rate at which you move the fabric back and forth.
-
 1
1 -
2
-
3
-
4
-
5
-
6
-
7
-
8
-
9
-
10
-
11
-
12
-
13
-
14
-
15
-
16
-
17
-
18
-
19
-
20
-
21
-
22
-
23
-
24
-
25
-
26
-
27
-
28
-
29
-
30
-
31
-
32
-
33
-
34
-
35
-
36
-
37
-
38
-
39
-
40
-
41
-
42
-
43
-
44
-
45
-
46
-
47
-
48
-
 49
49 -
 50
50 -
 51
51 -
 52
52 -
 53
53 -
 54
54 -
 55
55 -
 56
56 -
 57
57 -
 58
58 -
 59
59 -
60
-
61
-
62
-
63
-
64
-
65
-
66
-
67
-
68
-
69
-
70
-
71
-
72
-
73
-
74
-
75
-
76
-
77
-
78
-
79
-
80
-
81
-
82
-
83
-
84
-
85
-
86
-
87
-
88
-
89
-
90
-
91
-
92
 |
 |
