Pioneer DEH-P5100UB Owner's Manual - Page 7
About the demo mode, Use and care of the remote, control, Before You Start, Attaching the front panel
 |
UPC - 012562945170
View all Pioneer DEH-P5100UB manuals
Add to My Manuals
Save this manual to your list of manuals |
Page 7 highlights
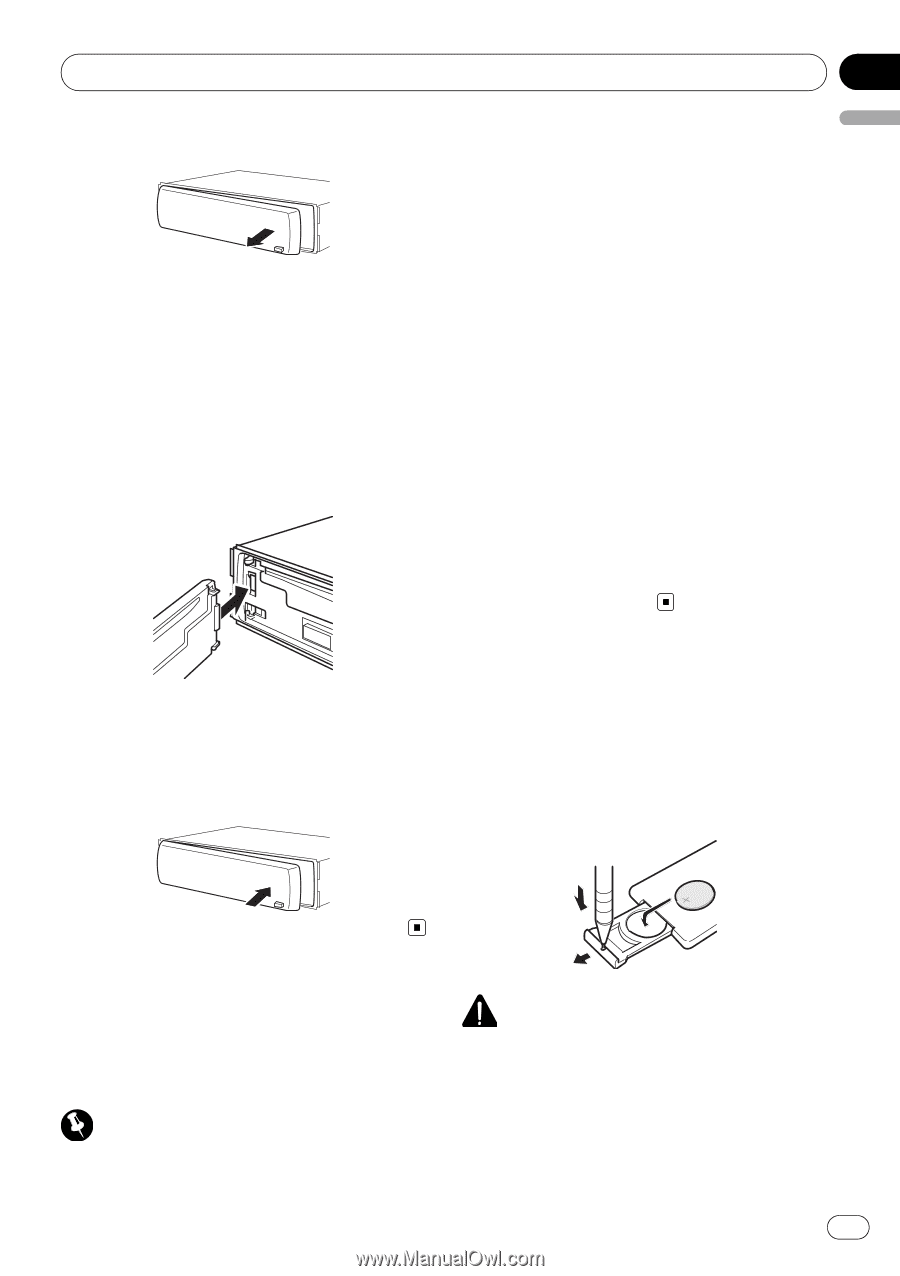
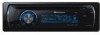
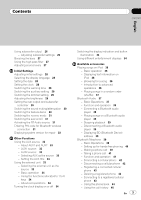
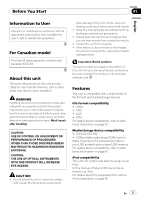
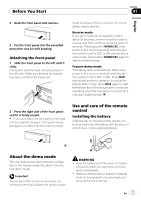
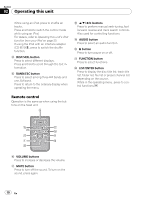
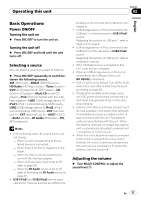
Before You Start Section 01 English 2 Grab the front panel and remove. 3 Put the front panel into the provided protective case for safe keeping. Attaching the front panel 1 Slide the front panel to the left until it clicks. Front panel and the head unit are jointed on the left side. Make sure that the front panel has been jointed to the head unit. on/off operations. If this is not done, the vehicle battery may be drained. Reverse mode If you do not perform an operation within about 30 seconds, screen indications start to reverse, and then continue reversing every 10 seconds. Pressing button BAND/ESC when power to this unit is turned off while the ignition switch is set to ACC or ON cancels the reverse mode. Press button BAND/ESC again to start the reverse mode. Feature demo mode The feature demo automatically starts when power to this unit is turned off while the ignition switch is set to ACC or ON. Press DISP during feature demo operation to cancel the feature demo mode. Press DISP again to start. Remember that if the feature demo continues operating when the car engine is turned off, it may drain battery power. 2 Press the right side of the front panel until it is firmly seated. # If you can't attach the front panel to the head unit successfully, try again. Front panel may be damaged if you attach the front panel forcedly. Use and care of the remote control Installing the battery Slide the tray on the back of the remote control out and insert the battery with the plus (+) and minus (-) poles aligned properly. About the demo mode This unit features two demonstration modes. One is the reverse mode, the other is the feature demo mode. Important The red lead (ACC) of this unit should be connected to a terminal coupled with ignition switch WARNING ! Keep the battery out of the reach of children. Should the battery be swallowed, consult a doctor immediately. ! Batteries (battery pack or batteries installed) shall not be exposed to excessive heat such as sunshine, fire or the like. En 7
-
 1
1 -
 2
2 -
 3
3 -
 4
4 -
 5
5 -
 6
6 -
 7
7 -
 8
8 -
 9
9 -
 10
10 -
 11
11 -
 12
12 -
13
-
14
-
15
-
16
-
17
-
18
-
19
-
20
-
21
-
22
-
23
-
24
-
25
-
26
-
27
-
28
-
29
-
30
-
31
-
32
-
33
-
34
-
35
-
36
-
37
-
38
-
39
-
40
-
41
-
42
-
43
-
44
-
45
-
46
-
47
-
48
-
49
-
50
-
51
-
52
-
53
-
54
-
55
-
56
-
57
-
58
-
59
-
60
-
61
-
62
-
63
-
64
-
65
-
66
-
67
-
68
-
69
-
70
-
71
-
72
-
73
-
74
-
75
-
76
-
77
-
78
-
79
-
80
-
81
-
82
-
83
-
84
-
85
-
86
-
87
-
88
-
89
-
90
-
91
-
92
-
93
-
94
-
95
-
96
-
97
-
98
-
99
-
100
-
101
-
102
-
103
-
104
-
105
-
106
-
107
-
108
-
109
-
110
-
111
-
112
-
113
-
114
-
115
-
116
-
117
-
118
-
119
-
120
-
121
-
122
-
123
-
124
-
125
-
126
-
127
-
128
-
129
-
130
-
131
-
132
-
133
-
134
-
135
-
136
-
137
-
138
-
139
-
140
-
141
-
142
-
143
-
144
-
145
-
146
-
147
-
148
-
149
-
150
-
151
-
152
-
153
-
154
-
155
-
156
-
157
-
158
-
159
-
160
-
161
-
162
-
163
-
164
-
165
-
166
-
167
-
168
-
169
-
170
-
171
-
172
-
173
-
174
-
175
-
176
-
177
-
178
-
179
-
180
-
181
-
182
-
183
-
184
-
185
-
186
-
187
-
188
-
189
-
190
-
191
-
192
-
193
-
194
-
195
-
196
-
197
-
198
-
199
-
200
-
201
-
202
-
203
-
204
-
205
-
206
-
207
-
208
-
209
-
210
-
211
-
212
-
213
-
214
-
215
-
216
-
217
-
218
 |
 |