Pioneer DVJ 1000 Owner's Manual - Page 12
Names and Functions of Parts - dj
 |
UPC - 012562821481
View all Pioneer DVJ 1000 manuals
Add to My Manuals
Save this manual to your list of manuals |
Page 12 highlights
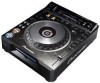
Before Operating (Names and Functions of Parts) Names and Functions of Parts Operation panel Buttons and controls with the Buttons and controls with the mark are disabled when the NORMAL/DJ switch is set to NORMAL. mark are disabled when the NORMAL/DJ switch is set to DJ. 12 534 6 7 8 9 10 46 4748 49 50 51 52 53 11 54 45 44 43 42 41 40 39 38 37 36 35 34 33 POWER OFF ON TIME MODE AUTO CUE TEXT MODE DVD TITLE MP3 FOLDER ANGLE SUBTITLE AUDIO DVJ-1000 UNLOCK STOP LOCK EJECT DISPLAY DELETE MEMORY MENU T.MENU RETURN SETUP HOT CUE REALTIME CUE IN OUT IN ADJUST OUT ADJUST BACK & FORTH LOOP RELOOP/ EXIT 4-BEAT ONE-TRACK REC MODE CUE / LOOP CALL ENTER TOUCH/BRAKE JOG ADJUST LIGHT HEAVY RELEASE/START HYPERJOG MODE DIRECTION FWD REV PREVIOUS NEXT JOG MODE VINYL WIDE TEMPO MASTER TEMPO 12 13 14 55 56 15 16 17 18 19 20 21 22 REV FWD 23 CUE PLAY/PAUSE REV TEMPO RESET FWD 24 TEMPO 32 31 30 29 28 27 26 25 7. 4-BEAT/ONE-TRACK button P.45 • 4-Beat Loop When this button is pressed, loop play will be- gin with that point as the loop-in point, and the loop-out automatically point set 4 beats later. • One-Track Loop When this button is held depressed for 1 sec- ond or more, the chapter loop or track loop play will begin. 8. CUE/LOOP CALL button P.48 Press to turn cue point navigation mode ON/ OFF. 9. Cursor button ( / / / ) This button is used for cue point navigation; during MP3 playback, functions for performing selections with MP3 navigator, and for making various DVD settings. 10. ENTER button This button is used for cue point navigation; during MP3 playback, functions for performing selections with MP3 navigator, and for making various DVD settings. 11. NORMAL/DJ switch P.18 Located on the rear panel. 12. STOP button Stops disc playback. When the eject/stop mode select switch is set to LOCK, playback will not stop unless the PAUSE mode is set first. 13. Eject/stop mode select switch (UNLOCK/LOCK) UNLOCK: If the EJECT (0) button is pressed during playback, the disc stops and is ejected. If the STOP button is pressed during playback, the disc playback stops. LOCK: If the EJECT (0) button is pressed dur- ing playback, the disc will not be ejected. To eject the disc, set the unit to pause, then press the EJECT (0) button. Likewise, playback will not stop if the STOP button is pressed during playback; to stop disc playback, set the unit to pause, then press the STOP button. 14. EJECT (0) button When this button is pressed, disc rotation stops and the disc is ejected from the loading slot. If 1. POWER OFF (-)/ON (_) switch Located on the rear panel. 2. Loop in/realtime cue/loop in point adjust button/indica- tor (IN/REALTIME CUE/IN ADJUST) Real time cue P.40 Loop-in point input P.44 Loop-in point adjust P.44 3. Loop out/loop out point adjust button/indicator (OUT/OUT ADJUST) Loop-out point input P.44 Loop-out point adjust P.44 4. BACK & FORTH button P.45 Use to switch between normal loop mode and back & forth loop mode. 5. Loop mode indicator P.45 Lights during back & forth loop mode. 6. RELOOP/EXIT button/indicator P.44 the eject/stop mode select switch is set to the LOCK position, the disc will not be ejected unless the unit is set to pause before pressing the EJECT (0) button ( P.35). 15. TOUCH/BRAKE response dial Adjusts the disc deceleration speed (time to playback stop) when the jog dial's top surface is touched with jog mode set to VINYL ON. Rotate the dial counterclockwise to stop playback quickly, and rotate dial clockwise to cause slower deceleration. 16. RELEASE/START response dial Adjusts the disc acceleration speed (playback startup time) when the jog dial's top surface is released with jog mode set to VINYL ON. Rotate the dial counterclockwise to restart playback quickly, and rotate dial clockwise to cause slower acceleration. 17. JOG ADJUST dial Use to adjust the felt resistance (light/heavy) of the jog dial when it is rotated. 18. HYPERJOG MODE button/indicator When hyper jog mode is set to ON with jog mode set to VINYL ON, turning the jog dial causes the rate of change of image and sound to increase to 4x the rate of changed normally produced (when the hyper jog mode is OFF). 12
-
 1
1 -
2
-
3
-
4
-
5
-
6
-
 7
7 -
 8
8 -
 9
9 -
 10
10 -
 11
11 -
 12
12 -
 13
13 -
 14
14 -
 15
15 -
 16
16 -
 17
17 -
18
-
19
-
20
-
21
-
22
-
23
-
24
-
25
-
26
-
27
-
28
-
29
-
30
-
31
-
32
-
33
-
34
-
35
-
36
-
37
-
38
-
39
-
40
-
41
-
42
-
43
-
44
-
45
-
46
-
47
-
48
-
49
-
50
-
51
-
52
-
53
-
54
-
55
-
56
 |
 |
