ProForm 10.8x Bike English Manual
ProForm 10.8x Bike Manual
 |
View all ProForm 10.8x Bike manuals
Add to My Manuals
Save this manual to your list of manuals |
ProForm 10.8x Bike manual content summary:
- ProForm 10.8x Bike | English Manual - Page 1
in the space above for reference. Serial Number Decal • Assembly • Operation • Maintenance • Part List and Drawing BIKE EXERCISER Userʼs Manual Sears, Roebuck and Co. Hoffman Estates, IL 60179 CAUTION Read all precautions and instructions in this manual before using this equipment. Keep this - ProForm 10.8x Bike | English Manual - Page 2
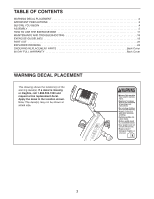
PLACEMENT 2 IMPORTANT PRECAUTIONS 3 BEFORE YOU BEGIN 4 ASSEMBLY 5 HOW TO USE THE EXERCISE BIKE 11 MAINTENANCE AND TROUBLESHOOTING 18 EXERCISE GUIDELINES 19 PART LIST 22 EXPLODED DRAWING 23 ORDERING REPLACEMENT PARTS Back Cover 90 DAY FULL WARRANTY Back Cover WARNING DECAL PLACEMENT This - ProForm 10.8x Bike | English Manual - Page 3
IMPORTANT PRECAUTIONS WARNING: To reduce the risk of serious injury, read all important precautions and instructions in this manual and all warnings on your exercise bike before using your exercise bike. ICON assumes no responsibility for personal injury or property damage sustained by or through - ProForm 10.8x Bike | English Manual - Page 4
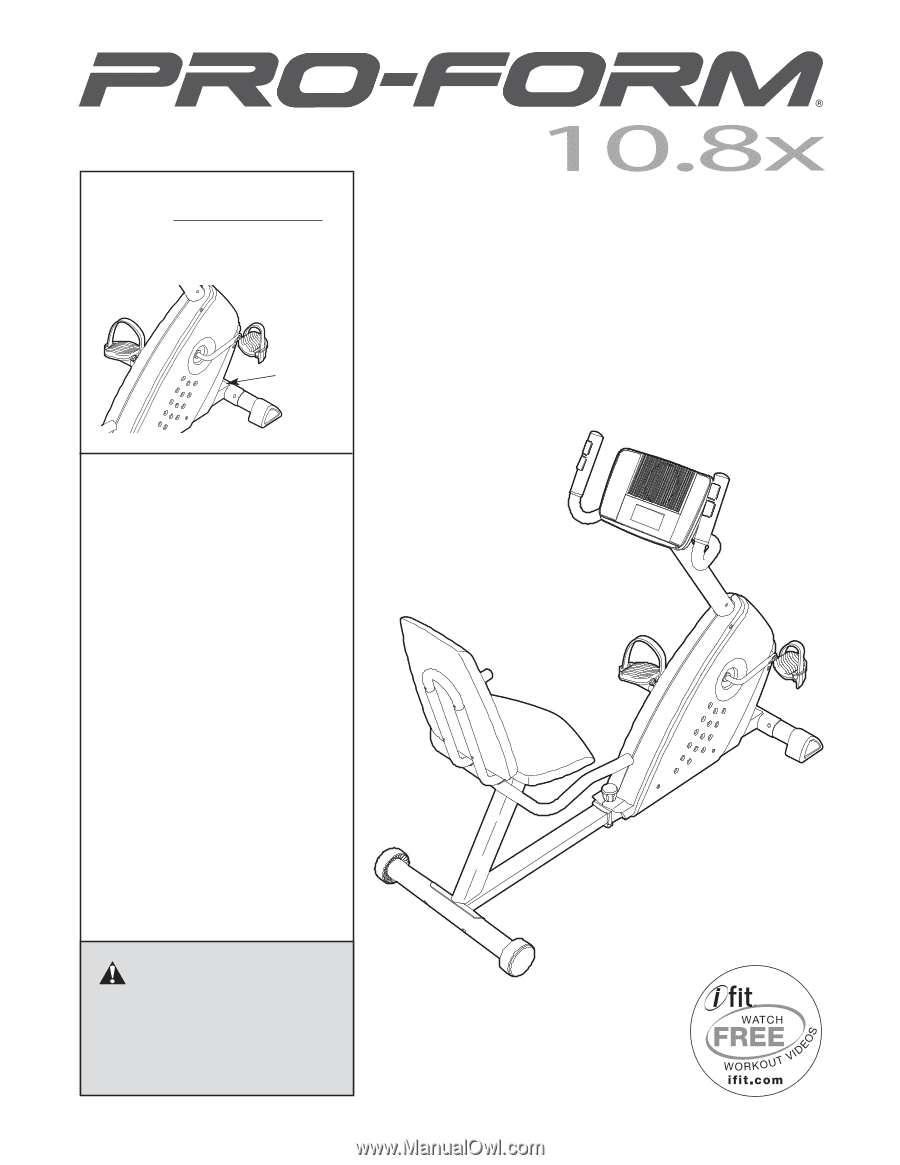
PROFORM® 10.8X exercise bike. Cycling is one of the most effective exercises for increasing cardiovascular fitness, building endurance, and toning the body. The 10.8X exercise bike the front cover of this manual. Before reading further, please familiarize yourself with the parts that are labeled in - ProForm 10.8x Bike | English Manual - Page 5
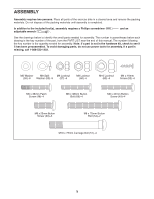
ASSEMBLY Assembly requires two persons. Place all parts of the exercise bike in a cleared area and remove the packing the key number of the part, from the PART LIST near the end of this manual. The number following the key number is the quantity needed for assembly. Note: If a part is not in the - ProForm 10.8x Bike | English Manual - Page 6
1. To make assembly easier, read the information on page 5 before you begin. While another person lifts the front of the Frame (1), attach the Front Stabilizer (3) to the Frame with two M10 x 75mm Carriage Bolts (51) and two M10 Locknuts (63). 1 51 3 1 63 2. Slide the Rear Frame (2) out of the - ProForm 10.8x Bike | English Manual - Page 7
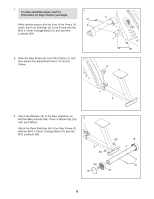
4. Attach the Seat Frame (7) to the Handlebar (6) with two M8 x 70mm Button Bolts (54), two M8 Split 4 Washers (59), and two M8 Locknuts (60). Do not tighten the Button Bolts yet. 5. Attach the Backrest (5) to the Seat Frame (7) with four M6 x 38mm Patch Screws (48) and four M6 5 Washers (55). - ProForm 10.8x Bike | English Manual - Page 8
. To purchase an optional power adapter, contact the store where you purchased this product or call the telephone number on the cover of this manual. To avoid damaging the console, use only a manufacturer-supplied power adapter. Plug one end of the power adapter into the receptacle on the console - ProForm 10.8x Bike | English Manual - Page 9
the hexagonal holes are in the indicated location. Insert the left Pulse Wire (71) into the Upright (13) and pull it upward out of the top of the Upright. Tip: Avoid pinching the wires. Slide the Left Pulse Bar (65) onto the Upright (13). Attach the Left Pulse Bar with two - ProForm 10.8x Bike | English Manual - Page 10
Upright with three M8 x 25mm Button Screws (33) and three M8 Split Washers (59). 10 33 59 13 33 59 36 8 1 Avoid pinching the Wire Harnesses (8, 36) 11 24 Tab 12. Make sure that all parts are properly tightened before you use the exercise bike. Note: Some hardware may be left over after assembly - ProForm 10.8x Bike | English Manual - Page 11
HOW TO USE THE EXERCISE BIKE HOW TO ADJUST THE SEAT After the exercise bike is assembled, adjust the Seat (12) to the proper position. As you pedal, there should be a slight bend in your knees when the pedals are - ProForm 10.8x Bike | English Manual - Page 12
and prompt you to vary your pace to keep your heart rate near a target heart rate while you exercise. To use the manual mode, see page 13. To use a smart workout, see page 15. To use a heart rate and prompt you to increase or decrease your pace while guiding you through an effective workout. 12 - ProForm 10.8x Bike | English Manual - Page 13
the console will be ready for use. 2. Select the manual mode. If you have selected a workout, reselect the manual mode by pressing a Smart Workouts button once or twice show a track representing 1/4 mile (400 meters). As you exercise, indicators will appear in succession around the track until the - ProForm 10.8x Bike | English Manual - Page 14
. Slide the thumb tab on the right side of the fan to pivot the fan to the desired angle. Thumb Tab 7. When you are finished exercising, the console will turn off automatically. If your heart rate is not shown, make sure that your hands are positioned as described. Be careful not - ProForm 10.8x Bike | English Manual - Page 15
right of the console. When you select a smart Profile workout, a pro- file of the resistance set- tings of the workout will scroll across the workout time will appear in the upper display. As you exercise, the target pace guide will help you to keep your pedaling pace near the pace - ProForm 10.8x Bike | English Manual - Page 16
. If desired, press the increase and decrease buttons in the upper left corner of the console to change the maximum target heart rate setting (see EXERCISE INTENSITY on page 19). Note: If you change the maximum target heart rate setting, the intensity level of the entire workout will change. 4. Hold - ProForm 10.8x Bike | English Manual - Page 17
target heart rate setting. Note: During the workout, you can manually override the resistance setting for the current segment, if desired, with heart rate closer to the target heart rate setting. As you exercise, the target pace guide will help you to keep your pedaling pace near the pace setting - ProForm 10.8x Bike | English Manual - Page 18
TROUBLESHOOTING Inspect and properly tighten all parts of the exercise bike regularly. Replace any worn parts immediately. To clean the exercise bike becomes dim, replace all the batteries at the same time; most console problems are the result of low batteries. To replace the batteries, see assembly - ProForm 10.8x Bike | English Manual - Page 19
, exercising at the proper intensity is the key to achieving results. You can use your heart rate as a guide to exercise-never hold your breath. Cooling Down-Finish with 5 to 10 minutes of stretching. Stretching increases the flexibility of your muscles and helps to prevent post-exercise problems - ProForm 10.8x Bike | English Manual - Page 20
SUGGESTED STRETCHES The correct form for several basic stretches is shown at the right. Move slowly as you stretch-never bounce. 1. Toe Touch Stretch Stand with your knees bent slightly - ProForm 10.8x Bike | English Manual - Page 21
NOTES 21 - ProForm 10.8x Bike | English Manual - Page 22
x 38mm Button Bolt M4 x 20mm Screw Pulse Wire Userʼs Manual Assembly Tool Note: Specifications are subject to change without notice. For information about ordering replacement parts, see the back cover of this manual. *These parts are not illustrated. If a part is missing, call 1-888-533-1333. 22 - ProForm 10.8x Bike | English Manual - Page 23
. 831.21932.0 R1110A 54 44 55 25 59 7 5 48 44 55 48 25 6 60 57 55 49 12 9 55 55 49 49 55 57 57 10 57 45 49 21 57 68 50 36 8 11 26 24 26 63 18 2 4 60 19 69 70 63 60 19 51 18 3 59 33 - ProForm 10.8x Bike | English Manual - Page 24
it, no matter who sold it! For the replacement parts, accessories, and user's manuals that you need to do-it-yourself. For Sears Service Mark of Sears Brands, LLC ® Marca Registrada / TM Marca de Fábrica / SM Marca de Servicio de Sears Brands, LLC 90 DAY FULL WARRANTY If this Sears bike exerciser
-
 1
1 -
 2
2 -
 3
3 -
 4
4 -
 5
5 -
 6
6 -
 7
7 -
8
-
9
-
10
-
11
-
12
-
13
-
14
-
15
-
16
-
17
-
18
-
19
-
20
-
21
-
22
-
23
-
24
 |
 |
Serial
Number
Decal
Model No. 831.21932.0
Serial No.
Write the serial number in the
space above for reference.
BIKE EXERCISER
Userʼs Manual
CAUTION
Read all precautions and instruc-
tions in this manual before using
this equipment. Keep this manual
for future reference.
• Assembly
• Operation
• Maintenance
• Part List and Drawing
Sears, Roebuck and Co.
Hoffman Estates, IL 60179