RCA 27F650T User Guide & Warranty - Page 25
Using the TV's Menu System
 |
UPC - 034909212196
View all RCA 27F650T manuals
Add to My Manuals
Save this manual to your list of manuals |
Page 25 highlights
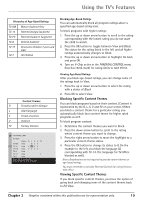
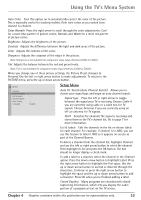
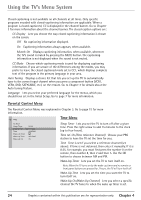
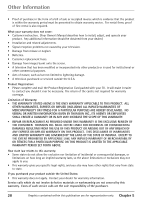
Using the TV's Menu System Auto Color Turn this option on to automatically correct the color of the picture. This is especially useful for tracking realistic flesh tone colors as you switch from channel to channel. Color Warmth Press the right arrow to scroll through the color adjustments: Cool for a more blue palette of picture colors; Normal; and Warm for a more red palette of picture colors. Brightness Adjusts the brightness of the picture. Contrast Adjusts the difference between the light and dark areas of the picture. Color Adjusts the richness of the color. Sharpness Adjusts the crispness of the edges in the picture. Note: Sharpness is not available for component video input channels (CVID2 or CVID3 ). Tint Adjusts the balance between the red and green levels. Note: Tint is not available for component video input channels (CVID2 or CVID3 ). When you change any of these picture settings, the Picture Preset changes to Personal. Use the left or right arrow button to make adjustments. To return to the PICTURE menu, press the up or down arrow button. SETUP Go Back Auto Ch. Search List & Labels Closed Caption Auto Tuning Language English . . . Setup Menu Auto Ch. Search (Auto Channel Search) Allows you to choose your signal type and begin an auto channel search. Signal Type Press the left or right arrow to toggle between the signal your TV is receiving. Choose Cable if you are currently using cable or a cable box for TV signals. Choose Antenna if you are currently using an off-air antenna for TV signals. Start Searches for channels the signal is receiving and stores them in the TV's channel list. Go to page 7 for more information. List & Labels Edit the channels in the list or choose labels for each channel. For example, if channel 12 is NBC, you can use this feature to label it NBC so it appears on-screen as part of the Channel Banner. To delete a channel from the channel list, highlight Channel and use the left or right arrow button to select the channel. Then highlight In list and press the OK button. The box should no longer display a check mark. To add a label to a channel, select the channel in the Channel option. Press the down arrow button to highlight Label. Press the right arrow button to highlight the first space. Use the up or down arrow button to ascend or descend through the characters. Continue to press the right arrow button to highlight the space and the up or down arrow button to add a character. Press OK when you're finished adding a label. Closed Caption Many programs are encoded with closedcaptioning information, which lets you display the audio portion of a program as text on the TV screen. Chapter 4 Graphics contained within this publication are for representation only. 23
-
 1
1 -
2
-
3
-
4
-
5
-
6
-
7
-
8
-
9
-
10
-
11
-
12
-
13
-
14
-
15
-
16
-
17
-
18
-
19
-
 20
20 -
 21
21 -
 22
22 -
 23
23 -
 24
24 -
 25
25 -
 26
26 -
 27
27 -
 28
28 -
 29
29 -
 30
30 -
31
-
32
-
33
-
34
-
35
-
36
-
37
-
38
-
39
-
40
-
41
-
42
-
43
-
44
-
45
-
46
-
47
-
48
-
49
-
50
-
51
-
52
-
53
-
54
-
55
-
56
-
57
-
58
-
59
-
60
-
61
-
62
-
63
-
64
 |
 |