Ricoh BP20N User Guide - Page 51
Using the Set IP (BP20N only), Installing Set IP
 |
UPC - 026649024542
View all Ricoh BP20N manuals
Add to My Manuals
Save this manual to your list of manuals |
Page 51 highlights
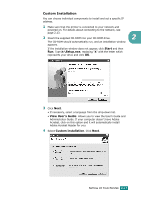
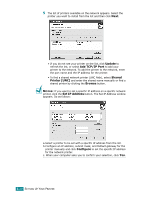
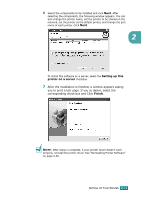
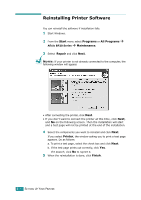
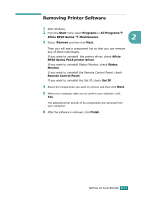
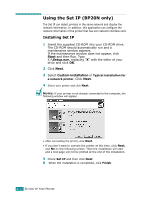
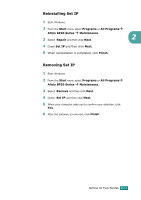
Using the Set IP (BP20N only) The Set IP can detect printers in the same network and display the network information. In addition, this application can configure the network information of the printer that has own network interface card. Installing Set IP 1 Insert the supplied CD-ROM into your CD-ROM drive. The CD-ROM should automatically run and a maintenance window appears. If the maintenance window does not appear, click Start and then Run. Type X:\Setup.exe, replacing "X" with the letter of your drive and click OK. 2 Click Next. 3 Select Custom installation or Typical installation for a network printer. Click Next. 4 Select your printer and click Next. NOTES: If your printer is not already connected to the computer, the following window will appear. • After connecting the printer, click Next. • If you don't want to connect the printer at this time, click Next, and No on the following screen. Then the installation will start and a test page will not be printed at the end of the installation. 5 Check Set IP and then click Next. 6 When the installation is completed, click Finish. 2.32 SETTING UP YOUR PRINTER
-
 1
1 -
2
-
3
-
4
-
5
-
6
-
7
-
8
-
9
-
10
-
11
-
12
-
13
-
14
-
15
-
16
-
17
-
18
-
19
-
20
-
21
-
22
-
23
-
24
-
25
-
26
-
27
-
28
-
29
-
30
-
31
-
32
-
33
-
34
-
35
-
36
-
37
-
38
-
39
-
40
-
41
-
42
-
43
-
44
-
45
-
 46
46 -
 47
47 -
 48
48 -
 49
49 -
 50
50 -
 51
51 -
 52
52 -
 53
53 -
 54
54 -
 55
55 -
 56
56 -
57
-
58
-
59
-
60
-
61
-
62
-
63
-
64
-
65
-
66
-
67
-
68
-
69
-
70
-
71
-
72
-
73
-
74
-
75
-
76
-
77
-
78
-
79
-
80
-
81
-
82
-
83
-
84
-
85
-
86
-
87
-
88
-
89
-
90
-
91
-
92
-
93
-
94
-
95
-
96
-
97
-
98
-
99
-
100
-
101
-
102
-
103
-
104
-
105
-
106
-
107
-
108
-
109
-
110
-
111
-
112
-
113
-
114
-
115
-
116
-
117
-
118
-
119
-
120
-
121
-
122
-
123
-
124
-
125
-
126
-
127
-
128
-
129
-
130
-
131
-
132
-
133
-
134
-
135
-
136
-
137
-
138
-
139
-
140
-
141
-
142
-
143
-
144
-
145
-
146
-
147
-
148
-
149
-
150
-
151
-
152
-
153
-
154
-
155
-
156
-
157
-
158
-
159
-
160
-
161
-
162
-
163
-
164
-
165
-
166
-
167
-
168
-
169
-
170
-
171
-
172
 |
 |
