Ricoh C222DN Operating Instructions - Page 97
Adjusting registration
 |
UPC - 026649060113
View all Ricoh C222DN manuals
Add to My Manuals
Save this manual to your list of manuals |
Page 97 highlights
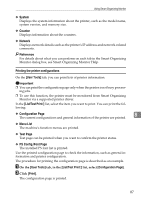
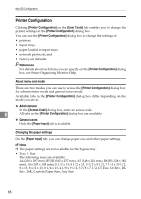
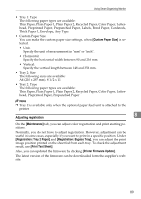
Using Smart Organizing Monitor • Tray 1: Type The following paper types are available: Thin Paper, Plain Paper 1, Plain Paper 2, Recycled Paper, Color Paper, Letterhead, Preprinted Paper, Prepunched Paper, Labels, Bond Paper, Cardstock, Thick Paper 1, Envelope, Any Type • Custom Paper Size You can make the custom paper size settings, when [Custom Paper Size] is selected. • Unit: Specify the unit of measurement in "mm" or "inch". • Horizontal: Specify the horizontal width between 90 and 216 mm. • Vertical: Specify the vertical length between 148 and 356 mm. • Tray 2: Size The following sizes are available: A4 (210 x 297 mm), 8 1/2 x 11 • Tray 2: Type The following paper types are available: Thin Paper, Plain Paper 1, Plain Paper 2, Recycled Paper, Color Paper, Letterhead, Preprinted Paper, Prepunched Paper Note ❒ Tray 2 is available only when the optional paper feed unit is attached to the printer Adjusting registration 8 On the [Maintenance] tab, you can adjust color registration and print starting positions. Normally, you do not have to adjust registration. However, adjustment can be useful in some cases, especially if you want to print in a specific position. Under [Registration: Tray 2 Paper] and [Registration: Bypass Tray], you can adjust the print image position printed on the sheet fed from each tray. To check the adjustment result, use [Print Test Sheet]. Also, you can updated the firmware by clicking [Printer Firmware Update]. The latest version of the firmware can be downloaded form the supplier's website. 89
-
 1
1 -
2
-
3
-
4
-
5
-
6
-
7
-
8
-
9
-
10
-
11
-
12
-
13
-
14
-
15
-
16
-
17
-
18
-
19
-
20
-
21
-
22
-
23
-
24
-
25
-
26
-
27
-
28
-
29
-
30
-
31
-
32
-
33
-
34
-
35
-
36
-
37
-
38
-
39
-
40
-
41
-
42
-
43
-
44
-
45
-
46
-
47
-
48
-
49
-
50
-
51
-
52
-
53
-
54
-
55
-
56
-
57
-
58
-
59
-
60
-
61
-
62
-
63
-
64
-
65
-
66
-
67
-
68
-
69
-
70
-
71
-
72
-
73
-
74
-
75
-
76
-
77
-
78
-
79
-
80
-
81
-
82
-
83
-
84
-
85
-
86
-
87
-
88
-
89
-
90
-
91
-
 92
92 -
 93
93 -
 94
94 -
 95
95 -
 96
96 -
 97
97 -
 98
98 -
 99
99 -
 100
100 -
 101
101 -
 102
102 -
103
-
104
-
105
-
106
-
107
-
108
-
109
-
110
 |
 |
