Samsung SHR-8162 User Manual - Page 18
the main board., data cables SATA Cable to connectors
 |
View all Samsung SHR-8162 manuals
Add to My Manuals
Save this manual to your list of manuals |
Page 18 highlights
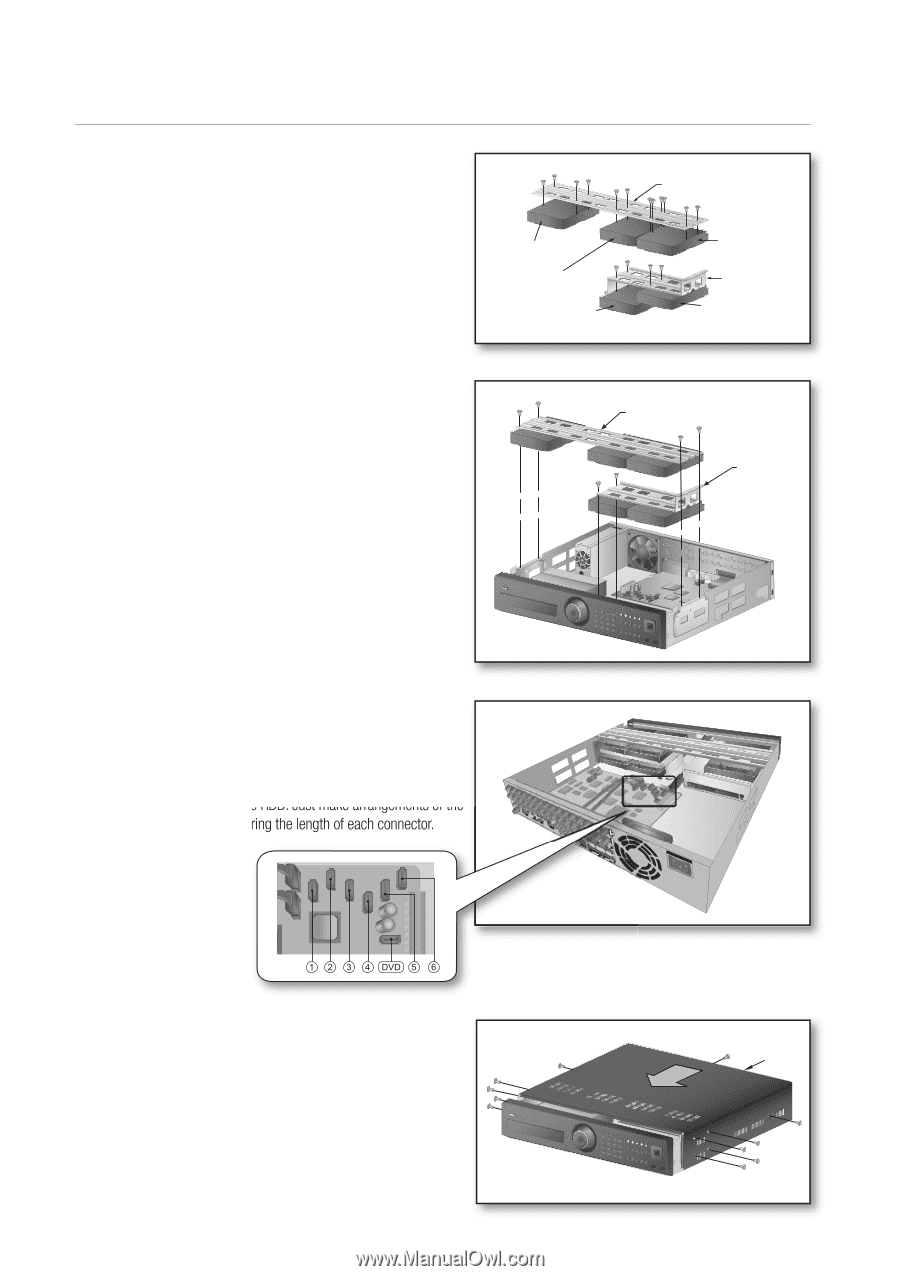
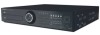
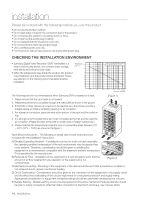
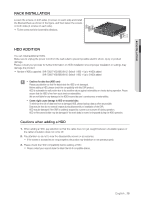
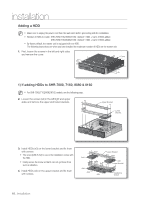
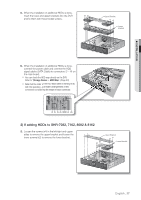
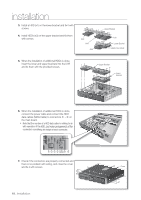
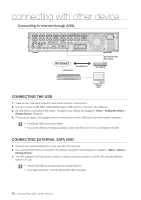
installation 3. Install a HDD (x1) on the lower bracket and fix it with screws. 4. Install HDDs (x3) on the upper bracket and fix them with screws. Add Add Add Upper Bracket Add Lower Bracket Installed by default 5. When the installation of additional HDDs is done, insert the lower and upper brackets into the DVR and fix them with the provided screws. Upper Bracket Lower Bracket 6. When the installation of additional HDDs is done, connect the power cable and connect the HDD data cables (SATA Cable) to connectors ~ on the main board. Note that the number of a HDD data calbe is nothing to do with operation of the HDD. Just make arrangements of the connectors considering the length of each connector. 7. Check if the connectors are properly connected and there is no problem with wiring, and close the cover and fix it with screws. Cover 18_ installation
-
 1
1 -
2
-
3
-
4
-
5
-
6
-
7
-
8
-
9
-
10
-
11
-
12
-
 13
13 -
 14
14 -
 15
15 -
 16
16 -
 17
17 -
 18
18 -
 19
19 -
 20
20 -
 21
21 -
 22
22 -
 23
23 -
24
-
25
-
26
-
27
-
28
-
29
-
30
-
31
-
32
-
33
-
34
-
35
-
36
-
37
-
38
-
39
-
40
-
41
-
42
-
43
-
44
-
45
-
46
-
47
-
48
-
49
-
50
-
51
-
52
-
53
-
54
-
55
-
56
-
57
-
58
-
59
-
60
-
61
-
62
-
63
-
64
-
65
-
66
-
67
-
68
-
69
-
70
-
71
-
72
-
73
-
74
-
75
-
76
-
77
-
78
-
79
-
80
-
81
-
82
-
83
-
84
-
85
-
86
-
87
-
88
-
89
-
90
-
91
-
92
-
93
-
94
-
95
-
96
-
97
-
98
-
99
-
100
-
101
-
102
-
103
-
104
-
105
-
106
-
107
-
108
-
109
-
110
-
111
-
112
-
113
-
114
-
115
-
116
-
117
-
118
-
119
-
120
 |
 |