Samsung SL-M5370LX User Manual Ver.1.0 (English)
Samsung SL-M5370LX Manual
 |
View all Samsung SL-M5370LX manuals
Add to My Manuals
Save this manual to your list of manuals |
Samsung SL-M5370LX manual content summary:
- Samsung SL-M5370LX | User Manual Ver.1.0 (English) - Page 1
User's Guide BBAASSIICC Samsung Multifunction MultiXpress M537x series M437x series This guide provides information concerning installation, basic operation and troubleshooting on Windows. ADVANCED (ADMINISTRATOR'S GUIDE) This guide provides information about installation, advanced configuration - Samsung SL-M5370LX | User Manual Ver.1.0 (English) - Page 2
by model 8 Useful to know 13 About this user's guide 14 Safety information 15 Machine overview 20 Control panel 24 Connecting 30 Understanding the pop-up keyboard 39 Installing the driver locally 40 Reinstalling the driver 43 2. Media and tray Loading originals 46 Selecting - Samsung SL-M5370LX | User Manual Ver.1.0 (English) - Page 3
management tools SyncThru™ Web Service Easy Capture Manager Samsung AnyWeb Print Easy Eco Driver Using Samsung Easy Document Creator Using Samsung Easy Printer Manager Using Samsung Printer Status Using Samsung Printer Experience Using Box 9. Troubleshooting Redistributing toner 151 153 157 166 - Samsung SL-M5370LX | User Manual Ver.1.0 (English) - Page 4
BASIC Replacing the toner cartridge 197 Replacing the imaging unit 200 Tips for avoiding paper jams 204 Clearing original document jams 205 Clearing paper jams 217 Understanding display messages 239 Power and cable connecting problems 248 Solving other problems 249 10. Consumables - Samsung SL-M5370LX | User Manual Ver.1.0 (English) - Page 5
Key benefits 6 • Features by model 8 • Useful to know 13 • About this user's guide 14 • Safety information 15 • Machine overview 20 • Control panel 24 • Turning on the machine menu 30 • Understanding the pop-up keyboard 39 • Installing the driver locally 40 • Reinstalling the - Samsung SL-M5370LX | User Manual Ver.1.0 (English) - Page 6
Key benefits Environmentally friendly Fast high resolution printing • To save toner and paper, this machine supports Eco feature (see "Eco tab" on page 75). • To save paper, you can print multiple pages on one single sheet of paper (see "Using special print features" on page 78). • To save paper, - Samsung SL-M5370LX | User Manual Ver.1.0 (English) - Page 7
you can get help, support application, machine drivers, manuals, and order information from the Samsung website, www.samsung.com > find your product > Support or Downloads. Wide range of functionality and application support • You can print in various operating systems (see "System requirements" on - Samsung SL-M5370LX | User Manual Ver.1.0 (English) - Page 8
model or country. Operating System Operating System Windows Mac Linux Unix (●: Included, Blank: Not available) M437x series M537x series Software You can install the printer driver and software when you insert the software CD into your CD-ROM drive. For windows, select the printer - Samsung SL-M5370LX | User Manual Ver.1.0 (English) - Page 9
SyncThru™ Web Service SyncThru Admin Web Service Easy Eco Driver Fax Samsung Network PC Fax Scan Twain scan driver M437x series M537x series a. Download the software from the Samsung website and install it: (http://www.samsung.com > find your product > Support or Downloads). Before - Samsung SL-M5370LX | User Manual Ver.1.0 (English) - Page 10
Features by model Variety feature Features Hi-Speed USB 2.0 Network Interface Ethernet 10/100/1000 Base TX wired LAN IEEE 1284B parallel connectora Google Cloud Print™ AirPrint Eco printing Duplex (2-sided) printing USB Drive interfaceb Optional tray (SCF) Optional tray (HCF) Finisher (1Bin) - Samsung SL-M5370LX | User Manual Ver.1.0 (English) - Page 11
Features by model Staple Document Feeder Fax Scan Features Dual Scan Document Feeder (DSDF) Automatic Document Feeder (ADF) Multi-send Delay send Duplex send Duplex receive Secure receive Send/ Receive forward - fax Send/ Receive forward - email Scanning to email Scanning to SMB server Scanning to - Samsung SL-M5370LX | User Manual Ver.1.0 (English) - Page 12
Features by model Features Copy ID card copying Reduced or enlarged copying Booklet Poster Book N-up Adjust background Image Shift Edge erase Duplex copy a. If you use the parallel port, you cannot use the USB cable. b. You can only print files stored on a USB - Samsung SL-M5370LX | User Manual Ver.1.0 (English) - Page 13
• Replace the toner cartridge (see "Replacing the toner cartridge" on page 197). Where can I download the machine's driver? • You can get help, support application, machine drivers, manuals, and order information from the Samsung website, www.samsung.com > find your product > Support or Downloads. - Samsung SL-M5370LX | User Manual Ver.1.0 (English) - Page 14
machine usage. • Do not discard this manual and keep it for future reference. • Read the safety information before using the machine. • If you have a problem using the machine, refer to the troubleshooting chapter. • Terms used in this user's guide are explained in the glossary chapter. • All - Samsung SL-M5370LX | User Manual Ver.1.0 (English) - Page 15
prevent injury to you and others, and to prevent any potential damage to your machine. Be sure to read and understand all of these instructions before using the machine. After reading this section, keep it in a safe place for future reference. 3 Important safety symbols Explanation of all icons and - Samsung SL-M5370LX | User Manual Ver.1.0 (English) - Page 16
result in electric shock or fire. If the machine does not operate properly after these instructions have been followed, unplug the machine from all interface connections and request assistance from qualified service personnel. Otherwise, this could result in electric shock or fire. If the plug does - Samsung SL-M5370LX | User Manual Ver.1.0 (English) - Page 17
specification. Otherwise, quality problems can occur and cause damage to the machine. see "General specifications" on page 282 Caution Before moving the machine, turn the power off and disconnect all cords. The information below are only suggestions based on the units - Samsung SL-M5370LX | User Manual Ver.1.0 (English) - Page 18
by yourself. It can damage the machine. Call a certified technician when the machine needs repairing. To clean and operate the machine, strictly follow the user's guide provided with the machine. Otherwise, you could damage the machine. 1. Introduction 18 - Samsung SL-M5370LX | User Manual Ver.1.0 (English) - Page 19
due to the use of recycled supplies, a service fee will be charged. For consumables that contain toner dust (toner cartridge, waste toner bottle, imaging unit, etc.) follow the instructions below. • When disposing of the supplies, follow the instructions for disposal. Refer to the reseller for - Samsung SL-M5370LX | User Manual Ver.1.0 (English) - Page 20
Power cord Software CDa Misc. accessoriesb a. The software CD contains the print drivers, user's guide, and software applications. b. Miscellaneous accessories included with your machine may vary by country of purchase and specific model. Quick installation guide Imaging unit 1. Introduction 20 - Samsung SL-M5370LX | User Manual Ver.1.0 (English) - Page 21
21 Multi-purpose tray paper width guide 6 Right door handle 14 Center tray 22 Multi-purpose tray support 7 Second cassette feeder 15 tray handlea retailer or distributor where you purchased the machine. Only authorized service providers, distributors, or retailers are permitted to install the - Samsung SL-M5370LX | User Manual Ver.1.0 (English) - Page 22
Machine overview 11 Inner view 2 1 3 1 Toner cartridges 2 Front cover door 3 Imaging unit 12 Rear view 1 2 3 FDI 4 5 6 7 8 1 Dual scan document feeder cable 2 USB port 3 USB printer port 4 FDI (Foreign Device Interface) 5 Network port 6 2Bin Finisher Port 7 Power switch 8 - Samsung SL-M5370LX | User Manual Ver.1.0 (English) - Page 23
Machine overview 13 Standard 2 Bin Finisher view(optional) 3 2 1 5 4 1 Standard 2Bin Finisher front door 2 Finishing tray 3 Top tray 4 Standard 2Bin Finisher front door handle 5 Staple 1. Introduction 23 - Samsung SL-M5370LX | User Manual Ver.1.0 (English) - Page 24
Control panel 14 Control Panel 2 3 1 4 Status LED Shows the status of your machine (see "Understanding the LEDs" on page 27). When you use the display screen, use your finger only. The screen may be damaged with a sharp pen or - Samsung SL-M5370LX | User Manual Ver.1.0 (English) - Page 25
Connecting a network cable This machine has a bulit-in network interface card. You can connect your machine to a network using a network cable. 1. Introduction 25 - Samsung SL-M5370LX | User Manual Ver.1.0 (English) - Page 26
. Doing so may give you an electric shock. • If you turn the machine off directly using the power switch, it could cause the hard disk problem in the machine. 3 1 2 You can also turn the machine on pressing the (Power/Wakeup) 1. Introduction 26 - Samsung SL-M5370LX | User Manual Ver.1.0 (English) - Page 27
its instructions from the troubleshooting part (see "Troubleshooting" on page 193). • You also can resolve the error with the guideline from the computers' Samsung Printer Status program window (see "Using Samsung Printer Status" on page 181). • If the problem persists, call a service representative - Samsung SL-M5370LX | User Manual Ver.1.0 (English) - Page 28
. Check the display message (see "Understanding display messages" on page 239). When the problem is cleared, the machine resumes its original task. • The toner cartridge lifea or imaging unit is near the end of its life. Order a new toner cartridge or imaging unit. You can temporarily improve print - Samsung SL-M5370LX | User Manual Ver.1.0 (English) - Page 29
or any screen is pressed, it switches to on-line automatically. Check the message on the display screen. Follow the instructions in the message or refer to the troubleshooting chapter (see "Understanding display messages" on page 239). If the problem persists, call for service. 1. Introduction 29 - Samsung SL-M5370LX | User Manual Ver.1.0 (English) - Page 30
both menus and widgets. Access features by scrolling through the available onscreen menus. Manual terms Tap Lightly touch the screen and release your finger. For example: • (Recent): Show recently used apps. • Quick launch: A customizable key. See the next section for options. 1. Introduction 30 - Samsung SL-M5370LX | User Manual Ver.1.0 (English) - Page 31
instant access to information and applications. You can open the default page at any time by tapping the icon . The screen images in this user guide may differ from your machine depending on its options or model. • Applications ( ): Open a screen showing all apps. • Search ( ): Open the search - Samsung SL-M5370LX | User Manual Ver.1.0 (English) - Page 32
Display screen and useful menu Navigating the application menus By default, this machine has several application menus available in the main home screen. If you want to access all application menus and widgets, tap the icon and swipe the screen left or right. As you add applications, the number of - Samsung SL-M5370LX | User Manual Ver.1.0 (English) - Page 33
Display screen and useful menu Adding a shortcut from the Apps menu 1 Tap the icon to go to the main home screen. 2 Tap the icon to view your current applications. 3 Scroll through the list and locate the desired application. 4 Touch and hold the application icon. This creates a shortcut to - Samsung SL-M5370LX | User Manual Ver.1.0 (English) - Page 34
Screen. To use this feature, you may need to log-in as an administrator (see"Log-in" on page 313). • Home and Login Screen : Set the wallpaper for and images in the machine's gallery. • Live wallpapers: Select an animated image. • Wallpapers: Select from several built-in stationary images. 4 - Samsung SL-M5370LX | User Manual Ver.1.0 (English) - Page 35
a pull-down list to show information about currently running processes, toner status, screen brightness, and recent notifications. 21 Job Status When print, You need to enter the ID and Password set in the printer driver set in the printer (see "Print Mode" on page 76). For secured fax, you need to - Samsung SL-M5370LX | User Manual Ver.1.0 (English) - Page 36
. Open the Web browser from your networked computer and type the IP address of your machine. When SyncThru™ Web Service opens, click Information tab > Usage Counters (see "Counter" on page 36). Print My Program All Period From, To Description Open the quick menu. Search for a desired menu or - Samsung SL-M5370LX | User Manual Ver.1.0 (English) - Page 37
any option you want to know about. (quick menu) and then To use the USB feature, tap Box > USB on the home screen or Apps (see "Using a USB Drive device" on page 275). To use this feature, you need to insert a USB memory device into the USB port on your machine - Samsung SL-M5370LX | User Manual Ver.1.0 (English) - Page 38
menu To use this feature, tap My Page on the home screen or Apps. Button Name Change Password Profile Image Description Allows you to change the password. Allows you to choose an image for your profile. Command keys Button Name Quick Menu Description Open the quick menu. Search Search for - Samsung SL-M5370LX | User Manual Ver.1.0 (English) - Page 39
Understanding the pop-up keyboard You can enter letters, numbers, or special symbols using the pop-up keyboard on the display screen. This keyboard uses the standard QWERTY layout for ease of use. When you touch an input area, the keyboard pops up on the screen. The keyboard initially shows - Samsung SL-M5370LX | User Manual Ver.1.0 (English) - Page 40
driver (see "Installing driver over the network" on page 345). • The installation window in this User's Guide 5 Follow the instructions in the installation manually download the V4 driver from Samsung website, www.samsung.com > find your product > Support or downloads. • You can download Samsung - Samsung SL-M5370LX | User Manual Ver.1.0 (English) - Page 41
is not installed. If you want to use the V4 driver in the Desktop screen, you can download from the Samsung website, www.samsung.com >find your product > Support or downloads. • If you want to install Samsung's printer management tools, you need to install them using the supplied software CD. 27 - Samsung SL-M5370LX | User Manual Ver.1.0 (English) - Page 42
, click Close. 28 Linux You need to download Linux software packages from the Samsung website to install the printer software (http://www.samsung.com > find your product > Support or Downloads). Installing the Unified Linux Driver 3 Open Terminal program and go to the folder that you copied the - Samsung SL-M5370LX | User Manual Ver.1.0 (English) - Page 43
or All Programs > Samsung Printers > Uninstall Samsung Printer Software. • For Windows 8, 1 From Charms, select Search > Apps. 2 Search and click Control Panel. 3 Click Programs and Features. 4 Right-click the driver you want to uninstall and select Uninstall. 5 Follow the instructions in the window - Samsung SL-M5370LX | User Manual Ver.1.0 (English) - Page 44
30 Mac 31 Linux If the printer driver does not work properly, uninstall the driver and reinstall it. If the printer driver does not work properly, uninstall the driver and reinstall it. 1 Open the Applications folder > Samsung > Printer Software Uninstaller. 2 To uninstall printer software - Samsung SL-M5370LX | User Manual Ver.1.0 (English) - Page 45
2. Media and tray This chapter provides information on how to load originals and print media into your machine. This chapter includes: • Loading originals 46 • Selecting print media 50 • Loading paper in the tray 51 • Printing on special media 58 • Setting the paper size and type 63 • - Samsung SL-M5370LX | User Manual Ver.1.0 (English) - Page 46
DSDF, the machine gives it priority over the original on the scanner glass. To get the best scan quality, especially for colored or gray-scaled images, use the scanner glass. Preparing originals • Do not load paper larger than 216 x 356 mm (8.5 x 14 inches). • Make sure any glue, ink, or correction - Samsung SL-M5370LX | User Manual Ver.1.0 (English) - Page 47
2 Place the original face down on the scanner glass and align it with the registration guide at the top left corner of the glass. • Leaving the DSDF open while copying may affect copy quality and toner consumption. • Dust on the scanner glass may cause black spots on the printout. Always keep - Samsung SL-M5370LX | User Manual Ver.1.0 (English) - Page 48
Loading originals 2 In the Dual scan document feeder (DSDF) 1 Flex or fan the edge of the paper stack to separate the pages before loading originals. Preparing originals • Do not load paper smaller than 105 x 148 (4.13 x 5.85 inches) or larger than 216 x 356 mm (8.5 x 14 inches). • Do not attempt - Samsung SL-M5370LX | User Manual Ver.1.0 (English) - Page 49
Loading originals 3 Adjust the document width guides to the paper size. Dust on the DSDF glass may cause black lines on the printout. Always keep the glass clean. 2. Media and tray 49 - Samsung SL-M5370LX | User Manual Ver.1.0 (English) - Page 50
may meet all of the guidelines in this user's guide and still not produce satisfactory results. This may be the problems or require repairs. Such repairs are not covered by Samsung's warranty or service agreements. • The amount of paper put into the tray may differ according to media type used (see - Samsung SL-M5370LX | User Manual Ver.1.0 (English) - Page 51
of 520 sheets of plain paper. You can purchase an optional tray (see "Available accessories" on page 269). 1 Pull out the tray. • guide provided with it. Using photographic paper or coated paper may cause problems, that require repairs. Such repairs are not covered by the warranty or service - Samsung SL-M5370LX | User Manual Ver.1.0 (English) - Page 52
Loading paper in the tray 2 Squeeze the paper width guide, and pull it to the end of the tray. 3 Squeeze the paper length guide, and pull it to the end of the tray. 1 2 1 Paper width guide 1 2 1 Paper length guide 4 Flex and fan the edge of the paper stack to separate the pages before loading - Samsung SL-M5370LX | User Manual Ver.1.0 (English) - Page 53
Loading paper in the tray 5 Load paper. 6 Adjust the paper width guide to the desired paper width. 1 2 2. Media and tray 53 - Samsung SL-M5370LX | User Manual Ver.1.0 (English) - Page 54
7 After inserting paper into the tray, squeeze the paper width guides and slide them to the desired paper size marked at the bottom sure that the paper is below the maximum paper capacity guide inside the tray. 1 • Do not push the paper guide too far causing the media to wrap. • If you do not - Samsung SL-M5370LX | User Manual Ver.1.0 (English) - Page 55
-purpose tray" on page 55). • Always load only the specified print media to avoid paper jams and print quality problems (see "Print media specifications" on page 284). • Flatten any curl on postcards, envelopes, and labels before loading them into the multi-purpose tray. 1 Open the multi- - Samsung SL-M5370LX | User Manual Ver.1.0 (English) - Page 56
in the tray 3 Load the paper. 4 Squeeze the multi-purpose tray paper width guides and adjust them to the width of the paper. Do not force too much, you print a document, set the paper type and size for the multipurpose tray. • See "Setting the paper size and type" on page 63. 2. Media and tray 56 - Samsung SL-M5370LX | User Manual Ver.1.0 (English) - Page 57
Loading paper in the tray 6 Media sizes automatically detected This machine can automatically detect various sized-paper. Refer to the table below. Sizea Letter Legal Oficio Folio A4 ISO B5 JIS B5 Statement Executive A5 A6 Standard tray/ Second Cassette Feederb/High Capacity Feederb ● Multi- - Samsung SL-M5370LX | User Manual Ver.1.0 (English) - Page 58
driver should match to print without a paper mismatch error. To change the paper setting set in the machine, from SyncThru™ Web Service click Settings tab > Machine Settings > System > Input Tray (see ● ● ● ● ● ● ● (●: Supported, Blank: Not supported) The media types are shown in the Printing - Samsung SL-M5370LX | User Manual Ver.1.0 (English) - Page 59
's fusing temperature about 170 °C (338 °F) for 0.1 second. The extra flaps and strips might cause wrinkling, creasing, or jams, and may even damage the fuser. • For the best print quality, position margins no closer than 15 mm (0.6 inches) from the edges of the envelope. • Avoid printing over the - Samsung SL-M5370LX | User Manual Ver.1.0 (English) - Page 60
Printing on special media 8 Labels Load the paper with the side to be printed on facing down. To avoid damaging the machine, use only labels designed for use in laser machines. - Condition: Do not use labels with wrinkles, bubbles, or other indications of separation. • Make sure that there is no - Samsung SL-M5370LX | User Manual Ver.1.0 (English) - Page 61
Printing on special media 9 Card stock/ Custom-sized paper 10 Letterhead/Preprinted paper Tray Tray 1, 2, 3, 4 Single-sided Face up double-sided Face down • Do not print on media smaller than 98 mm (3.8 inches) wide or 148 mm (5.8 inches) long. • In the software application, set margins to at - Samsung SL-M5370LX | User Manual Ver.1.0 (English) - Page 62
Printing on special media • Preprinted paper ink must be non-flammable and should not adversely affect machine rollers. • Forms should be sealed in a moisture-proof wrapping to prevent changes during storage. • Before you load preprinted paper, verify that the ink used is compatible with Laser - Samsung SL-M5370LX | User Manual Ver.1.0 (English) - Page 63
Setting the paper size and type The paper setting in the machine and driver should match to print without a paper mismatch error. To change the paper setting set in the machine, from the Samsung Easy Printer Manager select (Switch to advanced mode) > Device Settings. Or, you can set it from the - Samsung SL-M5370LX | User Manual Ver.1.0 (English) - Page 64
letter sized paper is not available in the tray, this machine substitutes A4 for the requested paper. When the paper is substituted, some image loss may occur. • Tray Confirmation Message: When you load paper into a tray, you can set the confirmation message to appear automatically. This machine - Samsung SL-M5370LX | User Manual Ver.1.0 (English) - Page 65
copy jobs on the display screen. Tap Copy > Finishing > Multi Bin (see "Finishing" on page 105). 13 Selecting an output location in printing mode 1 jobs from your computer. Tap Output Tray Options in the Finishing tab (see "Output options" on page 74). 14 Selecting an output location in faxing - Samsung SL-M5370LX | User Manual Ver.1.0 (English) - Page 66
3. Printing This chapter explains common printing tasks. This chapter includes: • Basic printing 68 • Opening printing preferences 70 • Setting Device Options 91 • Using special print features 78 • Using Direct Printing Utility 86 • Changing the default print settings 88 • Setting your - Samsung SL-M5370LX | User Manual Ver.1.0 (English) - Page 67
PostScript driver is recommended for best print image quality from PostScript-based applications such as Acrobat Reader®, Adobe Illustrator®, Adobe Photoshop®, etc. b. Download the software from the Samsung website and install it: (http://www.samsung.com > find your product > Support or Downloads - Samsung SL-M5370LX | User Manual Ver.1.0 (English) - Page 68
selected within the Print window. To take advantage of the printer features provided by your printer driver, click Properties or Preferences in the application's Print window to change the print setting (see "Opening printing preferences" on page 70). 4 To start the print job, click OK or Print in - Samsung SL-M5370LX | User Manual Ver.1.0 (English) - Page 69
by simply double-clicking the machine icon ( ) in the Windows task bar. • You can cancel the print job with the Cancel Print from the computers' Samsung Printer Status program window (see "Using Samsung Printer Status" on page 181). 3. Printing 69 - Samsung SL-M5370LX | User Manual Ver.1.0 (English) - Page 70
The screenshot may differ depending on model. • You can apply Eco features to save paper and toner before printing (see "Easy Eco Driver" on page 176). • You can check the machine's current status pressing the Printer Status button (see "Using Samsung Printer Status" on page 181). 3. Printing 70 - Samsung SL-M5370LX | User Manual Ver.1.0 (English) - Page 71
you to print a page on one side of a paper. • Multiple Pages Per Side: See "Printing multiple pages on one sheet of paper" on page 78. • Poster Printing: See "Printing posters" on page 79. • Booklet Printing: See "Printing booklets" on page 79. • Page Border: This option allows you to print your - Samsung SL-M5370LX | User Manual Ver.1.0 (English) - Page 72
appear larger or smaller on the printed page by typing in a percentage you want (see "Change the size by percentage of your document" on page 81). • Source: option is available only when you use the PCL printer driver. This option allows you to choose the number of copies to be printed. - Samsung SL-M5370LX | User Manual Ver.1.0 (English) - Page 73
to adjust the print quality for your specific printing needs. Toner Save The Toner Save setting allows the user to save printing toner when printing a draft version of a document. Select Off specify the tray where to output the printed documents (see "Tray setting" on page 46). 3. Printing 73 - Samsung SL-M5370LX | User Manual Ver.1.0 (English) - Page 74
you use the PCL printer driver. • Skip Blank Pages: This option allows you to specify not to print blank pages in the original data. • Manual Margin: This option allows panel or SyncThru™ Web Service. For the detailed information about them (see "SyncThru™ Web Service" on page 167). 3. Printing 74 - Samsung SL-M5370LX | User Manual Ver.1.0 (English) - Page 75
friendly printing. When you select Eco Printing, you can see the eco image ( ) on some options. Also, some options setting, while the Eco Options in the printer driver is disabled. If you need to change the Samsung tab Use the Samsung tab to display the copyright and the version number of the driver - Samsung SL-M5370LX | User Manual Ver.1.0 (English) - Page 76
used for printing confidential documents. You need to enter a password to print it (see "Job Status" on page 35). • Store: This mode is used only for storing on each preferences tab except for the Favorites tab and Samsung tab, allows you to save the current preferences for future use. To - Samsung SL-M5370LX | User Manual Ver.1.0 (English) - Page 77
press F1 on your keyboard. 3 Click Save. 4 Enter name and description, and then select the desired icon. 5 Click OK. When you save Favorites, all current driver settings are saved. To use a saved setting, select it in the Favorites tab. The machine is now set to print according to the settings you - Samsung SL-M5370LX | User Manual Ver.1.0 (English) - Page 78
you specify. You can print up to 16 pages on one sheet. 1 To change the print settings from your software application, access Printing Preferences (see "Opening printing preferences" on page 70). 2 Click the Basic tab, select Multiple Pages per Side in the Type dropdown list. 3 Select Page Border to - Samsung SL-M5370LX | User Manual Ver.1.0 (English) - Page 79
paper can be folded in half after printing to produce a booklet. 1 To change the print settings from your software application, access Printing Preferences (see "Opening printing preferences" on page 70). 2 Click the Basic tab, select Poster Printing in the Type drop-down list. 3 Select the page - Samsung SL-M5370LX | User Manual Ver.1.0 (English) - Page 80
the machine. This option is available only when you use the PCL printer driver. • None: Disables this feature. • Long Edge: This option is To change the print settings from your software application, access Printing Preferences (see "Opening printing preferences" on page 70). 2 Click the Basic tab. - Samsung SL-M5370LX | User Manual Ver.1.0 (English) - Page 81
Type. 6 Click OK or Print until you exit the Print window. 1 To change the print settings from your software application, access Printing Preferences (see "Opening printing preferences" on page 70). 2 Click the Paper tab. 3 Select actual paper size of the originals from the Original Size. 4 Select - Samsung SL-M5370LX | User Manual Ver.1.0 (English) - Page 82
on page 70). 2 Click the Advanced tab, and select the desired watermark from the Watermark drop-down list. You will see the selected watermark in the Triple Cassette Feeder image. 3 Click OK or Print until you exit the print window. There are several predefined watermarks that come with the machine - Samsung SL-M5370LX | User Manual Ver.1.0 (English) - Page 83
Print until you exit the Print window. Deleting a watermark 1 To change the print settings from your software application, access Printing Preferences (see "Opening printing preferences" on page 70). 2 Click the Advanced tab, select Edit... from the Watermark drop-down list. 3 Select the watermark - Samsung SL-M5370LX | User Manual Ver.1.0 (English) - Page 84
you use the PCL printer driver. What is an overlay? An overlay is text and/or images stored on the computer image for use in a new page overlay. Position the items exactly as you wish them to appear when printed as an overlay. 2 To save the document as an overlay, access Printing Preferences (see - Samsung SL-M5370LX | User Manual Ver.1.0 (English) - Page 85
with a document: 1 Create or open the document you want to print. 2 To change the print settings from your software application, access Printing Preferences (see "Opening printing preferences" on page 70). 3 Click the Advanced tab. 4 Select the Print Overlay from the Overlay drop-down list. 5 If the - Samsung SL-M5370LX | User Manual Ver.1.0 (English) - Page 86
the Windows spooler using the port of the printer driver. It only supports PDF format. To install this program: Download the software from the Samsung website then unpack and install it: (http://www.samsung.com > find your product > Support or Downloads). There are several ways you can print - Samsung SL-M5370LX | User Manual Ver.1.0 (English) - Page 87
Using Direct Printing Utility 23 Using the right-click menu 1 Right-click on the PDF file you wish to print and select Direct Printing. The Direct Printing Utility window appears with the PDF file is added. 2 Select the machine you wish to use. 3 Customize the machine settings for your needs. 4 - Samsung SL-M5370LX | User Manual Ver.1.0 (English) - Page 88
Change all print settings available in the software application first, and change any remaining settings using the printer driver. 1 Click the Windows Start menu. • For Windows 8, from the Charms, select Search > Settings. 2 For Windows XP/Server 2003, select Printer and Faxes. • For Windows Server - Samsung SL-M5370LX | User Manual Ver.1.0 (English) - Page 89
machine and select Set as Default Printer. For Windows 7 or Windows Server 2008 R2, if Set as default printer has a ►, you can select other printer drivers connected to the selected printer. 3. Printing 89 - Samsung SL-M5370LX | User Manual Ver.1.0 (English) - Page 90
Print Settings in Machine You can set print related settings. When there is no specific input for printing options, the machine prints with the settings you set here. Set the frequently used printing settings. This feature can be useful if your company has a specific printing form. Tab Settings > - Samsung SL-M5370LX | User Manual Ver.1.0 (English) - Page 91
tray, memory, etc, this machine automatically detects and sets the optional devices. If you cannot use the optional devices you installed in this driver, you can set the optional devices in Device Options. 1 Click the Windows Start menu. • For Windows 8, from the Charms, select Search > Settings - Samsung SL-M5370LX | User Manual Ver.1.0 (English) - Page 92
Setting Device Options If you want to encrypt job accounting password, check Job Accounting Password Encryption. • Custom Paper Size Settings: You can specify custom paper size. 7 Click OK until you exit the Properties or Printer properties window. 3. Printing 92 - Samsung SL-M5370LX | User Manual Ver.1.0 (English) - Page 93
Printing to a file (PRN) You will sometimes need to save the print data as a file. To create a file: 1 Check the Print to file box at the Print window. If you type in only the file name, the file is automatically saved in My Documents, Documents and Settings or Users. The saved folder may differ, - Samsung SL-M5370LX | User Manual Ver.1.0 (English) - Page 94
depending on models or options. It means that the features are not supported. This section explains how to print using a Mac. 26 Printing to the following. When you print with a Mac, you need to check the printer driver setting in each application you use. Follow the steps below to print from a Mac - Samsung SL-M5370LX | User Manual Ver.1.0 (English) - Page 95
on the topic you want to know about. A pop-up window appears with information about that option's feature, which is provided from the driver. 1 From your Mac application, select Print from the File menu. 2 Select Layout from the drop-down list under Orientation. 3 Select a binding orientation from - Samsung SL-M5370LX | User Manual Ver.1.0 (English) - Page 96
It means that the features are not supported. 31 Printing from applications There are . Click Apply. 8 Click Print. Automatic/manual duplex printing may not be available depending on printing. 32 Printing files You can print text, image, pdf files on your machine using the standard CUPS, directly - Samsung SL-M5370LX | User Manual Ver.1.0 (English) - Page 97
Linux printing 33 Configuring printer properties You can change the default printing options or connection type with a printing utility supplied by O/S. 1 Launch Printing utility(Go to System > Administration > Printing menu or execute "system-config-printer" command in Terminal program). 2 Select - Samsung SL-M5370LX | User Manual Ver.1.0 (English) - Page 98
not supported. 34 Proceeding the print job After installing the printer, choose any of the image, text printer driver, press Properties. 35 Changing the machine settings The UNIX printer driver Print sides of paper to save paper. Automatic/manual duplex printing may not be available depending on - Samsung SL-M5370LX | User Manual Ver.1.0 (English) - Page 99
and depend on the PPD file. In this tab, you can change the brightness, resolution, or image position of your document. Text tab Set the character margin, line space, or the columns of depend on the page size selected. • Unit: Change the units to points, inches, or centimeters. 3. Printing 99 - Samsung SL-M5370LX | User Manual Ver.1.0 (English) - Page 100
4. Copying This chapter gives you step-by-step instructions for copying documents. This chapter includes: • Understanding the copy screen 101 • Basic copy 110 • Using the Quick Copy menu 111 • ID card copying 112 - Samsung SL-M5370LX | User Manual Ver.1.0 (English) - Page 101
Understanding the copy screen When you tap Copy from the home screen or Apps , the Copy screen appears. This screen has several tabs and many copying options. All the options are grouped by feature so you can configure your selections easily. If want to go home, tap the home( ) button. (Help) app - Samsung SL-M5370LX | User Manual Ver.1.0 (English) - Page 102
tab Button Name Description Preview for Scans for job. play Preview edit This button appears to edit when scanning. mode Adjust the prescanned image with operation functions such as rotate and crop. Start Some features are not available to preview edit mode. Starts a job. Preview Display - Samsung SL-M5370LX | User Manual Ver.1.0 (English) - Page 103
few or no images. • Text/Photo : Use if the original is a mix of text and images. • Photo : Use if the original is mostly or exclusively images. Sub menu ( for copying originals with important information on both sides, such as driver's licenses. • Save to Box: Allows you to save scanned originals - Samsung SL-M5370LX | User Manual Ver.1.0 (English) - Page 104
additional sections. Paper Source The paper source option sets the tray for this print job. The machine prints the scanned image on the paper in the selected tray. You can see icons that represent paper sizes and the amount of paper remaining in each tray. Duplex You can set the machine to - Samsung SL-M5370LX | User Manual Ver.1.0 (English) - Page 105
paper size of the originals. • Auto: Automatically detect the size of original (see "Media sizes automatically detected" on page 57). • Mixed Size: If the original set the orientation of the original. • Upright Images: Use this setting for an original document loaded with the top toward the back of - Samsung SL-M5370LX | User Manual Ver.1.0 (English) - Page 106
then folded to produce a booklet with all pages in the correct sequence. The machine will also reduce and correctly adjust the position of each image to fit on the selected paper. • Off: Disables this feature. • 1 Sided Originals: Copy one side of the original to one sheet of a booklet. • 2 Sided - Samsung SL-M5370LX | User Manual Ver.1.0 (English) - Page 107
selected based on size of the original, the size of output page, and the reduce/enlarge percentage by up to 100 %. • Manual Repeat: Manually select the number of images from 2, 4, 6, 8, 9 or 16. Watermark The watermark option allows you to print text over an existing document. For example, you use - Samsung SL-M5370LX | User Manual Ver.1.0 (English) - Page 108
Text Size, Opacity or Position of the stamp. Overlay An overlay is text and/or images stored on a computer hard drive (HDD) in a special file format that can the default paper tray to use. Image Adjustment This option allows you to manually adjust the image Darkness, Sharpness, Contrast and Negative - Samsung SL-M5370LX | User Manual Ver.1.0 (English) - Page 109
This feature is useful when scanning originals that have turned yellow from age or originals with a dark background. • Backside Image: Allows you to erase any text or images that show through from the other side of the original. You can use this feature to ensure that your scanned output is clearly - Samsung SL-M5370LX | User Manual Ver.1.0 (English) - Page 110
screen or Apps. 2 Place the originals face up in the DSDF or place a single original face down on the scanner glass and close the DSDF (see "Loading originals" on page 46). 3 Adjust the settings on the Copy tab and More tab. 4 Enter the number of copies desired on the numeric keypad - Samsung SL-M5370LX | User Manual Ver.1.0 (English) - Page 111
. 2 Place the originals face up in the DSDF or place a single original face down on the scanner glass and close the DSDF (see "Loading originals" on page 46). 3 Adjust the settings (Paper Source, Reduce/Enlarge, Original Orientation, Darkness, Duplex, N-UP, Multi Bina, Collation, Staplea). 4 Enter - Samsung SL-M5370LX | User Manual Ver.1.0 (English) - Page 112
Apps. 2 If necessary, adjust the settings for each copy such as Print Layout, Original Size, Paper Source, Adjust to Paper Size, and Align. Follow the instructions on the control panel. 4 Tap . Your machine begins scanning the front side. 4. Copying 112 - Samsung SL-M5370LX | User Manual Ver.1.0 (English) - Page 113
ID card copying 5 Turn the original over and place it on the scanner glass where arrows indicate as shown. Then, close the scanner lid. 6 Tap . Your machine begins scanning the back side. • If you do not press the button, only the front side will be copied. • If the original is larger than - Samsung SL-M5370LX | User Manual Ver.1.0 (English) - Page 114
can be stored on your computer. This chapter includes: • Understanding the Scan & Send screen 115 • Basic scan 123 • Scanning with TWAIN-enabled software 124 • Using Samsung Easy Document Creator 125 • Mac scanning 127 • Linux scanning 129 - Samsung SL-M5370LX | User Manual Ver.1.0 (English) - Page 115
Understanding the Scan & Send screen This section describes all scanning and fax functions. When you tap Send from the home screen or Apps, the Send screen appears. This screen has two tabs and many options. All options are grouped by feature so that you can configure the job easily. If want to go - Samsung SL-M5370LX | User Manual Ver.1.0 (English) - Page 116
, the destination configured in their My Page profile appears. You can set the destination in the Send to Destination menu of the My Page app (see "My Page" on page 37). Administrators can also set the default destination in the sub menu (Action overflow) > Send Settings > + Me Setting. You must log - Samsung SL-M5370LX | User Manual Ver.1.0 (English) - Page 117
. Preview for Shows the job preview. status Preview for Scans for job. play : This button appears to edit when scanning. Adjust the prescanned image with operation functions such as rotate and crop. Start Starts a job. Adjusting the brightness You can adjust the brightness level of a copy if - Samsung SL-M5370LX | User Manual Ver.1.0 (English) - Page 118
a document and send it to a destination. The scanned document is sent as an image file. Tap this option in the sub menu (action overflow menu) to scan and If the report contains characters or fonts that the machine does not support, then Unknown may appear in the report instead of the characters - Samsung SL-M5370LX | User Manual Ver.1.0 (English) - Page 119
menu appears whenever the machine is processing a job. • Detail : Tap this button to see the status, type, and time of the job. • Preview Area : Allows you to see a preview of the document being copied. The image in the preview area indicates the current send settings, such as the orientation and - Samsung SL-M5370LX | User Manual Ver.1.0 (English) - Page 120
Super Fine resolution. - Ultra Fine: Recommended for originals containing extremely fine details. This option is only available if the receiving machine also supports Ultra Fine resolution. Book Scan Use this feature to scan a book. If the book is too thick, lift the DADF until its hinges are - Samsung SL-M5370LX | User Manual Ver.1.0 (English) - Page 121
Use if the original is a mix of text and images. • Photo: Use if the original is mostly or exclusively images. Original Size Use this option to set the actual paper size of the originals. • Auto: Automatically detect the size of original (see "Media sizes automatically detected" on page 57). • Mixed - Samsung SL-M5370LX | User Manual Ver.1.0 (English) - Page 122
other side of the original. You can use this feature to ensure that your scanned output is clearly legible. Image Adjustment This option allows you to manually adjust the image Darkness, Sharpness and Contrast. • Darkness: Allows you to adjust the darkness of the scanned output file. This feature - Samsung SL-M5370LX | User Manual Ver.1.0 (English) - Page 123
screen or Apps. 2 Place the originals face up in the DSDF or place a single original face down on the scanner glass and close the DSDF (see "Loading originals" on page 46). 3 Adjust the settings in the Send tab and More tab. 4 Select a destination using (Add Destination), + Me, Email, SMB, FTP, Box - Samsung SL-M5370LX | User Manual Ver.1.0 (English) - Page 124
and powered on. 2 Place the originals face up in the DSDF or place a single original face down on the scanner glass and close the DSDF (see "Loading originals" on page 46). 3 Open an application, such as Adobe Photoshop. 4 Open the TWAIN window and set the scan options. 5 Scan and save your - Samsung SL-M5370LX | User Manual Ver.1.0 (English) - Page 125
. • SNS Upload: Use to quickly and easily upload scanned images or existing images to a variety of social networking sites (SNS). • E-Book feeder (see "Loading originals" on page 46). 2 From the Windows Start menu, click Programs or All Programs. 3 Click Samsung Printers, and run Samsung Easy - Samsung SL-M5370LX | User Manual Ver.1.0 (English) - Page 126
Using Samsung Easy Document Creator 9 Click Save (to save the scanned image), Send (to email the scanned image), or Share (to upload the scanned image). If there is room on the scanning glass, you can scan more than one item at a time. Use the tool to define multiple selection areas. 5. - Samsung SL-M5370LX | User Manual Ver.1.0 (English) - Page 127
face up into the document feeder (see "Loading originals" on page 46). 3 Start Applications and click Image Capture. If No Image Capture device connected message appears, disconnect the USB cable and reconnect it. If the problem continues, refer to the Image Capture's help. 4 Select the option you - Samsung SL-M5370LX | User Manual Ver.1.0 (English) - Page 128
version. • For more information, refer to the Image Capture's help. • You can also scan using TWAIN-compliant software, such as Adobe Photoshop. • You can scan using Samsung Scan Assistant software. Open the Applications folder > Samsung folder > Samsung Scan Assistant. 5. Scan & Send (Scanning) 128 - Samsung SL-M5370LX | User Manual Ver.1.0 (English) - Page 129
is connected to your computer and powered on. 2 Launch a scan application such as xsane or simple-scan(If it's not installed, please install it manually to use scan features. For example, you may use "yum install xsane" for rpm package systems and "apt-get install xsane" for deb package systems - Samsung SL-M5370LX | User Manual Ver.1.0 (English) - Page 130
6. Scan & Send (Faxing) This guide gives you information about using your machine as a fax machine. This chapter includes: • Preparing to fax 131 • Using a fax in your computer 132 • Understanding the fax screen 134 • Sending a fax 143 • Receiving a fax 145 - Samsung SL-M5370LX | User Manual Ver.1.0 (English) - Page 131
, ask your internet service provider. • We recommend you use traditional analog phone services like PSTN (public as a fax line. If you use internet services (DSL, ISDN, VolP), you can improve is not provided with the machine, contact your internet service provider. 1 Line port 2 Micro filter 3 DSL - Samsung SL-M5370LX | User Manual Ver.1.0 (English) - Page 132
Checking a sent fax list (Windows) 1 Sending a fax (Windows) To send a fax from your computer, the Samsung Network PC Fax program must be installed. You can install the Samsung Network PC Fax driver from the software CD. When the installation window appears, select Installation Now. You can select - Samsung SL-M5370LX | User Manual Ver.1.0 (English) - Page 133
the subject and message of the fax job. 10 Click Fax. 11 The Fax Queue icon ( ) appears on your Mac dock. Click the icon to see the status of the fax job. You can also delete, hold, pause and resume jobs from this window. 6. Scan & Send (Faxing) 133 - Samsung SL-M5370LX | User Manual Ver.1.0 (English) - Page 134
the destination configured in their My Page profile appears. You can set the destination in the Send to Destination menu of the My Page app (see "My Page" on page 37). Administrators can also set the default destination in the sub menu (Action overflow) > Send Settings > + Me Setting. You must log - Samsung SL-M5370LX | User Manual Ver.1.0 (English) - Page 135
a job at any time. A popup window appears to show the jobs that you can stop. Start a job. Preview Preview displays the original scanned image. Button Name Description Setting History View changed options list. Preview for Shows the job preview. status Preview for Scans for job. play : This - Samsung SL-M5370LX | User Manual Ver.1.0 (English) - Page 136
a copy job. • Text: Use if the original is mostly text and very few or no images. • Text/Photo: Use if the original is a mix of text and images. • Photo: Use if the original is mostly or exclusively images. Selecting the color mode Use one of the following options to use for the scan - Samsung SL-M5370LX | User Manual Ver.1.0 (English) - Page 137
If the report contains characters or fonts that the machine does not support, then Unknown may appear in the report instead of the characters/ this button to see the status, type, and time of the job. • Preview Area : Allows you to see a preview of the document being copied. The image in the preview - Samsung SL-M5370LX | User Manual Ver.1.0 (English) - Page 138
document. The higher quality you select, the larger file size. • OCR Language: When producing scanned output for OCR software, select the appropriate language. This is supported when Searchable PDF option is selected in File Format settings. 6. Scan & Send (Faxing) 138 - Samsung SL-M5370LX | User Manual Ver.1.0 (English) - Page 139
Super Fine resolution. - Ultra Fine: Recommended for originals containing extremely fine details. This option is only available if the receiving machine also supports Ultra Fine resolution. • Both Pages(From Right): Scans both facing pages from the right page. • Book Center & Edge Erase: You can - Samsung SL-M5370LX | User Manual Ver.1.0 (English) - Page 140
images. • Photo: Use if the original is mostly or exclusively images. Original Size Use this option to set the actual paper size of the originals. • Auto: Automatically detect the size of original (see set as MONO. Image Adjustment This option allows you to manually adjust the image. • Darkness: - Samsung SL-M5370LX | User Manual Ver.1.0 (English) - Page 141
This feature is useful when scanning originals that have turned yellow from age or originals with a dark background. • Backside Image: Allows you to erase any text or images that show through from the other side of the original. You can use this feature to ensure that your scanned output is clearly - Samsung SL-M5370LX | User Manual Ver.1.0 (English) - Page 142
Understanding the fax screen Button Name Recent Description View any recently-used addresses. Groups Open a list of group addresses. Contacts Open a list of your contacts. Pause Pause the current job. Add Contacts Add To Add a new contact to your addresses. Add to the destination list. - Samsung SL-M5370LX | User Manual Ver.1.0 (English) - Page 143
or place a single original face down on the scanner glass and close the DSDF (see "Loading originals" on page 46). 2 Tap Send from the home screen or Apps box. The pop-up keyboard appears. 3 Enter your name or the company name (see "Understanding the pop-up keyboard" on page 39). 4 Tap Done. 5 Tap - Samsung SL-M5370LX | User Manual Ver.1.0 (English) - Page 144
virtual hard key before the machine starts transmission. Or tap Job Status from the home screen or Apps, select the job you want to delete (see "Job Status" on page 35). • You cannot send emails with the machine while it is sending a fax. Resending automatically If the line is busy or - Samsung SL-M5370LX | User Manual Ver.1.0 (English) - Page 145
the machine automatically switches to Fax mode to receive the fax. 9 Receiving manually in Telephone mode You can receive a fax call by pressing On Hook of your machine. For more details, refer to "Fax kit installation guide". If the caller leaves a message, the answering machine records the - Samsung SL-M5370LX | User Manual Ver.1.0 (English) - Page 146
Receiving a fax • If you have set your machine to this mode and your answering machine is turned off, or no answering machine is connected to the EXT socket, your machine automatically enters Fax mode after a predefined number of rings. • If your answering machine has a configurable ring counter, - Samsung SL-M5370LX | User Manual Ver.1.0 (English) - Page 147
screen or (quick menu) and then click on any option you want to know about. • You can also use this feature from the SyncThru™ Web Service. Open a web browser from a networked computer and type the IP address of your machine. When SyncThru™ Web - Samsung SL-M5370LX | User Manual Ver.1.0 (English) - Page 148
Receiving a fax Option Machine ID & Fax No Redial Prefix Dial Dial Mode Description You can set the machine ID and fax number to be printed at the top of each page. Set the machine to re-dial the fax number if the recipient's fax line is busy or not answered. Set the number of re-dial attempts and - Samsung SL-M5370LX | User Manual Ver.1.0 (English) - Page 149
or receiving faxes. Select Auto Detection to automatically detect the environment, or manually specify the faxing environment as Normal, VoIP(Office), Noise(Home), or the administrator depending on the authentication settings selected (see "Authentication" on page 322). 6. Scan & Send (Faxing) 149 - Samsung SL-M5370LX | User Manual Ver.1.0 (English) - Page 150
7. Setting up an address book This guide gives you guidelines for the address book. This chapter includes: • Understanding the address screen 151 • Using the control panel 153 • Using SyncThru™ Web Service 157 - Samsung SL-M5370LX | User Manual Ver.1.0 (English) - Page 151
and so on. Tap Address Book from the home screen or Apps. If you see a different screen, tap to go to the home display screen. 1 Address on any option you want to know about. • You can set general options (see "Setting options" on page 119). • Contacts: Displays the name and contact information - Samsung SL-M5370LX | User Manual Ver.1.0 (English) - Page 152
Action overflow) Command keys To use some features, you may need to log-in as an administrator (see "Login" on page 313). To use some features, you may need to log-in as an administrator (see "Login" on page 313). Button Name Quick Menu Description Show the quick menu. • Search: Searches the - Samsung SL-M5370LX | User Manual Ver.1.0 (English) - Page 153
Using the control panel 2 Storing individual addresses 1 Tap Address on the home screen or Apps > Tap (add) on the display screen 2 Tap the Name input box, and then enter the name of the recipient. Tab (favorites) icon for addresses you use often and want to find easily. 3 Tap the Email input boxes - Samsung SL-M5370LX | User Manual Ver.1.0 (English) - Page 154
Using the control panel \\folder\user name\2014-01-01\DOCJPEG\DOC001.jpg \\folder\user name\2014-01-01\DOCJPEG\DOC002.jpg 4 Storing address groups 7 Tap OK to save the information. 3 Editing Individual address When editing a contact, tap a field to change or delete the information, or add - Samsung SL-M5370LX | User Manual Ver.1.0 (English) - Page 155
book entries You can delete addresses currently stored in the address book. To use this feature, you may need to log-in as an administrator (see "Log-in" on page 313). 1 Tap Address book > Contacts or Groups on the home screen or Apps. 2 Check the boxes of the addresses you want - Samsung SL-M5370LX | User Manual Ver.1.0 (English) - Page 156
. 8 Viewing the address book You can browse for individual addresses and groups. 1 Tap Address book on the home screen or Apps. 2 Tap an address to see more information about it. You can tap (edit) when viewing an address to edit its information directly, or when viewing an address group to - Samsung SL-M5370LX | User Manual Ver.1.0 (English) - Page 157
's IP address as the URL in the browser (for example, http://123.123.123.123) 3 Press Enter or click Go to access the SyncThru™ Web Service shows. 4 Click Login. 5 Enter your ID and password and select a domain to log in to. 6 Click Login. 7 Click Address Book. 8 Click Add. 10 Enter an - Samsung SL-M5370LX | User Manual Ver.1.0 (English) - Page 158
Using SyncThru™ Web Service If the SMB server you entered is not registered to a domain, leave this field blank or enter the computer name of the SMB server. 18 Enter the scan file folder to store scanned images in Path. Example: /shared_Folder/ 19 Select Scan folder creating policy options: • - Samsung SL-M5370LX | User Manual Ver.1.0 (English) - Page 159
123.123.123.123). 3 Press Enter or click Go to access the SyncThru™ Web Service page. 4 Click Login. 5 Enter your ID and password, and select a domain 123.123.123.123). 3 Press Enter or click Go to access the SyncThru™ Web Service page. 4 Click Login. 5 Enter your ID and password, and select a domain - Samsung SL-M5370LX | User Manual Ver.1.0 (English) - Page 160
123.123.123.123) 3 Press Enter or click Go to access the SyncThru™ Web Service page. 4 Click Login. 5 Enter your ID and password, and select a domain to appear. You can see the addresses in a specific category such as Fax Number, Email, SMB, etc. For example, if you want to see the addresses which - Samsung SL-M5370LX | User Manual Ver.1.0 (English) - Page 161
not mandatory. You can enter up to 128 byte in email address format (ex: [email protected]) 1 Access the SyncThru™ Web Service (see "Logging into SyncThru™ Web Service" on page 168). 2 Click Address Book tab > Individual. 3 Select Import from the Task drop down list. 4 Select Browse, and select the - Samsung SL-M5370LX | User Manual Ver.1.0 (English) - Page 162
's IP address as the URL in the browser (for example, http://123.123.123.123). 3 Press Enter or click Go to access the SyncThru™ Web Service page. 4 Click Login. 5 Enter your ID and password and select a domain as you log in the machine. 6 Click Login. 7 Click Address Book. 8 Click Groups. 9 Click - Samsung SL-M5370LX | User Manual Ver.1.0 (English) - Page 163
the URL in the browser (for example, http://123.123.123.123) 3 Press Enter or click Go to access the SyncThru™ Web Service page. 4 Click Login. You can see information about address groups and add or delete individual addresses from the group in the Group Details window. 1 Open a web browser from - Samsung SL-M5370LX | User Manual Ver.1.0 (English) - Page 164
Using SyncThru™ Web Service 5 Enter the ID and password, and select a domain as you log in the machine. 6 Click Login. 7 Click Address Book. 8 Click Groups. 9 Click the group address you want to see and click Group Details. • You can add individual addresses directly. Check the addresses you want to - Samsung SL-M5370LX | User Manual Ver.1.0 (English) - Page 165
tools 166 • SyncThru™ Web Service 167 • Easy Capture Manager 174 • Samsung AnyWeb Print 175 • Easy Eco Driver 176 • Using Samsung Easy Document Creator 177 • Using Samsung Easy Printer Manager 178 • Using Samsung Printer Status 181 • Using Samsung Printer Experience 183 • Using - Samsung SL-M5370LX | User Manual Ver.1.0 (English) - Page 166
Programs. • For Windows 8, from the Charms, select Search > Apps. 3 Find Samsung Printers. 4 Under Samsung Printers, you can see installed management tools. 5 Click the management tool you want to use. • After installing the driver, for some management tools, you can access them directly from the - Samsung SL-M5370LX | User Manual Ver.1.0 (English) - Page 167
Explorer®, that supports IPv4 addressing as a URL. Enter the machine's IP address (http://xxx.xxx.xxx.xxx) in the address field and press the Enter key or click Go. You can get the machine's IP address from the machine (see"Report" on page 328). 2 Your machine's SyncThru™ Web Service website opens - Samsung SL-M5370LX | User Manual Ver.1.0 (English) - Page 168
Service IPv6 supported web browser 1 Start a web browser, such as Internet Explorer®, that supports IPv6 addressing as a URL. 2 Select one of the IPv6 address (Stateless Address, Stateful Address, Manual (see "Log-in" on page 313.) If you want to create a new user or change the password, see "Security - Samsung SL-M5370LX | User Manual Ver.1.0 (English) - Page 169
Web Service 5 Information information to troubleshoot machine errors. • Supplies: You can check the supplies' information. For toner cartridges and imaging units, supplies' of the machine. This feature is also available from the machine (see "Counter" on page 36). • Current Settings: Shows the - Samsung SL-M5370LX | User Manual Ver.1.0 (English) - Page 170
menus, Machine Settings and Network Settings. You cannot view or access this tab if you do not log-in as an administrator (see "Logging into SyncThru™ Web Service" on page 168). • Machine Settings: You can set machine settings. - System: You can set machine related settings. - Printer: You can set - Samsung SL-M5370LX | User Manual Ver.1.0 (English) - Page 171
and System Log. You cannot access this tab if you do not log-in as an administrator (see "Log-in" on page 313). • System Security: From the SyncThru™ Web Service, select the Security tab > System Security. - System Administrator: Enter the system administrator's information. The machine sends email - Samsung SL-M5370LX | User Manual Ver.1.0 (English) - Page 172
• Network Security: From the SyncThru™ Web Service, select the Security tab > Network Security. - Mac filtering as well as manage filtering rules. This feature is also available from the machine (see "Network filtering settings" on page 344). - 802.1x: You can enable/disable 802.1x Security - Samsung SL-M5370LX | User Manual Ver.1.0 (English) - Page 173
contact information. To change the information, (see "Contact Information" on page 335). • Link : You can view links to useful websites where you can: - view product information and get support (samsung website). - download manuals and drivers. - order consumable supplies. - register your machine - Samsung SL-M5370LX | User Manual Ver.1.0 (English) - Page 174
Easy Capture Manager • Available for Windows OS users only. • This feature may not be available depending on model or optional goods (see "Software" on page 8). Capture your screen and launch Easy Capture Manager by simply pressing the Print Screen key on the keyboard. Now you can easily - Samsung SL-M5370LX | User Manual Ver.1.0 (English) - Page 175
you screen-capture, preview, scrap, and print Windows Internet Explorer pages more easily, than when you use an ordinary program. Download the software from the Samsung website then unpack and install it: (http://www.samsung.com > find your product > Support or Downloads). 8. Management tools 175 - Samsung SL-M5370LX | User Manual Ver.1.0 (English) - Page 176
Available for Windows OS users only (see "Software" on page 8). With the Easy Eco Driver, you can apply Eco features to save paper and toner before printing. Easy Eco Driver also allows you simple editing such as removing images and texts, and more. You can save frequently used settings as a preset - Samsung SL-M5370LX | User Manual Ver.1.0 (English) - Page 177
at-home mom sharing scanned pictures from last year's birthday party, Samsung Easy Document Creator will provide you with the necessary tools. The Samsung Easy Document Creator provides features mentioned below: • Image Scanning: Use for scanning single or multiple pictures. • Document Scanning: Use - Samsung SL-M5370LX | User Manual Ver.1.0 (English) - Page 178
settings as well as printing environments, settings/actions and launching. All of these features provide a gateway to conveniently use your Samsung machine. Samsung Easy Printer Manager provides two different user interfaces for the user to choose from: the basic user interface and the advanced - Samsung SL-M5370LX | User Manual Ver.1.0 (English) - Page 179
Troubleshooting Guide when an error occurs. You can directly open the necessary section in the user's guide. Contents area 5 Order 6 supplies Displays information about the selected machine, remaining toner user interface (see "Advanced settings Service icon is enabled. 8. Management tools 179 - Samsung SL-M5370LX | User Manual Ver.1.0 (English) - Page 180
Using Samsung Easy via email. • Alert History: Provides a history of device and toner related alerts. Job Accounting Provides querying of quota information of the specified related general scan and device settings. • Image tab: Contains settings related to image altering. 8. Management tools 180 - Samsung SL-M5370LX | User Manual Ver.1.0 (English) - Page 181
its contents shown in this user's guide may differ depending on the machine or operating system in use. • Check the operating system(s) that are compatible with your machine (see "System requirements" on page 288). • Available for Windows OS users only. 13 Samsung Printer Status overview If an error - Samsung SL-M5370LX | User Manual Ver.1.0 (English) - Page 182
Samsung Printer Status User's Guide You can view the online User's Guide. This button opens the Troubleshooting Guide 1 when an error occurs. You can directly open the troubleshooting section in the user's guide related settings. You can order replacement toner cartridge(s) from online. • If - Samsung SL-M5370LX | User Manual Ver.1.0 (English) - Page 183
location. You can set device settings, order supplies, open troubleshooting guides, visit Samsung's web site, and check connected machine information. This application can check information, such as the 1 machine's status, location, IP address, and remaining toner level. 8. Management tools 183 - Samsung SL-M5370LX | User Manual Ver.1.0 (English) - Page 184
Service. Your machine needs to be connected to a network. This button will be disabled if your machine is connected via USB cable. Device List & Latest The scan list displays devices that supports Scanned Image Samsung Printer Experience. Under the device, you can see the latest scanned images - Samsung SL-M5370LX | User Manual Ver.1.0 (English) - Page 185
Deleting a printer 1 From the Charms, select Settings. Or, right-click the Samsung Printer Experience page and select Settings. 2 Select Remove Printer. 3 Select the printer you want to delete. 4 Click Yes. You can see that the selected printer is removed from the screen. 16 Printing from Windows - Samsung SL-M5370LX | User Manual Ver.1.0 (English) - Page 186
Using Samsung Printer Experience 5 Click the Print button to start the print job. Cancelling a print job If the printing job is waiting in the print queue or - Samsung SL-M5370LX | User Manual Ver.1.0 (English) - Page 187
Using Samsung Printer Experience Basic tab Advanced tab Basic This option allows you to choose the basic printing settings such as copies, orientation, and document type. Eco - Samsung SL-M5370LX | User Manual Ver.1.0 (English) - Page 188
depending on the model or options. If this tab is not shown or disabled, it means that this features are not supported. 17 Using the sharing feature Samsung Printer Experience allows you to print from other applications installed on the computer using the sharing feature. This feature is only - Samsung SL-M5370LX | User Manual Ver.1.0 (English) - Page 189
face down on the document glass, or load the documents face up into the document feeder. 2 Click the Samsung Printer Experience tile on the Start screen. 3 Click Scan ( ). 4 Set up the scanning parameters such as image type, document size, and resolution. 5 Click Prescan ( ) to check the - Samsung SL-M5370LX | User Manual Ver.1.0 (English) - Page 190
Documents and images printed, a Stored Document and use Stored Document feature with SyncThru™ Web Service. When you selected files, shows below meus. • (Print) the Box, we recommend you to backup the data regularly. Samsung disclaims all responsibility for damage or loss of data caused by - Samsung SL-M5370LX | User Manual Ver.1.0 (English) - Page 191
menu appears whenever the machine is processing a job. • Detail : Tap this button to see the status, type, and time of the job. • Preview Area : Allows you to see a preview of the document being saved. The image in the Preview area indicates the current send settings, such as the orientation and - Samsung SL-M5370LX | User Manual Ver.1.0 (English) - Page 192
Using Box Using multi check This function is not available in Print and Send storage. Touch and hold a folder or file, then change the multi check mode. Create private folder This function is not available in Download and USB storage. • Public: All users can access to the files. • Private: Set up - Samsung SL-M5370LX | User Manual Ver.1.0 (English) - Page 193
and cable connecting problems 248 • Solving other problems 249 If you cannot solve problems using this chapter, contact your administrator or service center. You can see the contact information from Settings > Contact Information > System Administrator or Samsung Support. This information is - Samsung SL-M5370LX | User Manual Ver.1.0 (English) - Page 194
the toner cartridge package. They might scratch the drum of the cartridge. • If toner gets toner into fabric. 2 1 Toner particles can be released inside the machine but it does not mean the machine is damaged. Contact a service representative when print quality problems occur. 9. Troubleshooting - Samsung SL-M5370LX | User Manual Ver.1.0 (English) - Page 195
toner cartridge out from the machine. 2 1 3 3 Thoroughly shake the cartridge five or six times to distribute the toner evenly inside the cartridge. If toner gets on your clothing, wipe it off with a dry cloth and wash clothing in cold water. Hot water sets toner into fabric. 9. Troubleshooting - Samsung SL-M5370LX | User Manual Ver.1.0 (English) - Page 196
Redistributing toner 4 Hold the toner cartridge and align it with the corresponding slot inside the machine. Insert it back into its slot until it locks . Ensure that the door is securely closed. 1 2 If the front door is not completely closed, the machine will not operate. 9. Troubleshooting 196 - Samsung SL-M5370LX | User Manual Ver.1.0 (English) - Page 197
to open the toner 1 cartridge package. They might scratch the drum of the cartridge. • If toner gets on your clothing, wipe it off with a dry cloth and wash clothing in cold water. Hot water sets toner into fabric. At this stage, the toner cartridge needs to be replaced. 9. Troubleshooting 197 - Samsung SL-M5370LX | User Manual Ver.1.0 (English) - Page 198
Replacing the toner cartridge 2 Pull the corresponding toner cartridge out from the machine. 2 1 4 Thoroughly roll the cartridge five or six times to distribute the toner evenly inside the cartridge. 3 3 Remove the new toner cartridges from its bag. 9. Troubleshooting 198 - Samsung SL-M5370LX | User Manual Ver.1.0 (English) - Page 199
toner cartridge and align it with the corresponding slot inside the machine. Insert it back into its slot until locks in place. 1 2 6 Close the front door. Ensure that the door is securely closed. 1 2 If the front door is not completely closed, the machine will not operate. 9. Troubleshooting - Samsung SL-M5370LX | User Manual Ver.1.0 (English) - Page 200
message of replacing imaging unit. • Check the type of the imaging unit for your machine. At this stage, the imaging unit needs to be replaced. 1 Open the side and front door. 2 Push down the lever and pull the corresponding toner cartridge out from the machine. 2 1 3 2 1 9. Troubleshooting 200 - Samsung SL-M5370LX | User Manual Ver.1.0 (English) - Page 201
from the machine. Do not use sharp objects, such as a knife or scissors, to open the imaging unit package. You could damage the surface of the imaging unit. 5 Remove the sheet protecting the surface of the imaging unit. 1 2 4 Remove the new imaging unit from its package. 9. Troubleshooting 201 - Samsung SL-M5370LX | User Manual Ver.1.0 (English) - Page 202
. 8 Hold the toner cartridge and align it with the corresponding slot inside the machine. Insert it back into its slot until locks in place. 1 2 7 Hold the handles on the new imaging unit, and push the imaging unit until it locks into place. Then, close the inner cover. 9. Troubleshooting 202 - Samsung SL-M5370LX | User Manual Ver.1.0 (English) - Page 203
Replacing the imaging unit 9 Close the front door. Ensure that the door is securely closed. 1 2 If the front door is not completely closed, the machine will not operate. 9. Troubleshooting 203 - Samsung SL-M5370LX | User Manual Ver.1.0 (English) - Page 204
a paper jam occurs, refer to the next guidelines. • Ensure that the adjustable guides are positioned correctly (see "Loading paper in the tray" on page 51). Do not overload the tray. in a tray. • Use only recommended print media (see "Print media specifications" on page 284). 9. Troubleshooting 204 - Samsung SL-M5370LX | User Manual Ver.1.0 (English) - Page 205
remaining pages from the DSDF. 2 Open the DSDF cover. To prevent document jams, use the scanner glass for thick, thin, or mixed paper-type originals. 9. Troubleshooting 205 - Samsung SL-M5370LX | User Manual Ver.1.0 (English) - Page 206
Clearing original document jams 3 Gently remove the jammed paper from the DSDF. 4 Close the DSDF cover. 9. Troubleshooting 206 - Samsung SL-M5370LX | User Manual Ver.1.0 (English) - Page 207
Clearing original document jams 4 Original paper jam inside of scanner 1 Remove any remaining pages from the DSDF. 2 Open the DSDF cover. 3 Gently remove the jammed paper from the DSDF. If you do not see paper in this area, go to the next step. 9. Troubleshooting 207 - Samsung SL-M5370LX | User Manual Ver.1.0 (English) - Page 208
Clearing original document jams 4 Open the DSDF. 5 Open the DSDF jam cover. 9. Troubleshooting 208 - Samsung SL-M5370LX | User Manual Ver.1.0 (English) - Page 209
remaining pages from the DSDF. 2 Open the DSDF cover. 7 Close the DSDF jam cover and the DSDF. Load the removed pages back into the DSDF. 9. Troubleshooting 209 - Samsung SL-M5370LX | User Manual Ver.1.0 (English) - Page 210
Clearing original document jams 3 Open the DSDF input tray. 4 Pull the jammed paper gently out of the DSDF. 5 Close the DSDF input tray and the DSDF cover. Load the removed pages back into the DSDF. 9. Troubleshooting 210 - Samsung SL-M5370LX | User Manual Ver.1.0 (English) - Page 211
out of the DSDF. Close the duplex jam cover and the DSDF cover. Load the removed pages back into the DSDF. If you do not see paper in this area, go to the next step. 9. Troubleshooting 211 - Samsung SL-M5370LX | User Manual Ver.1.0 (English) - Page 212
Clearing original document jams 4 Open the DSDF. 5 Open the DSDF jam cover. 9. Troubleshooting 212 - Samsung SL-M5370LX | User Manual Ver.1.0 (English) - Page 213
remaining pages from the DSDF. 2 Open the DSDF cover. 7 Close the DSDF jam cover and the DSDF. Load the removed pages back into the DSDF. 9. Troubleshooting 213 - Samsung SL-M5370LX | User Manual Ver.1.0 (English) - Page 214
Clearing original document jams 3 Open the DSDF input tray. 4 Gently remove the jammed paper from the DSDF. 5 Close the DSDF input tray and the DSDF cover. Load the removed originals back into the DSDF. 9. Troubleshooting 214 - Samsung SL-M5370LX | User Manual Ver.1.0 (English) - Page 215
Clearing original document jams 8 Original paper jam in duplex exit area of scanner 1 Remove any remaining pages from the DSDF. 2 Open the DSDF cover. 3 Open the DSDF input tray. 9. Troubleshooting 215 - Samsung SL-M5370LX | User Manual Ver.1.0 (English) - Page 216
Clearing original document jams 4 Gently remove the jammed paper from the DSDF. 5 Pull the jammed paper gently out of the DSDF. If you do not see paper in this area, go to the next step. 6 Close the DSDF input tray and the DSDF cover. Load the removed originals back into the - Samsung SL-M5370LX | User Manual Ver.1.0 (English) - Page 217
paper out slowly and gently. Follow the instructions in the following sections to clear the jam. 1 Pull out tray 1. 9 Paper jam in tray 1 Click this link to open an animation about clearing a jam. The fuser area is hot. Take care when removing paper from the machine. 9. Troubleshooting 217 - Samsung SL-M5370LX | User Manual Ver.1.0 (English) - Page 218
Clearing paper jams 2 Remove the jammed paper from the machine. 3 Lift the side of the tray, pull the tray out. If you do not see paper in this area, go to the next step. 9. Troubleshooting 218 - Samsung SL-M5370LX | User Manual Ver.1.0 (English) - Page 219
4 Remove the jammed paper from the machine. 6 Open the right door. Remove the jammed paper by gently pulling it straight out. If you do not see paper in this area, go to the next step. 5 Insert tray 1 back into the machine until it locks into place. 7 Close the right door - Samsung SL-M5370LX | User Manual Ver.1.0 (English) - Page 220
Clearing paper jams 10 Paper jam in tray 2 Click this link to open an animation about clearing a jam. 1 Pull out tray 2. 2 Remove the jammed paper from the machine. 9. Troubleshooting 220 - Samsung SL-M5370LX | User Manual Ver.1.0 (English) - Page 221
see paper in this area: Lift the side of the tray, pull the tray out. Remove the jammed paper from the machine. 4 Open the right bottom door. 1 2 If you do not see paper in this area, go to the next step. 3 Insert tray 2 back into the machine until it locks into place. 9. Troubleshooting - Samsung SL-M5370LX | User Manual Ver.1.0 (English) - Page 222
Clearing paper jams 5 Remove the jammed paper by gently pulling it straight out. 11 Paper jam in tray 3 Click this link to open an animation about clearing a jam. 1 Pull out tray 3. 6 Close the right bottom door. 9. Troubleshooting 222 - Samsung SL-M5370LX | User Manual Ver.1.0 (English) - Page 223
Clearing paper jams 2 Remove the jammed paper from the machine. 4 Open the right bottom door of the Triple Cassette Feeder. 1 2 If you do not see paper in this area, go to the next step. 3 Insert tray 3 back into the machine until it locks into place. 9. Troubleshooting 223 - Samsung SL-M5370LX | User Manual Ver.1.0 (English) - Page 224
is not feeding properly, pull the paper out of the machine. 6 Close the right bottom door. 2 Open and close the front door to resume printing. 9. Troubleshooting 224 - Samsung SL-M5370LX | User Manual Ver.1.0 (English) - Page 225
the machine (Jam feed 1) 2 Remove the jammed paper by gently pulling it straight out. Click this link to open an animation about clearing a jam. The fuser area is hot. Take care when removing paper from the machine. 1 Open the right door. 3 Close the right door - Samsung SL-M5370LX | User Manual Ver.1.0 (English) - Page 226
Clearing paper jams 14 Paper jam inside the machine (Jam feed 2) Click this link to open an animation about clearing a jam. 1 Open the right bottom door. 1 2 2 Remove the jammed paper by gently pulling it straight out. 3 Close the right bottom door. 9. Troubleshooting 226 - Samsung SL-M5370LX | User Manual Ver.1.0 (English) - Page 227
Clearing paper jams 15 Paper jam inside the machine (Jam feed 3) 1 Open the right bottom door of the Triple Cassette Feeder. 2 Remove the jammed paper by gently pulling it straight out. 1 2 3 Close the dual cassette feeder right bottom door. 9. Troubleshooting 227 - Samsung SL-M5370LX | User Manual Ver.1.0 (English) - Page 228
the machine (Jam Registration) 2 Remove the jammed paper by gently pulling it straight out. Click this link to open an animation about clearing a jam. The fuser area is hot. Take care when removing paper from the machine. 1 Open the right door. 3 Close the right door - Samsung SL-M5370LX | User Manual Ver.1.0 (English) - Page 229
of the machine (Jam at Fuser out) 2 Remove the jammed paper by gently pulling it straight out. Click this link to open an animation about clearing a jam. The fuser area is hot. Take care when removing paper from the machine. 1 Open the right door. 3 Close the right door. 9. Troubleshooting 229 - Samsung SL-M5370LX | User Manual Ver.1.0 (English) - Page 230
path (Jam Duplex Return) 2 Remove the jammed paper by gently pulling it straight out. Click this link to open an animation about clearing a jam. The fuser area is hot. Take care when removing paper from the machine. 1 Open the right door. 3 Close the right door - Samsung SL-M5370LX | User Manual Ver.1.0 (English) - Page 231
duplex path (Jam Duplex 1) 2 Remove the jammed paper by gently pulling it straight out. Click this link to open an animation about clearing a jam. The fuser area is hot. Take care when removing paper from the machine. 1 Open the right door. 3 Close the right door - Samsung SL-M5370LX | User Manual Ver.1.0 (English) - Page 232
duplex path (Jam Duplex 2) 2 Remove the jammed paper by gently pulling it straight out. Click this link to open an animation about clearing a jam. The fuser area is hot. Take care when removing paper from the machine. 1 Open the right door. 3 Close the right door - Samsung SL-M5370LX | User Manual Ver.1.0 (English) - Page 233
path (Jam Duplex Regi.) 2 Remove the jammed paper by gently pulling it straight out. Click this link to open an animation about clearing a jam. The fuser area is hot. Take care when removing paper from the machine. 1 Open the right door. 3 Close the right door - Samsung SL-M5370LX | User Manual Ver.1.0 (English) - Page 234
Click this link to open an animation about clearing a jam. 1 Open the 2Bin Finisher front door. 2 Open and close the front door. Printing automatically resumes. 9. Troubleshooting 234 - Samsung SL-M5370LX | User Manual Ver.1.0 (English) - Page 235
the 2Bin Finisher front door. 3 Remove the jammed paper. 4 Slide in the stacker until you hear the sound 'click'. 5 Close the 2Bin Finisher front door. 9. Troubleshooting 235 - Samsung SL-M5370LX | User Manual Ver.1.0 (English) - Page 236
Clearing paper jams 2 Pull the stacker lever 1a down. If necessary, pull the stacker lever 1b down as well. 3 Remove the jammed paper. 9. Troubleshooting 236 - Samsung SL-M5370LX | User Manual Ver.1.0 (English) - Page 237
Clearing paper jams 4 Pull up on the stacker lever and then close the stacker front cover. 25 Paper jam at exit of 2 Bin Finisher Click this link to open an animation about clearing a jam. 1 Gently pull the paper out through the exit area. 2 1 9. Troubleshooting 237 - Samsung SL-M5370LX | User Manual Ver.1.0 (English) - Page 238
Clearing paper jams 2 Open and close the 2Bin Finisher front door. Printing automatically resumes. 9. Troubleshooting 238 - Samsung SL-M5370LX | User Manual Ver.1.0 (English) - Page 239
problem persists, call for service. Remove the sealing tape from the toner cartridge. Refer to Quick Install Guide. Message Meaning Suggested solutions Door is open. Close it The door is not securely latched. Close the door until it locks into place. End of life, Replace with new imaging unit - Samsung SL-M5370LX | User Manual Ver.1.0 (English) - Page 240
unit. Turn the machine off and back on again. If the problem persists, call for service. Imaging unit Failure: [error number]. Please turn off then on There is a problem in the imaging unit. Turn the machine off and back on again. If the problem persists, call for service. 9. Troubleshooting - Samsung SL-M5370LX | User Manual Ver.1.0 (English) - Page 241
Imaging unit is not installed. Install the unit The imaging unit is not installed or the imaging unit is not properly installed. Install the imaging unit. If it is already installed, try to reinstall the imaging unit. If the problem persists, call for service. Install toner cartridge The toner - Samsung SL-M5370LX | User Manual Ver.1.0 (English) - Page 242
problem persists, call for service. Turn the machine off and back on again. If the problem persists, call for service. Connect the machine to the network with a network cable. Clear the jam (see finishing. Clear the jam (see "Paper jam front of 2 Bin Finisher" on page 234). 9. Troubleshooting 242 - Samsung SL-M5370LX | User Manual Ver.1.0 (English) - Page 243
solutions Paper Jam inside of machine Paper has jammed inside of the machine. Clear the jam (see "Paper jam inside the machine (Jam feed 1)" on page 225 or "Paper jam inside has jammed in Clear the jam (see "Paper the feeding area of the jam in tray 3" on page 222). HCF. 9. Troubleshooting 243 - Samsung SL-M5370LX | User Manual Ver.1.0 (English) - Page 244
again. If the problem persists, call for service. Prepare new imaging unit The estimated lifea of the imaging unit is close. Prepare a new imaging unit for a replacement (see "Replacing the imaging unit" on page 200). Message Prepare new toner cartridge Replace with new toner cartridge Meaning - Samsung SL-M5370LX | User Manual Ver.1.0 (English) - Page 245
beyond this stage can result in printing quality issues (see "Replacing the imaging unit" on page 200). The life of the fuser unit Replace the fuser unit with expires totally. a Samsung-genuine fuser unit, call for service. The life of the transfer roller expires totally. Replace the transfer - Samsung SL-M5370LX | User Manual Ver.1.0 (English) - Page 246
installed, try to reinstall the staple cartridge. If the problem persists, call for service. Staple cartridge is low. Replace it Small amount of is in a room with improper room temperature. Please adjust room temperature (see "Adjustment" on page 317). This IP address conflicts The IP address is - Samsung SL-M5370LX | User Manual Ver.1.0 (English) - Page 247
off and back on again. If the problem persists, call for service. Toner cartridge is not compatible. Check users guide The imaging unit you have installed is not for your machine. Install a Samsung-genuine imaging unit, designed for your machine (see "Available Consumables" on page 267). TR - Samsung SL-M5370LX | User Manual Ver.1.0 (English) - Page 248
cord and turn on the power switch (see "Turning on the machine" on page 26). power, • Disconnect the machine cable and reconnect it (see "Connecting a network cable" on page 25). or the connection cable between the computer and the machine is not connected properly. 9. Troubleshooting 248 - Samsung SL-M5370LX | User Manual Ver.1.0 (English) - Page 249
lists some trouble conditions that may occur and the recommended solutions. Follow the suggested solutions until the problem is corrected. If the problem persists, contact a service representative. Other problems include: • See "Display screen problem" on page 249. • See "Paper feeding problems" on - Samsung SL-M5370LX | User Manual Ver.1.0 (English) - Page 250
217). • No paper is loaded. Load paper (see "Loading paper in the tray" on page 51). • The toner cartridge or the imaging unit is not installed. Install the toner cartridge or imaging unit. If a system error occurs, contact your service representative. The connection cable Disconnect the machine - Samsung SL-M5370LX | User Manual Ver.1.0 (English) - Page 251
message on the control panel to see if the machine is indicating a system error. Contact a service representative. If printing GUI, make more the Printing Preferences. Select the correct paper source. See the printer driver help screen (see "Opening printing preferences" on page 70). Condition - Samsung SL-M5370LX | User Manual Ver.1.0 (English) - Page 252
the photo size in the software application, the resolution will be reduced. This is not a problem. Just keep printing. Try a fresh ream of paper. Set the correct paper size in the Custom Paper List in the Paper tab in the Printing Preferences (see "Paper Options" on page 72). 9. Troubleshooting 252 - Samsung SL-M5370LX | User Manual Ver.1.0 (English) - Page 253
screen of the printer driver. • A combination of faded or smeared defects may indicate that the toner cartridge needs cleaning. Contact a service representative. • The surface of the LSU part inside the machine may be dirty. Clean the LSU, contact a service representative. 9. Troubleshooting 253 - Samsung SL-M5370LX | User Manual Ver.1.0 (English) - Page 254
representative. If black vertical streaks appear on the page: • The drum inside the printer has probably been scratched. Remove the imaging unit and install a new one. Contact a service representative. If white vertical streaks appear on the page: • The surface of the LSU part inside the machine - Samsung SL-M5370LX | User Manual Ver.1.0 (English) - Page 255
page, run a cleaning sheet through several times to clean the imaging unit. Cleaning the inside. If you still have the same problems, remove the imaging unit and install a new one. Contact a service representative. • Parts of the machine may have toner on them. If the defects occur on the back of - Samsung SL-M5370LX | User Manual Ver.1.0 (English) - Page 256
and producing hollow images, the paper stock may be too slick. Try different paper (see "Print media specifications" on page 284). • If characters are improperly formed and producing a wavy effect, the scanner unit may need service. Cleaning the scan unit or contact a service representative. Page - Samsung SL-M5370LX | User Manual Ver.1.0 (English) - Page 257
. Loose toner • Clean the inside of the machine. Cleaning the inside or contact a service representative. • Check the paper type and quality (see "Print media specifications" on page 284). • Remove the imaging unit and install a new one. Contact a service representative. • If the problem persists - Samsung SL-M5370LX | User Manual Ver.1.0 (English) - Page 258
Copy from the home marks, or spots screen or Apps (see "Changing Darkness" on page 102). appear on copies. • If there are no defects on the original, clean the scan unit. Cleaning the scan unit or contact a service representative. Copy image is skewed. • Ensure that the original is face down - Samsung SL-M5370LX | User Manual Ver.1.0 (English) - Page 259
problems Condition The scanner does not work. Suggested solutions • Make sure that you place the original to be scanned face down on the scanner glass, or face up in the DSDF. • There may not be enough available memory to hold the document you want to scan. Try the Prescan function to see image. - Samsung SL-M5370LX | User Manual Ver.1.0 (English) - Page 260
to be replaced. Contact a service representative. condition suggested solutions Faxes toner cartridge may be empty. Replace the toner cartridge. • Find the optimal line for communication. To check that, see Smart Fax Diagnostics menu (see "General fax settings" on page 147). 9. Troubleshooting - Samsung SL-M5370LX | User Manual Ver.1.0 (English) - Page 261
(see "Setting the paper size and type" on page 63). 33 Operating system problems Common Windows problems Samsung Printer Experience is not shown when you click more settings. Samsung Printer Experience is not installed. Download the app from the Windows Store and install it. 9. Troubleshooting - Samsung SL-M5370LX | User Manual Ver.1.0 (English) - Page 262
or LPT, uncheck them and select TCP/IP, USB, or WSD. Common Mac problems Condition Suggested solutions The machine does not print PDF files correctly. Some parts of graphics, text, or illustrations are missing. Printing the PDF file as an image may enable the file to print. Turn on Print As - Samsung SL-M5370LX | User Manual Ver.1.0 (English) - Page 263
problems Common Linux problems - 22161 manually or disable the problem occurs on Ubuntu 12.04 due to the problem in standard CUPS filter 'pdftops'. Update 'cups-filters' package to version 1.0.18 to fix the problem 15ubuntu2.2. The problem occurs on Debian for example) The problem occurs on Fedora 19 - Samsung SL-M5370LX | User Manual Ver.1.0 (English) - Page 264
not selected in the driver Possible cause Solution The PostScript driver may • Install the PostScript driver. not be installed correctly. • Print a configuration page and verify that the PS version is available for printing. • If the problem persists, contact a service representative. The print - Samsung SL-M5370LX | User Manual Ver.1.0 (English) - Page 265
10. Consumables and accessories This guide provides information on purchasing Consumables, accessories and maintenance parts available for your machine. This chapter includes: • Ordering supplies and accessories 266 • Available Consumables 267 • Precautions - Samsung SL-M5370LX | User Manual Ver.1.0 (English) - Page 266
the list of available supplies, and maintenance parts. • See "Available Consumables" on page 267. • See "Available accessories" on page 269. To order Samsung-authorized supplies, accessories, and maintenance parts, contact your local Samsung dealer or the retailer where you purchased your machine - Samsung SL-M5370LX | User Manual Ver.1.0 (English) - Page 267
When Consumables reach their lifespan, you can order the following types of Consumables for your machine. Type Toner cartridgea Average yield Approx. 30,000 standard pages. • MLT-D358S Part name Imaging unitb Approx. 100,000 pages • MLT-R358 a. Declared yield value in accordance with ISO/IEC - Samsung SL-M5370LX | User Manual Ver.1.0 (English) - Page 268
in the PS driver properties. After installing an accessory such as an optional tray, PS driver users must do the service component. Do not change it by yourself. There is a risk of an explosion if battery is replaced by an incorrect type. Dispose used batteries according to the instructions - Samsung SL-M5370LX | User Manual Ver.1.0 (English) - Page 269
name Optional tray 2/3/4 If you are experiencing frequent paper supply problems, you can attach up to three additional 520 sheet trays. into the cabinet. SL-DSK001T / SL-DSK002S When using the optional Stand, you must install the foot as shown in the Optional Stand Install Guide provided with the - Samsung SL-M5370LX | User Manual Ver.1.0 (English) - Page 270
of big size output tray which holds up to 500 sheets of paper . SL-FIN001M The 2-Bin Finisher consists of big size output tray which holds up to operated device or a card reader. Those devices allow the payfor-print service on your machine. CLX-KIT20F To purchase the Wireless/NFC kit, contact - Samsung SL-M5370LX | User Manual Ver.1.0 (English) - Page 271
condition and avoid print quality and paper feeding problems resulting from the worn-out parts. Maintenance parts can be performed only by an authorized service provider, dealer, or the retailer where you informed by the "Samsung Printer Status" program. Or if your machine supports display screen, a - Samsung SL-M5370LX | User Manual Ver.1.0 (English) - Page 272
the battery inside the machine is a service component. Do not change it by yourself type. Dispose used batteries according to the instructions. When you install the optional devices such cannot use the optional devices you installed in this driver, you can set the optional devices in Device Options - Samsung SL-M5370LX | User Manual Ver.1.0 (English) - Page 273
Installing accessories If Printer properties item has ▶ mark, you can select other printer drivers connected with selected printer. 5 Select Device Options. The Properties window may differ depending on the driver or operating system you are using. 6 Select the appropriate option. Some menus may - Samsung SL-M5370LX | User Manual Ver.1.0 (English) - Page 274
Checking replaceable's lifespan If you experience frequent paper jams or printing problems, check the remaining lifespan of Consumables. Replace the corresponding parts, if necessary. 1 Tap Settings > Management > Supplies Life from the main screen. 2 Check the consumables life. - Samsung SL-M5370LX | User Manual Ver.1.0 (English) - Page 275
home screen or Apps. Documents and images printed, scanned, downloaded and sent from USB can be stored in the Box (see "Using Box" on page 190). on a USB Drive device. • Format the USB Drive device. Your machine supports USB Drive devices with FAT16/FAT32 and sector size of 512 bytes. Check your - Samsung SL-M5370LX | User Manual Ver.1.0 (English) - Page 276
is as shown below the image. If you insert the USB print option supported file types: • PRN: Only files created by provided driver with see "Printing to a file (PRN)" on page 93). • TIFF: TIFF 6.0 Baseline • JPEG: JPEG Baseline • PDF: PDF these features, see USB Drive device's User's Guide. In case - Samsung SL-M5370LX | User Manual Ver.1.0 (English) - Page 277
machine. Your machine automatically detects the device and reads data stored on it (see "About USB Drive device" on page 275). • The machine cannot detect hold folder or document you want to print from the list. If the PDF file you selected is secured with a password, you have to know the password - Samsung SL-M5370LX | User Manual Ver.1.0 (English) - Page 278
After deleting files or reformatting a USB Drive device, files cannot be restored. Confirm that you no longer need the data before deleting it. Deleting an image file 1 Insert a USB Drive device into the USB port on your machine. 2 Tap Box > USB from the home screen or Apps. 3 The machine shows all - Samsung SL-M5370LX | User Manual Ver.1.0 (English) - Page 279
Replacing the staple cartridge When the stapler is completely empty, the message for installing the staple cartridge appears on the display screen. 1 Open the 2Bin Finisher front cover. 2 Pull the stapler unit out. 10. Consumables and accessories 279 - Samsung SL-M5370LX | User Manual Ver.1.0 (English) - Page 280
the staple cartridge 3 Lift the empty staple cartridge form the stapler unit. 6 Slide the stapler unit in until it locks in place. 4 Unpack the new staple cartridge. 5 Place the staple cartridge back into the stapler unit. 7 Close the 2Bin Finisher front cover. 10. Consumables and accessories - Samsung SL-M5370LX | User Manual Ver.1.0 (English) - Page 281
11. Appendix This chapter provides product specifications and information concerning applicable regulations. • Specifications 282 • Regulatory information 293 • Copyright 303 - Samsung SL-M5370LX | User Manual Ver.1.0 (English) - Page 282
Specifications 1 General specifications The specification values listed below are subject to change without notice. See www.samsung.com for possible changes in information. Dimensiona Weighta Noise Levelbc Temperature Humidity Power ratingd Items Width x Length x Height Description 630 x 506 x - Samsung SL-M5370LX | User Manual Ver.1.0 (English) - Page 283
. c. China only: If the equipment's noise is louder than 63 db (A), the equipment should be placed in region of relatively independent advice. d. See the rating label on the machine for the correct voltage (V), frequency (hertz) and of current (A) for your machine. e. The power consumption may be - Samsung SL-M5370LX | User Manual Ver.1.0 (English) - Page 284
Specifications 2 Print media specifications Type Plain paper Size Letter Legal Folio A4 Oficio JIS B5 ISO B5 Executive A5 Statement A6c Dimensions Print media weighta/Capacityb Tray1 / Tray 2, 3, 4 Multi-purpose tray HCF 216 x 279 mm (8.5 x 11 inches) 70 to 90 g/m2 (18 to 24 lbs 216 x 356 - Samsung SL-M5370LX | User Manual Ver.1.0 (English) - Page 285
Specifications Type Envelope Thick paper Thin paper Cotton Color Size Dimensions Print media weighta/Capacityb Tray1 / Tray 2, 3, 4 Multi-purpose tray HCF Envelope Monarch 98 x 191 mm (3.87 x 7.5 inches) Envelope No. 10 105 x 241 mm (4.12 x 9.5 inches) 75 to 90 g/m2 (20 to 24 lbs 75 to 90 - Samsung SL-M5370LX | User Manual Ver.1.0 (English) - Page 286
Specifications Type Pre-Printed Recycled Labelscd Cardstockc Bond Archivec Size Dimensions Print media weighta/Capacityb Tray1 / Tray 2, 3, 4 Multi-purpose tray HCF Letter, Legal, Oficio, Folio, A4, JIS B5, ISO B5, Statement, Executive, A5 Refer to the Plain paper section 75 to 85g/m2 (20 - Samsung SL-M5370LX | User Manual Ver.1.0 (English) - Page 287
to 24 lbs bond) bond) bond) • Multi-purpose(or manual feeder) tray / Tray 1: 98 x 148 mm (3.85 x 5.83 inches) • Multi-purpose(or manual feeder) tray: 60 to 163 g/m2 (16 to 43 lbs environmental conditions. c. A6 is supported only multi-purpose tray/tray1. d. Smoothness: 100 to 250 (sheffield) 11 - Samsung SL-M5370LX | User Manual Ver.1.0 (English) - Page 288
512 MB (2 GB) Intel® Pentium® IV 3 GHz 512 MB (1 GB) Intel® Pentium® IV 1 GHz 32-bit or 64-bit processor or higher 1 GB (2 GB) • Support for DirectX® 9 graphics with 128 MB memory (to enable the Aero theme). • DVD-R/W Drive Intel® Pentium® IV 1.4 GHz (x64) processors (2 GHz or faster) 512 MB - Samsung SL-M5370LX | User Manual Ver.1.0 (English) - Page 289
or higher is the minimum requirement for all Windows operating systems. • Users who have administrator rights can install the software. • Windows Terminal Services is compatible with your machine. Mac Operating system Mac OS X 10.5 Mac OS X 10.6 Mac OS X 10.7 - 10.9 CPU • Intel® processors • 867 - Samsung SL-M5370LX | User Manual Ver.1.0 (English) - Page 290
Specifications Linux Items Operating system CPU RAM Free HDD space Red Hat Enterprise Linux 5, 6 Fedora 11, 12, 13, 14, 15, 16, 17, 18, 19 openSUSE 11.0, 11.1, 11.2, 11.3, 11.4, 12.1, 12.2, 12.3 Ubuntu 10.04, 10.10, 11.04, 11.10, 12.04, 12.10, 13.04 SUSE Linux Enterprise Desktop 10, 11 Debian - Samsung SL-M5370LX | User Manual Ver.1.0 (English) - Page 291
Specifications Unix Items Operating system Free HDD space Requirements Sun Solaris 9, 10, 11 (x86, SPARC) HP-UX 11.0, 11i v1, 11i v2, 11i v3 (PA-RISC, Itanium) IBM AIX 5.1, 5.2, 5.3, 5.4, 6.1 7.1 (PowerPC) Up to 100 MB 11. Appendix 291 - Samsung SL-M5370LX | User Manual Ver.1.0 (English) - Page 292
4 Network environment Network and wireless models only (see "Features by model" on page 8). You need to set up the network protocols on the machine to use it as your network machine. The following table shows the network environments supported by the machine. Items Network interface Network - Samsung SL-M5370LX | User Manual Ver.1.0 (English) - Page 293
never any human access to laser radiation above a Class I level during normal operation, user maintenance or prescribed service condition. Warning Never operate or service the printer with the protective cover removed from laser/scanner assembly. The reflected beam, although invisible, can damage - Samsung SL-M5370LX | User Manual Ver.1.0 (English) - Page 294
Lithium coin cells in the product sold or distributed ONLY in California USA. Perchlorate Material - special handling may apply. See www.dtsc.ca.gov/hazardouswaste/perchlorate. (U.S.A. only) This printer contains advanced energy conservation technology that reduces power consumption when it is not - Samsung SL-M5370LX | User Manual Ver.1.0 (English) - Page 295
Regulatory information 12 China only Website : http://www.samsung.com/cn/support/location/ supportServiceLocation.do?page=SERVICE.LOCATION 13 Correct disposal of this product (Waste electrical & electronic equipment) (Applicable in countries with separate collection systems) This marking on the - Samsung SL-M5370LX | User Manual Ver.1.0 (English) - Page 296
United States of America only) Dispose unwanted electronics through an approved recycler. To find the nearest recycling location, go to our website: www.samsung. and, if not installed and used in accordance with the instructions, may cause harmful interference to radio communications. However, there - Samsung SL-M5370LX | User Manual Ver.1.0 (English) - Page 297
Regulatory information • Consult the dealer or experienced radio TV technician for help. Change or modifications not expressly approved by the manufacturer responsible for compliance could void the user's authority to operate the equipment. 18 Taiwan only Canadian radio interference regulations - Samsung SL-M5370LX | User Manual Ver.1.0 (English) - Page 298
Regulatory information 20 Germany only 21 Turkey only The Ringer Equivalence Number (REN) is an indication of the maximum number of devices allowed to be connected to a telephone interface. The termination of an interface may consist of any combination of devices subject only to the requirement - Samsung SL-M5370LX | User Manual Ver.1.0 (English) - Page 299
may be stopped. However, where prior notice is impractical, the company may temporarily cease service, providing that they: a promptly notify the customer. b give the customer an opportunity to correct the equipment problem. c inform the customer of the right to bring a complaint to the Federal - Samsung SL-M5370LX | User Manual Ver.1.0 (English) - Page 300
emergency numbers and/or making test calls to emergency numbers, use a non-emergency number to advise the emergency service dispatcher of your intentions. The dispatcher will give you further instructions on how to actually test the emergency number. • This machine may not be used on coin - Samsung SL-M5370LX | User Manual Ver.1.0 (English) - Page 301
the essential requirements and other relevant provisions of R&TTE Directive 1999/5/EC. The declaration of conformity may be consulted at www.samsung.com, go to Support > Download center and enter your printer (MFP) name to browse the EuDoC. January 1, 1995: Council Directive 2006/95/EC Approximation - Samsung SL-M5370LX | User Manual Ver.1.0 (English) - Page 302
Regulatory information 28 China only 11. Appendix 302 - Samsung SL-M5370LX | User Manual Ver.1.0 (English) - Page 303
from or related to use of this user's guide. • Samsung and the Samsung logo are trademarks of Samsung Electronics Co., Ltd. • Microsoft, Windows, Windows are either registered trademarks or trademarks of Microsoft Corporation in the United States and other countries. • Google, Picasa, Google Cloud - Samsung SL-M5370LX | User Manual Ver.1.0 (English) - Page 304
User's Guide Samsung Multifunction MultiXpress M537x series M437x series AADDVVAANNCCEEDD ((AADDMMIINNIISSTTRRAATTOORR''SS GGUUIIDDEE)) This administrator's guide provides advanced information for administrator's to use and manage the machine. Some features may not be available depending on model or - Samsung SL-M5370LX | User Manual Ver.1.0 (English) - Page 305
308 Security policies for administrators 309 Terminology used in this guide 310 2. Advanced Features for Settings Menu Log-in 313 342 Set Protocols 343 Network filtering settings 344 Installing driver over the network 345 Samsung Mobile Print 353 AirPrint 354 Google Cloud Print™ - Samsung SL-M5370LX | User Manual Ver.1.0 (English) - Page 306
for administrators, such as remotely installing the driver or creating the installer package. You can also refer to this guide for maintenance information (eg., cleaning the machine, replacing toner cartridges). This guide provides instructional screen images, easy-to-read tables of features, and - Samsung SL-M5370LX | User Manual Ver.1.0 (English) - Page 307
Do not touch the surface of the drum located in the toner cartridge or imaging unit. Footnote ("Cross-reference") Provides additional information on certain words or a phrase. Guides users to a reference page for the additional detailed information. a. pages per minute (See "Glossary" on page 384 - Samsung SL-M5370LX | User Manual Ver.1.0 (English) - Page 308
Intended audience The expected user for this guide is an administrator with an understanding of: • General knowledge of machine and other optional parts. • - subnets, security features, addresses. • Windows operating systems on server and client computers. 1. About this administrator's guide 308 - Samsung SL-M5370LX | User Manual Ver.1.0 (English) - Page 309
administrator should manage the machine in a trusted network supported environment. • The administrator should guarantee that the certifying service via certification server is through a safe channel and from any unauthorized contact with external interfaces. 1. About this administrator's guide 309 - Samsung SL-M5370LX | User Manual Ver.1.0 (English) - Page 310
MFP, device User's Guide manual, guide Synonym 2 Acronyms The following acronyms are used throughout this guide in examples, instructions, and descriptions: System LDAP Lightweight Directory Access Protocol SLP Service Location Protocol SMB Server Message Block 1. About this - Samsung SL-M5370LX | User Manual Ver.1.0 (English) - Page 311
Terminology used in this guide Acronyms SWS WINS WSD Meaning SyncThru™Web Service Windows Internet Name Service Web Service for Device 3 Glossary (See "Glossary" on page 384.) 1. About this administrator's guide 311 - Samsung SL-M5370LX | User Manual Ver.1.0 (English) - Page 312
Network Settings 330 • System 334 • This administrator's guide mainly describes features administrators would often use and settings to machine. • For some options, you need to contact your local service provider to set the settings. • Some menus may not appear see "Authentication" on page 322). - Samsung SL-M5370LX | User Manual Ver.1.0 (English) - Page 313
settings you selected, you may need to log-in as an administrator to access some options under Settings menu (see "Authentication" on page 322). Contact your network service provider or network administrator for more information. 1 Tap Settings from the home screen or Apps. 2 Select the option you - Samsung SL-M5370LX | User Manual Ver.1.0 (English) - Page 314
Language and Input This menu allows you to configure the language in which to display the menus. You can also set onscreen keyboard options. Tap Settings > Language and Input from the home screen or Apps. Feature Language Keyboard & Input Methods Speech Description Allows you to select the - Samsung SL-M5370LX | User Manual Ver.1.0 (English) - Page 315
Management all application's storage. Allows you to adjust altitude, huminity, image, and macine test functions. Feature Description Power Saver Allows you to power saving mode when not in use. There are two power saving modes (see "Power Saver" on page 318). Timers Allows you to set the time - Samsung SL-M5370LX | User Manual Ver.1.0 (English) - Page 316
of your machine. When SyncThru™ Web Service opens, click Settings tab > Machine Settings > System >Input Trays (see "Settings tab" on page 170). If some options are grayed out, it means that the grayed-out option is not supported for your machine - Samsung SL-M5370LX | User Manual Ver.1.0 (English) - Page 317
of the place where your machine is located. You can also adjustment the image management and checking the machine test. • Altitude Adjustment : You can the best possible print quality. - Auto Tone Adjustment Activation: Instructs the machine to automatically calibrate the tone at certain intervals. - Samsung SL-M5370LX | User Manual Ver.1.0 (English) - Page 318
entirely to adjust the color tone. • Machine Test: Allows you to adjust the tone level. - Print Adjustment : Allows you to adjust the print area. When images are printed off the page or shifted, adjust the print area. 10 Power Saver When you are not using the machine for a while, use this - Samsung SL-M5370LX | User Manual Ver.1.0 (English) - Page 319
. Open the Web browser from your networked computer and type the IP address of your machine. When SyncThru™ Web Service opens, click Settings > Machine Settings > System > Setup. • System Timeout: The machine returns to the Copy menu if there is no input for the given time. • - Samsung SL-M5370LX | User Manual Ver.1.0 (English) - Page 320
"Initial settings (administrator only)" on page 324). You can set the default fax options. Set the most frequently used fax settings (see "Fax Settings" on page 325). Box Settings Report Settings Application Management Description You can set print related settings. When there is no specific input - Samsung SL-M5370LX | User Manual Ver.1.0 (English) - Page 321
non-volatile memory. If you want to secure memory space, you can set the machine to automatically overwrite secure non-volatile memory. • Manual Image Overwrite: When printing, copying, scanning, and faxing, the machine temporarily uses memory space. For security reasons, you can set the machine to - Samsung SL-M5370LX | User Manual Ver.1.0 (English) - Page 322
Web browser from your networked computer and type the IP address of your machine. When SyncThru™ Web Service opens, click the Security tab > User Access Control. (see "Security tab" on page 171). • Mode: Select the authentication mode. - Basic Authentication: Activate basic authentication. Users are - Samsung SL-M5370LX | User Manual Ver.1.0 (English) - Page 323
Web Admin Service (For detailed information, refer to the SyncThru™Web Admin Service guide). 14 imaging unit has the specified lifespan remaining. • Toner Cartridge Reorder Notification: Issues a notification when a toner cartridge has the specified lifespan remaining. • Toner Save: The Toner - Samsung SL-M5370LX | User Manual Ver.1.0 (English) - Page 324
Admin Settings Contention Management Allows you to set Copy, Print, Send, Report priority. More Settings You can set Job Progress Window and Job Deletion. • Job Progress Window: Allows you to show job progress in display. • Job Deletion: The Job Deletion setting specifies whether users can delete - Samsung SL-M5370LX | User Manual Ver.1.0 (English) - Page 325
the LAN connection again. • If a network connection problem persists, contact your network administrator. • If you instructions have been grayed-out, it means that the grayed-out option is not supported in your communication environment. • You can also use this feature from the SyncThru™ Web Service - Samsung SL-M5370LX | User Manual Ver.1.0 (English) - Page 326
see "Settings tab" on page 170). If important data is stored in the Box, we recommend you to backup the data regularly. Samsung computers or scanned images in the Box. Service opens, click the Maintenance tab > Application Management. (see "Maintenance tab" on page 173). • Some models may not support - Samsung SL-M5370LX | User Manual Ver.1.0 (English) - Page 327
Admin Settings Installing an application Uninstalling an application 1 Tap Install button. 2 A pop-up window with folder tree appears. Select the application file and press OK. 3 A verification message appears. Read the agreement and check I accept terms of the License Agreement and press OK. - Samsung SL-M5370LX | User Manual Ver.1.0 (English) - Page 328
of each supply. ex) toner cartridge / imaging unit You can also use this feature from the SyncThru™ Web Service. Open the Web browser from types and counts are included. - Network Configuration: Print to see the network configuration information. Network configuration information such as TCP - Samsung SL-M5370LX | User Manual Ver.1.0 (English) - Page 329
Management - Account: Print to see the account list. • Send: - Send Confirmation: You can set the machine to print a report state of the Scan to Email job. • Font: - PCL Font List: Print to see the PCL font list. - PS Font List: Print to see the PS font list 2. Advanced Features for Settings Menu 329 - Samsung SL-M5370LX | User Manual Ver.1.0 (English) - Page 330
settings. • IP Setting: You can choose the method for allocating IP addresses. - Static: Select to enter IP address/Subnet Mask/ Gateway Address manually. - BOOTP: IP address/Subnet Mask/ Gateway Address are automatically allocated by the BOOTP Server. - DHCP: IP address/Subnet Mask/ Gateway Address - Samsung SL-M5370LX | User Manual Ver.1.0 (English) - Page 331
in the display screen. - Stateful Address: This is an IPv6 address which is acquired by a DHCPv6 server. - Manual Address: This is an IPv6 address which an administrator can configure manually. • DHCPv6 Configuration: Select the DHCPv6 configuration you want to us. - Use DHCP as directed by a router - Samsung SL-M5370LX | User Manual Ver.1.0 (English) - Page 332
the authentication algorithm to use. - EAP-MD5: Offers minimal security. The MD5 hash function is vulnerable to dictionary attacks, and does not support key generation. - PEAP: Recommended for users who only intend to use Microsoft desktop clients and servers. For other users, it is not recommended - Samsung SL-M5370LX | User Manual Ver.1.0 (English) - Page 333
Network Security You can enable and configure these options in SyncThru™ Web Service only(see "Security tab" on page 171.) IPSec Feature Network Filtering Description You can disable IPSec if it is turned on in SyncThru™ Web Service. You can disable the network filtering options if it is turned - Samsung SL-M5370LX | User Manual Ver.1.0 (English) - Page 334
need to change it to the correct time. 26 About System You can see the hardware configuration, system capabilities, and software version of the machine. Machine . You can download the latest software from the Samsung website (http:// www.samsung.com/printer). • H/W Configuration: Shows the status - Samsung SL-M5370LX | User Manual Ver.1.0 (English) - Page 335
can get help. If you log in as an administrator, you can change the contact information. • System Administrator: Check the contact information of the administrator. • Samsung Support: Check the information of the service center. 2. Advanced Features for Settings Menu 335 - Samsung SL-M5370LX | User Manual Ver.1.0 (English) - Page 336
setup This chapter gives you step-by-step instructions for setting up the network environment before using the printing) 342 • Set Protocols 343 • Network filtering settings 344 • Installing driver over the network 345 • Samsung Mobile Print 353 • AirPrint 354 • Google Cloud Print™ 356 - Samsung SL-M5370LX | User Manual Ver.1.0 (English) - Page 337
network machine. You can set up the basic network settings through the machine's control panel. The following table shows the network environments supported by the machine: Item Network interface Network operating system Specification Ethernet 10/100/1000 Base-T • Windows® XP, Windows Server® 2003 - Samsung SL-M5370LX | User Manual Ver.1.0 (English) - Page 338
Accessing network setup 1 Make sure that the ethernet cable is connected to your machine. 2 Tap Settings > Network Settings > Ethernet from the home screen or Apps. 3 Log-in as an administrator (see "Log-in" on page 313). 3. Network setup 338 - Samsung SL-M5370LX | User Manual Ver.1.0 (English) - Page 339
feature from the SyncThru™ Web Service. Open the Web browser from your networked computer and type the IP address of your machine (see "Settings tab" on page • Static: Select to enter IP address/Subnet Mask/ Gateway Address manually. • BOOTP: IP address/Subnet Mask/ Gateway Address are automatically - Samsung SL-M5370LX | User Manual Ver.1.0 (English) - Page 340
, DHCP FQDN options are automatically disabled. WINS (Windows Internet Name Service) You can configure the WINS server. WINS is used in the feature from the SyncThru™ Web Service. Open the Web browser from your networked computer and type the IP address of your machine (see "Settings tab" on page 170 - Samsung SL-M5370LX | User Manual Ver.1.0 (English) - Page 341
acquired by a DHCPv6 server. - Manual Address: This is an IPv6 address which an administrator can configure manually. • DHCPv6 Configuration: Select the DHCPv6 MD5 hash function is vulnerable to dictionary attacks, and does not support key generation. - PEAP: Recommended for users who only intend to - Samsung SL-M5370LX | User Manual Ver.1.0 (English) - Page 342
. Tap Settings > Management > Report > Network Configuration from the home screen or Apps then tap Print. You can also use this feature from the SyncThru™ Web Service. Open the Web browser from your networked computer and type the IP address of your machine - Samsung SL-M5370LX | User Manual Ver.1.0 (English) - Page 343
IP, LPR, IPP, ThinPrint, CIFS, SNTP (Simple Network Time Protocol), SLP (Service Location Protocol), Telnet, SNMP V1/V2 (Simple Network Management Protocol), SNMPv3, UPnP use this feature from the SyncThru™ Web Service. Open the Web browser from your networked computer and type the IP address of your - Samsung SL-M5370LX | User Manual Ver.1.0 (English) - Page 344
from the home screen or App. You can also use this feature from the SyncThru™ Web Service. Open the Web browser from your networked computer and type the IP address of your machine (see "Settings tab" on page 170). • MAC Filtering: Disable MAC filtering. • IPv4 Filtering: Disable IPv4 filtering - Samsung SL-M5370LX | User Manual Ver.1.0 (English) - Page 345
the Printer Connection Type screen. Then, click Next. 5 Follow the instructions in the installation window. From the Windows 8 Start Screen If can manually download the V4 driver from Samsung website, www.samsung.com > find your product > Support or downloads. • You can download Samsung Printer - Samsung SL-M5370LX | User Manual Ver.1.0 (English) - Page 346
not installed. If you want to use the V4 driver in the Desktop screen, you can download from the Samsung website, www.samsung.com >find your product > Support or downloads. • If you want to install Samsung's printer management tools, you need to install them using the supplied software CD. Silent - Samsung SL-M5370LX | User Manual Ver.1.0 (English) - Page 347
/a"" or /A"" Specifies destination path for installation. The destination path should be a fully qualified path. Since machine drivers should be installed on the OS specific location, this command applies to only application software. /n"" or /N" - Samsung SL-M5370LX | User Manual Ver.1.0 (English) - Page 348
from your system. /v"" or Shares installed machine /V"" and add other available platform drivers for Point & Print. It will install all supported Windows OS platform's machine drivers to system and share it with specified for point and print. /o or /O Opens - Samsung SL-M5370LX | User Manual Ver.1.0 (English) - Page 349
to install the printer software (http://www.samsung.com > find your product > Support or Downloads). 1 Make sure that the machine is connected to your network and powered on. Also, your machine's IP address should have been set. 2 Copy Unified Linux Driver package to your system. 3 Open Terminal - Samsung SL-M5370LX | User Manual Ver.1.0 (English) - Page 350
supports the UNIX operating system before installing the UNIX printer driver (see Samsung website, download and unpack the UNIX Printer Driver package to your computer. 2 Acquire root privileges. "su -" 3 Copy the appropriate driver archive to the target UNIX computer. See administration guide - Samsung SL-M5370LX | User Manual Ver.1.0 (English) - Page 351
accept jobs. In this case run the following two commands on the root terminal: "accept " "enable " Uninstalling the printer driver package The utility should be used to delete the printer installed in the system. a Run "uninstallprinter" command from the terminal. It will - Samsung SL-M5370LX | User Manual Ver.1.0 (English) - Page 352
Installing driver over the network 11 Check the Make Default option to set this printer as default. 12 Click OK to add the printer. 3. Network setup 352 - Samsung SL-M5370LX | User Manual Ver.1.0 (English) - Page 353
a new driver or configuring network settings isn't necessary - just simply install the Samsung Mobile Print application, and it will automatically detect compatible Samsung printers. Besides printing photos, web pages, and PDFs, scanning is also supported. If you have a Samsung multifunction, scan - Samsung SL-M5370LX | User Manual Ver.1.0 (English) - Page 354
and select the Domain. then click LOGIN. Use the same login ID, Password, Domain as when logging in from the machine (see "Log-in" on page 313.) 5 When the SyncThru™ Web Service window opens, click Settings > Network Settings. 6 Click AirPrint. 3 Click Login in the upper right of the SyncThru™ Web - Samsung SL-M5370LX | User Manual Ver.1.0 (English) - Page 355
AirPrint 13 Printing via AirPrint For example, the iPad manual provides these instructions: 1 Open your email, photo, web page, or document you want to print. 2 Touch the action icon( ). 3 Select your printer driver name and option menu to set up. 4 Touch Print button. Print it out. Cancelling print - Samsung SL-M5370LX | User Manual Ver.1.0 (English) - Page 356
driver on the mobile device. Refer to the Google website (http://www.google.com/cloudprint/learn/ or http:// support in the upper right corner of the SyncThru™ Web Service website. 6 Type in the ID and Password and , Domain as when logging in from the machine (see "Log-in" on page 313.) If the network - Samsung SL-M5370LX | User Manual Ver.1.0 (English) - Page 357
with Google Cloud Print™ The printing procedure varies depending on the application or the device you are using. You can see the application list that supports Google Cloud Print™ service. Make sure the printer is turned on and connected to a wired or wireless network that has access to the Internet - Samsung SL-M5370LX | User Manual Ver.1.0 (English) - Page 358
Google Cloud Print™ 5 Select Print with Google Cloud Print. 6 Click the Print button. 3. Network setup 358 - Samsung SL-M5370LX | User Manual Ver.1.0 (English) - Page 359
4. Maintenance This chapter provides information for maintaining your machine. This chapter includes: • Monitoring the supplies life 360 • Setting supplies reorder notification 361 • Replacing & redistributing supplies 362 • Clearing memory 364 • Cleaning the machine 365 • Tips for - Samsung SL-M5370LX | User Manual Ver.1.0 (English) - Page 360
1 From the SyncThru™ Web Service, select the Information tab > Supplies. 2 Check the remaining percentage. We recommend you prepare new supplies if the remaining percentage is less than 10% (see "Replacing & redistributing supplies" on page 362). We recommend you prepare new supplies or those - Samsung SL-M5370LX | User Manual Ver.1.0 (English) - Page 361
Setting supplies reorder notification Set the supplies reorder notification to receive notification emails and prepare supplies in advance. See "Supplies Management" on page 323. 4. Maintenance 361 - Samsung SL-M5370LX | User Manual Ver.1.0 (English) - Page 362
, white streaks or light printing will still occur even after you have redistributed the toner. How to redistribute the toner (see "Redistributing toner" on page 194). 4 Replacing the imaging unit When the imaging unit is totally empty: • The status LED turns red on and the display screen shows - Samsung SL-M5370LX | User Manual Ver.1.0 (English) - Page 363
Finding the serial number You might need to know the serial number of your machine when calling for a service. To check the serial number of your machine, follow the steps below. The serial number is written on the beginning of all the machine reports. 1 - Samsung SL-M5370LX | User Manual Ver.1.0 (English) - Page 364
Clearing memory There are few ways to clear memory to ensure the memory capacity of your machine. Select one of the ways below. 6 Clearing stored documents Check the stored documents before clearing machine memory. 1 Tap Box from the home screen or Apps. 2 Touch and hold folder or document you want - Samsung SL-M5370LX | User Manual Ver.1.0 (English) - Page 365
process, paper, toner, and dust particles can accumulate inside the machine. These accumulations can cause print quality problems, such as toner specks or smearing. machine. • Illustrations on this user's guide may differ from your machine depending on its options or models. Check your machine type - Samsung SL-M5370LX | User Manual Ver.1.0 (English) - Page 366
to cool down. 2 Open the front door. 3 Pull the corresponding toner cartridge out from the machine. 2 1 3 2 1 Toner particles can be released inside the machine but it does not mean the machine is damaged. Contact a service representative when print quality problems occur. 4. Maintenance 366 - Samsung SL-M5370LX | User Manual Ver.1.0 (English) - Page 367
-free cloth, wipe away any dust and spilled toner from the toner cartridge area. 5 Hold the toner cartridge and align it with the corresponding slot inside not use solvents such as benzene or thinner to clean. Printing quality problems can occur and cause damage to the machine. • To prevent damage - Samsung SL-M5370LX | User Manual Ver.1.0 (English) - Page 368
Cleaning the machine 6 Close the front door. Ensure that the door is securely closed. Cleaning the imaging unit area 1 Open the front door. 1 2 2 1 If the front door is not completely closed, the machine will not operate. 7 Plug in the power cord and turn the machine on. 4. Maintenance 368 - Samsung SL-M5370LX | User Manual Ver.1.0 (English) - Page 369
machine 2 Open the side cover, Hold and push down the lever. 2 1 3 3 Open the inner cover and pull the corresponding imaging unit out from the machine. • To prevent damage to the imaging unit, do not expose it to light for more than a few minutes. Cover it with a piece of paper, if necessary. • Do - Samsung SL-M5370LX | User Manual Ver.1.0 (English) - Page 370
Cleaning the machine 4 With a dry, lint-free cloth, wipe away any dust and spilled toner from the imaging unit area. 5 Hold the handles on the new imaging unit, and push the imaging unit until it locks into place. 4. Maintenance 370 - Samsung SL-M5370LX | User Manual Ver.1.0 (English) - Page 371
Cleaning the machine 6 Hold the toner cartridge and align it with the corresponding slot inside the machine. Insert it back into its slot until it locks in place. 1 2 7 Close the side - Samsung SL-M5370LX | User Manual Ver.1.0 (English) - Page 372
helps to ensure the best possible copy quality. We suggest that you clean the scan unit at the start of each day and during the day, as needed. 1 Prepare a soft, lint-free cloth. 2 Open the scanner lid. 3 Wipe the surface of - Samsung SL-M5370LX | User Manual Ver.1.0 (English) - Page 373
it in a temperatures between 15°C ~30°C and humidity between 10% ~ 70%. 11 Toner cartridge/ Imaging unit To get the best, print quality from the toner cartridge, keep the following guidelines in mind: • Do not remove the toner cartridge from its package until it's ready to use. • Do not refill the - Samsung SL-M5370LX | User Manual Ver.1.0 (English) - Page 374
machine securely. • Lock the scanner lock. • Moving long distances using a truck: - Remove the finisher, optional trays, or desk and inner imaging units and toner cartridges. - Fasten the scanner locking screw and the 3 finisher locking screws. - Tape trays and DSDF cover. • Moving short distances - Samsung SL-M5370LX | User Manual Ver.1.0 (English) - Page 375
Printing a demo page Print a demo page to check the print quality of the machine if you have not used the machine for sometime. 13 From the machine See "Report" on page 328. 14 From the SyncThru™ Web Service See "Information tab" on page 169. 4. Maintenance 375 - Samsung SL-M5370LX | User Manual Ver.1.0 (English) - Page 376
WebSite www.samsung.com/ n_africa/support www.samsung.com/ ar/support www.samsung.com/ support www.samsung.com/ au/support www.samsung.com/ at/support www.samsung.com/ support www.samsung.com/ ae/support (English) www.samsung.com/ ae_ar/support (Arabic) www.samsung.com/ support www.samsung.com/ in - Samsung SL-M5370LX | User Manual Ver.1.0 (English) - Page 377
Customer Care Center WebSite CANADA 1-800-SAMSUNG (726-7864) www.samsung.com/ ca/support(English) www.samsung.com/ ca_fr/support (French) CHILE 800-SAMSUNG (726-7864) [HHP] 02-24828200 www.samsung.com/ cl/support CHINA 400-810-5858 www.samsung.com/ cn/support COLOMBIA Bogotá 600 12 72 - Samsung SL-M5370LX | User Manual Ver.1.0 (English) - Page 378
.samsung.com/ africa_en/support www.samsung.com/ gr/support www.samsung.com/ latin/support (Spanish) www.samsung.com/ latin_en/support (English) www.samsung.com/ latin/support (Spanish) www.samsung.com/ latin_en/support (English) www.samsung.com/ hk/support (Chinese) www.samsung.com/ hk_en/support - Samsung SL-M5370LX | User Manual Ver.1.0 (English) - Page 379
com/ support www.samsung.com/ ae/support (English) www.samsung.com/ ae_ar/support (Arabic) www.samsung.com/ kz_ru/support www.samsung.com/ lv/support www.samsung.com/ lt/support www.samsung.com/ support www.samsung.com/ support www.samsung.com/ my/support www.samsung.com/ mx/support Contact SAMSUNG - Samsung SL-M5370LX | User Manual Ver.1.0 (English) - Page 380
-0101 WebSite www.samsung.com/ latin/support(Spanish) www.samsung.com/ latin_en/support (English) www.samsung.com/ no/support www.samsung.com/ ae/support (English) www.samsung.com/ ae_ar/support (Arabic) www.samsung.com/ pk/support www.samsung.com/ latin/support (Spanish) www.samsung.com/ latin_en - Samsung SL-M5370LX | User Manual Ver.1.0 (English) - Page 381
.samsung.com/ latin/support (Spanish) www.samsung.com/ latin_en/support (English) www.samsung.com/ ae/support (English) www.samsung.com/ ae_ar/support (Arabic) www.samsung.com/ support www.samsung.com/ ro/support www.samsung.com/ ru/support www.samsung.com/ sa/support www.samsung.com/ sa_en/support - Samsung SL-M5370LX | User Manual Ver.1.0 (English) - Page 382
-12 WebSite www.samsung.com/ levant/support (English) www.samsung.com/ support www.samsung.com/ tw/support www.samsung.com/ support www.samsung.com/ th/support www.samsung.com/ latin/support (Spanish) www.samsung.com/ latin_en/support (English) www.samsung.com/ tr/support www.samsung.com/ n_africa - Samsung SL-M5370LX | User Manual Ver.1.0 (English) - Page 383
WebSite www.samsung.com/ ae/support (English) www.samsung.com/ ae_ar/support (Arabic) www.samsung.com/ uk/support www.samsung.com/ us/support www.samsung.com/ us/support www.samsung.com/ support www.samsung.com/ ua/support (Ukrainian) www.samsung.com/ ua_ru/support (Russian) www.samsung.com/ latin - Samsung SL-M5370LX | User Manual Ver.1.0 (English) - Page 384
as mentioned in this user's guide. 802.11 802.11 is 802.11b supports bandwidth up to 11 Mbps, 802.11n supports bandwidth up Automatic Document Feeder (ADF) is a scanning unit that will automatically feed an original sheet of a single pixel in a bitmapped image. Higher color depth gives a broader - Samsung SL-M5370LX | User Manual Ver.1.0 (English) - Page 385
toner usage measurement on printing. For example, 5% coverage means that an A4 sided paper has about 5% image or text on it. So, if the paper or original has complicated images A Duplex Automatic Document Feeder (DADF) is a scanning unit that will automatically feed and turn over an original sheet - Samsung SL-M5370LX | User Manual Ver.1.0 (English) - Page 386
in a higher resolution, more visible detail in the image, and a larger file size. DRPD DIMM Dual Inline Distinctive Ring is a telephone company service which enables a user to use both sides of the paper. A printer equipped with a Duplex Unit can print on both sides of paper during one print cycle - Samsung SL-M5370LX | User Manual Ver.1.0 (English) - Page 387
such as a coin operated device or a card reader. Those devices allow the pay-for-print service on your machine. FTP A File Transfer Protocol (FTP) is a commonly used protocol for exchanging files over any network that supports the TCP/IP protocol (such as the Internet or an intranet). Glossary 387 - Samsung SL-M5370LX | User Manual Ver.1.0 (English) - Page 388
roller. After toner is transferred onto the paper, the fuser unit applies heat and pressure to ensure that the toner stays on the that represent light and dark portions of an image when color images are converted to grayscale; colors are represented service, the internal website. Glossary 388 - Samsung SL-M5370LX | User Manual Ver.1.0 (English) - Page 389
world-wide industrial and commercial standards. IPM The Images Per Minute (IPM) is a way of the Internet to hundreds of printers, and also supports access control, authentication, and encryption, making it systems. IPX and SPX both provide connection services similar to TCP/IP, with the IPX protocol - Samsung SL-M5370LX | User Manual Ver.1.0 (English) - Page 390
Access Protocol (LDAP) is a networking protocol for querying and modifying directory services running over TCP/IP. LED A Light-Emitting Diode (LED) is a that needs to be transmitted between the fax machines to transfer the image recommended by ITU-T T.4. MH is a codebook-based run-length encoding - Samsung SL-M5370LX | User Manual Ver.1.0 (English) - Page 391
. Today NetWare supports TCP/IP as well as IPX/SPX. OPC Organic Photo Conductor (OPC) is a mechanism that makes a virtual image for print using a laser beam emitted from a laser printer, and it is usually green or rust colored and has a cylinder shape. An imaging unit containing a drum slowly wears - Samsung SL-M5370LX | User Manual Ver.1.0 (English) - Page 392
an image. Printer Driver A program See PostScript. PSTN The Public-Switched Telephone Network (PSTN) is the network of the world's public circuit-switched telephone networks which, on industrial premises, is usually routed through the switchboard. RADIUS Remote Authentication Dial In User Service - Samsung SL-M5370LX | User Manual Ver.1.0 (English) - Page 393
server protocol, where the client transmits an email message to the server. SSID Service Set Identifier (SSID) is a name of a wireless local area network Image File Format (TIFF) is a variable-resolution bitmapped image format. TIFF describes image data that typically come from scanners. TIFF images - Samsung SL-M5370LX | User Manual Ver.1.0 (English) - Page 394
or container used in a machine like a printer which contains toner. Toner is a powder used in laser printers and photocopiers, which forms the text and images on the printed paper. Toner can be fused by by a combination of heat/pressure from the fuser, causing it to bind to the fibers in the paper - Samsung SL-M5370LX | User Manual Ver.1.0 (English) - Page 395
more advanced security. WPS The Wi-Fi Protected Setup (WPS) is a standard for establishing a wireless home network. If your wireless access point supports WPS, you can configure the wireless network connection easily without a computer. XPS XML Paper Specification (XPS) is a specification for a Page - Samsung SL-M5370LX | User Manual Ver.1.0 (English) - Page 396
imaging unit area inside outside scan unit toner area cleaning a machine connect printer cable control panel convention copy setting copying basic copying 172 79 79 172 364 368 365 365 372 366 365 25 24 14 170 110, 123 understanding the copy screen 101, 115, 134, 151 customer support - Samsung SL-M5370LX | User Manual Ver.1.0 (English) - Page 397
header features print media feature printer driver 145 145, 147 146, firmware 173 front view 1 21 G general icons general settings glossary google cloud printing group group address 14 314, 315, 320, 328 384 356 154 H HTTP settings 171 I id copy 112 imaging unit replacing imaging unit - Samsung SL-M5370LX | User Manual Ver.1.0 (English) - Page 398
media log login LPR/LPD settings 129 48 46 55 51 58 173 168, 313 171 M Mac common Mac problems 262 driver installation for network connected 348 driver reinstallation for USB cable connected 44 printing 94 scanning 127 system requirements 289 mac scanning 127 machine detail 334 - Samsung SL-M5370LX | User Manual Ver.1.0 (English) - Page 399
postScript driver 292, 337 337 344 94 78 23 205 48 46 84 85 85 64 64 79 troubleshooting 264 power save 317, 318 print mobile OS 353 mobileprint 353 print media card stock 61 envelope 59 guidelines 50 labels 60 letterhead/preprinted paper 61 output support - Samsung SL-M5370LX | User Manual Ver.1.0 (English) - Page 400
system problems problems copying problems paper feeding problems power problems printing quality problems touch screen Q quick copy R Raw TCP/IP settings rear view regulatiory information report demo page requirements SyncThruTM Web Service S safety information symbols 261 samsung printer - Samsung SL-M5370LX | User Manual Ver.1.0 (English) - Page 401
361 toner unit sending the toner reorder notification 361 touch screen problem solving 249 tray auto continue 64 loading paper in multi-purpose tray 55 paper substitution 64 Tray 1 63 tray setting 316 TWAIN, scan 124 U Understanding the status LED 27 UNIX driver installation - Samsung SL-M5370LX | User Manual Ver.1.0 (English) - Page 402
95 W watermark create 83 delete 83 edit 83 print 82 Windows common Windows problems 261 driver installation for network connected 345 driver installation for USB cable connected 40 driver reinstallation for USB cable connected 43 printing 66 scanning 114 system requirements 288
-
 1
1 -
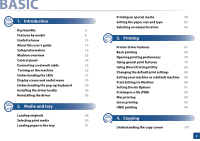 2
2 -
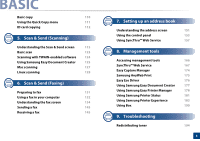 3
3 -
 4
4 -
 5
5 -
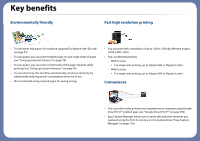 6
6 -
 7
7 -
8
-
9
-
10
-
11
-
12
-
13
-
14
-
15
-
16
-
17
-
18
-
19
-
20
-
21
-
22
-
23
-
24
-
25
-
26
-
27
-
28
-
29
-
30
-
31
-
32
-
33
-
34
-
35
-
36
-
37
-
38
-
39
-
40
-
41
-
42
-
43
-
44
-
45
-
46
-
47
-
48
-
49
-
50
-
51
-
52
-
53
-
54
-
55
-
56
-
57
-
58
-
59
-
60
-
61
-
62
-
63
-
64
-
65
-
66
-
67
-
68
-
69
-
70
-
71
-
72
-
73
-
74
-
75
-
76
-
77
-
78
-
79
-
80
-
81
-
82
-
83
-
84
-
85
-
86
-
87
-
88
-
89
-
90
-
91
-
92
-
93
-
94
-
95
-
96
-
97
-
98
-
99
-
100
-
101
-
102
-
103
-
104
-
105
-
106
-
107
-
108
-
109
-
110
-
111
-
112
-
113
-
114
-
115
-
116
-
117
-
118
-
119
-
120
-
121
-
122
-
123
-
124
-
125
-
126
-
127
-
128
-
129
-
130
-
131
-
132
-
133
-
134
-
135
-
136
-
137
-
138
-
139
-
140
-
141
-
142
-
143
-
144
-
145
-
146
-
147
-
148
-
149
-
150
-
151
-
152
-
153
-
154
-
155
-
156
-
157
-
158
-
159
-
160
-
161
-
162
-
163
-
164
-
165
-
166
-
167
-
168
-
169
-
170
-
171
-
172
-
173
-
174
-
175
-
176
-
177
-
178
-
179
-
180
-
181
-
182
-
183
-
184
-
185
-
186
-
187
-
188
-
189
-
190
-
191
-
192
-
193
-
194
-
195
-
196
-
197
-
198
-
199
-
200
-
201
-
202
-
203
-
204
-
205
-
206
-
207
-
208
-
209
-
210
-
211
-
212
-
213
-
214
-
215
-
216
-
217
-
218
-
219
-
220
-
221
-
222
-
223
-
224
-
225
-
226
-
227
-
228
-
229
-
230
-
231
-
232
-
233
-
234
-
235
-
236
-
237
-
238
-
239
-
240
-
241
-
242
-
243
-
244
-
245
-
246
-
247
-
248
-
249
-
250
-
251
-
252
-
253
-
254
-
255
-
256
-
257
-
258
-
259
-
260
-
261
-
262
-
263
-
264
-
265
-
266
-
267
-
268
-
269
-
270
-
271
-
272
-
273
-
274
-
275
-
276
-
277
-
278
-
279
-
280
-
281
-
282
-
283
-
284
-
285
-
286
-
287
-
288
-
289
-
290
-
291
-
292
-
293
-
294
-
295
-
296
-
297
-
298
-
299
-
300
-
301
-
302
-
303
-
304
-
305
-
306
-
307
-
308
-
309
-
310
-
311
-
312
-
313
-
314
-
315
-
316
-
317
-
318
-
319
-
320
-
321
-
322
-
323
-
324
-
325
-
326
-
327
-
328
-
329
-
330
-
331
-
332
-
333
-
334
-
335
-
336
-
337
-
338
-
339
-
340
-
341
-
342
-
343
-
344
-
345
-
346
-
347
-
348
-
349
-
350
-
351
-
352
-
353
-
354
-
355
-
356
-
357
-
358
-
359
-
360
-
361
-
362
-
363
-
364
-
365
-
366
-
367
-
368
-
369
-
370
-
371
-
372
-
373
-
374
-
375
-
376
-
377
-
378
-
379
-
380
-
381
-
382
-
383
-
384
-
385
-
386
-
387
-
388
-
389
-
390
-
391
-
392
-
393
-
394
-
395
-
396
-
397
-
398
-
399
-
400
-
401
-
402
 |
 |

Samsung
Multifunction
Multi
X
press
M537x series
M437x series
BASIC
User’s Guide
BASIC
User’s Guide
This guide provides information concerning installation, basic operation and
troubleshooting on Windows.
ADVANCED (ADMINISTRATOR’S GUIDE)
This guide provides information about installation, advanced configuration, operation and
troubleshooting on various OS environments.
Some features may not be available depending on models or countries.