Samsung SMX-F50SN User Manual (user Manual) (ver.1.0) (English) - Page 99
Connecting to a TV, CONNECTING TO A TV (16:9/4:3
 |
UPC - 036725303942
View all Samsung SMX-F50SN manuals
Add to My Manuals
Save this manual to your list of manuals |
Page 99 highlights
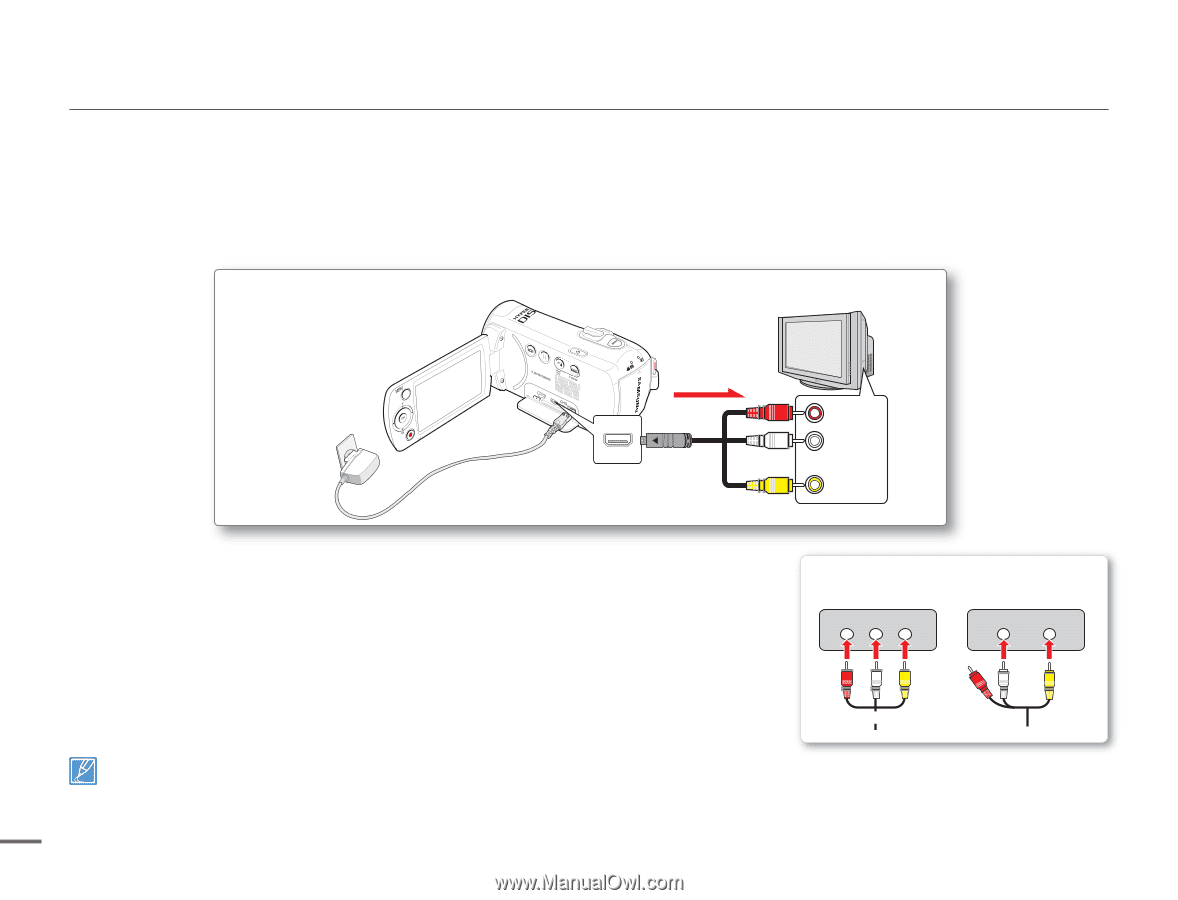
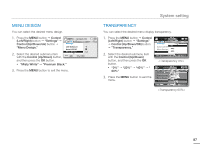
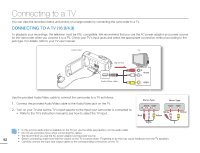
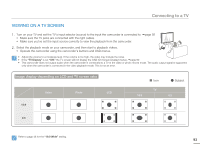
Connecting to a TV You can view the recorded videos and photos on a large screen by connecting the camcorder to a TV. CONNECTING TO A TV (16:9/4:3) To playback your recordings, the television must be PAL-compatible. We recommend that you use the AC power adaptor as a power source for the camcorder when you connect it to a TV. Check your TV's input jacks and select the appropriate connection method according to the jack type. For details, refer to your TV user manual. Camcorder TV Signal flow CARD Audio/Video cable R AUDIO L VIDEO Use the provided Audio/Video cable to connect the camcorder to a TV as follows: 1. Connect the provided Audio/Video cable to the Audio/Video jack on the TV. 2. Turn on your TV and set the TV's input selector to the Input your camcorder is connected to. • Refer to the TV's instruction manual to see how to select the TV input. Stereo Type Mono Type AUDIO VIDEO R L AUDIO VIDEO Red White Yellow Yellow White • If only a mono audio input is available on the TV set, use the white plug (audio L) on the audio cable. • Do not use excessive force when connecting the cables. • We recommend you use the AC power adaptor as the power source. 92 • Before connecting, make sure that the volume on the TV is turned down. Forgetting to do this may cause feedback from the TV speakers. • Carefully connect the input and output cables to the corresponding connections on the TV.
-
 1
1 -
2
-
3
-
4
-
5
-
6
-
7
-
8
-
9
-
10
-
11
-
12
-
13
-
14
-
15
-
16
-
17
-
18
-
19
-
20
-
21
-
22
-
23
-
24
-
25
-
26
-
27
-
28
-
29
-
30
-
31
-
32
-
33
-
34
-
35
-
36
-
37
-
38
-
39
-
40
-
41
-
42
-
43
-
44
-
45
-
46
-
47
-
48
-
49
-
50
-
51
-
52
-
53
-
54
-
55
-
56
-
57
-
58
-
59
-
60
-
61
-
62
-
63
-
64
-
65
-
66
-
67
-
68
-
69
-
70
-
71
-
72
-
73
-
74
-
75
-
76
-
77
-
78
-
79
-
80
-
81
-
82
-
83
-
84
-
85
-
86
-
87
-
88
-
89
-
90
-
91
-
92
-
93
-
 94
94 -
 95
95 -
 96
96 -
 97
97 -
 98
98 -
 99
99 -
 100
100 -
 101
101 -
 102
102 -
 103
103 -
 104
104 -
105
-
106
-
107
-
108
-
109
-
110
-
111
-
112
-
113
-
114
-
115
-
116
-
117
-
118
-
119
-
120
-
121
-
122
-
123
-
124
 |
 |