Singer CE-150 Futura Instruction Manual
Singer CE-150 Futura Manual
 |
View all Singer CE-150 Futura manuals
Add to My Manuals
Save this manual to your list of manuals |
Singer CE-150 Futura manual content summary:
- Singer CE-150 Futura | Instruction Manual - Page 1
CE-150 INSTRUCTION MANUAL - Singer CE-150 Futura | Instruction Manual - Page 2
- Singer CE-150 Futura | Instruction Manual - Page 3
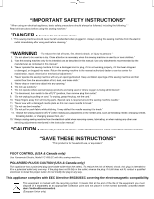
bobbin, or changing presser foot, etc." 15. "Always unplug sewing machine from the electrical outlet when removing covers, lubricating, or when making any other user servicing adjustments mentioned in the instruction manual." "CAUTION - Moving parts-To reduce risk of injury switch off before - Singer CE-150 Futura | Instruction Manual - Page 4
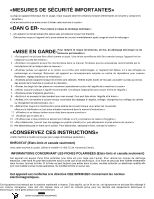
débranchez la prise externe de courant.» 15. «Ne débranchez pas en tirant sur le cordon. Pour débrancher, saisissez la fiche, non pas le cordon.» «CONSERVEZ CES INSTRUCTIONS» «Cette machine à coudre est couçue pour usage domestique seulement.» RHÉOSTAT (Etats-Unis et canada seulement) Avec cette - Singer CE-150 Futura | Instruction Manual - Page 5
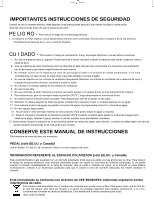
, no del cable. 10. Mantener los dedos alejados de todas las partes movibles de la máuqina. Tener un cuidado especial con la aguja. 11 realice algún otro tipo de ajuste mecánico mencionado en el manual de instrucciones. CONSERVE ESTE MANUAL DE INSTRUCCIONES Esta máquina de coser es para uso doméstico - Singer CE-150 Futura | Instruction Manual - Page 6
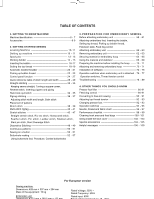
66 - 69 Preparing the machine before installing the hoop ------- 70 - 71 Attaching and removing embroidery hoop 70 - 71 Installation of software 72 - 75 Operation switches when embroidery unit is attached - 76 - 77 Operation switches, Thread tension control Troubleshooting 78 - 89 4. OTHER THINGS - Singer CE-150 Futura | Instruction Manual - Page 7
62 - 63 Fixation du tissu dans le cerceau de broderie 64 - 65 Utilisation du tissu et de l'entoilage 66 - 69 Préparation de la machine avant d'installer le cerceau 70 - 71 Fixation et retrait du cerceau de broderie 70 - 71 Installation du logiciel 72 - 75 Touches de fonctionnement lorsque - Singer CE-150 Futura | Instruction Manual - Page 8
CONTENIDO 1. PRINCIPALES PARTES DE LA MAQUINA Identificación de la máquina 6 - 7 Accesorios 8 - 9 2. COMENZAR A ---------- 70 - 71 Colocando y retirando el aro para bordar 70 - 71 Instalación del software 72 - 75 Interruptores de control cuando la unidad de bordado está instalada 76 - 77 - Singer CE-150 Futura | Instruction Manual - Page 9
- Singer CE-150 Futura | Instruction Manual - Page 10
44. Inner frame 45. Outer frame 46. Hoop adjusting screw 47. Hoop mounting plate 48. Small hoop 49. Power line cord 50. Foot control 51. USB cable 52. Instruction manual NOTE: Be sure to use the USB cable attached with your machine when doing embroidery sewing. 1 2 3 4 5 6 7 13 14 15 16 17 18 3938 - Singer CE-150 Futura | Instruction Manual - Page 11
Guide de référence des messages d'aide 12.Porte-bobine horizontal 13.Poignée 14.Volant 15.Support guide instruction REMARQUE: Utiliser le cable USB fourni avec votre machine quand vous voulez faire de la broderie. 1. PRINCIPALES PARTES .Cable USB 52.Manual de instrucciones NOTA: Asegurese de utilizar el - Singer CE-150 Futura | Instruction Manual - Page 12
Button sewing foot 11. Blind stitch foot 12. Buttonhole foot 13. Satin stitch foot 14. Thread spool net (long) 15. Thread spool net (short) 16. Removable thread guide 1 2 3 4 5 6 7 8 FOR EMBROIDERY 17. Vinyl bag 18. Bobbins 19. Scissors 20. Embroidery presser foot 21. Embroidery software CD - Singer CE-150 Futura | Instruction Manual - Page 13
ACCESSOIRES POUR LA MACHINE À COURE 1. Aiguilles 2. Canettes 3.Chapeau pour petite pour point bourdon 14.Filet de bobine (long) 15.Filet de bobine (court) 16.Guide-fil amovible ACCESORIOS PARA MAQUINA DE COSER 1. Agujas 2. Canillas 3.Tapa del pasador carrete de bordado 21. CD de software de bordado - Singer CE-150 Futura | Instruction Manual - Page 14
machine socket (3), when using sewing machine only. NOTE: When foot control is disconnected, the machine will not operate. Always disconnect the machine both the power and the light. When servicing the machine, or changing needles or Iamps, etc., machine must be disconnected from the Power line cord - Singer CE-150 Futura | Instruction Manual - Page 15
le réglage en le tournant. * Utilisez le tournevis (petit) fourni comme accessoire. Une fois le réglage effectué, vérifiez le bon équilibre de la machine. AJUSTE Incline la máquina hacia atrás cuidadosamente con ambas manos. Tenga cuidado de no rayar la máquina ni la mesa. Tenga cuidado de no dejar - Singer CE-150 Futura | Instruction Manual - Page 16
the spool pin and draw thread through the thread guide pole, the removable thread guide and further threading path from the spool as illustrated. 1 Removable thread guide Guide-fil amovible Guia del hilo trasladable 2 Thread guide pole Support guide-fils télescopique Barra-guía ddel hilo For - Singer CE-150 Futura | Instruction Manual - Page 17
la salida suave de hilo PORTE-BOBINE VERTICAL pour grande bobine 1. Placez le guide de fil amovible sur la tige du porte- bobine horizontal tel qu'illustré. 2. Abaissez le porte-bobine vertical et remontez le support-guide de fils télescopique pour le mettre en place. 3. Placez la bobine sur - Singer CE-150 Futura | Instruction Manual - Page 18
secure it with the spool pin cap. Pull the thread out from the spool through thread guide. 1 2 2. Pull end of thread through hole in bobbin as shown. 3. Push clicks. Hold onto end of thread. 4. Start machine. Bobbin will automatically stop turning when 4 completely filled. Push shaft to the - Singer CE-150 Futura | Instruction Manual - Page 19
Tirez le fil hors de la bobine par le guide-fil. 1. Coloque un carrete de hilo en el con el extremo del hilo saliendo por la parte superior de la canilla. Empujar hacia la derecha pleine, elle s'arrêtera de tourner. Arrêter la machine. Pousser l'ensemble axe canette vers la gauche pour pouvoir - Singer CE-150 Futura | Instruction Manual - Page 20
gently on top of the bobbin, pull thread through the slot (B) until you hear a clicking sound, and then leave about 6" (15 cm) of thread. 11. Replace the bobbin cover plate onto the needle A B A - Singer CE-150 Futura | Instruction Manual - Page 21
ENFILAGE DU FIL DE CANETTE 1. Relevez l'aiguille en position haute en tournant manuellement le volant vers vous. ENHEBRADO DEL HILO DE LA CANILLA 1. Eleve la aguja hasta su posición más alta girando el volante. 2. Retirez la plaque de canette en poussant le bouton de libération vers la droite tout - Singer CE-150 Futura | Instruction Manual - Page 22
wheel toward you until the needle is in its highest position and the thread take-up is visible. C. Thread the machine in the following order as illustrated. ∗ Guide the thread through thread guide (1), and then pull it down along the groove. ∗ Do a U-turn around the inside of the tab (2). ∗ Pass the - Singer CE-150 Futura | Instruction Manual - Page 23
tensión correcta del hilo.) B. Tournez le volant vers vous jusqu'à ce que l'aiguille soit en position haute et que le releveur de fil vista. C. Enfilez le fil de la machine dans l'ordre suivant, comme indiqué sur l'illustration. ∗ Faites passer le fil par le guide-fil (1), puis tirez-le vers le - Singer CE-150 Futura | Instruction Manual - Page 24
end passes 2 through the needle eye. Guide thread into hooked end and pull it upward. 3. Release the threader lever and thread simultaneously, and needle will be threaded automatically. 3 NOTE: For smooth threading, it is recommended that the machine be set for straight stitch (in center - Singer CE-150 Futura | Instruction Manual - Page 25
UTILISATION DE L'ENFILEUR DE CHAS D'AIGUILLE Elever l'aiguille en position haute en toumant le volant vers vous. 1. Passer le fil dans le crochet de l'enfileur. EMPLEO DEL ENSARTADOR AGUJA Levantar la aguja a la posición más elevada girando el volante de la máquina hacia uated. 1. Bajar la palanca - Singer CE-150 Futura | Instruction Manual - Page 26
up the bobbin thread, which 3 will then appear through the needle plate slot. 4. Pull both top and bobbin threads together toward the back of the machine under the presser foot, leaving about 6" (15 cm) 4 clear. - Singer CE-150 Futura | Instruction Manual - Page 27
RAPPEL DU FIL INFÉRIEUR 1. Relever le pied presseur. RECOGIDA DEL HILO DE LA CANILLA 1. Alzar la palanca del pie prensatelas. 2. Tenir le fil de l'aiguille et tourner le volant vers vous en faisant remonter l'aiguille à sa position la plus haute. 2. Manteniendo flojo el hilo de la aguja con la - Singer CE-150 Futura | Instruction Manual - Page 28
Pattern selection buttons Turn on the power switch and the LED indicator above the straight stitch pattern will be lit. At this point you may sew Straight Stitch. To select other patterns, push the pattern selection button to the right of the row that contains your desired pattern. Stop when the - Singer CE-150 Futura | Instruction Manual - Page 29
FUNCIONES DEL PANEL DE CONTROL Mettez l'interrupteur d'alimentation sous tension pour allumer le témoin à diode au-dessus du motif de point droit. A ce point, vous pouvez coudre des points droits. Pour sélectionner d'autres motifs, appuyez sur la touche de sélection des motifs à la droite de - Singer CE-150 Futura | Instruction Manual - Page 30
sewing machine will produce most of your stitching requirements at an Auto/Default Stitch Length and Width. When a pattern is selected, it will automatically sew left or right to locate each of the potential adjustments. At each manual adjustment point, the LED will blink 3 times in green and a beep - Singer CE-150 Futura | Instruction Manual - Page 31
de point/ position de l'aiguille *Réglages Auto/Par défaut Votre machine à coudre exécute la plupart de vos nécessités de couture que se encuentra en la posición de ajustes por defecto/automático. *Ajustes manuales Una vez que haya determinado la posición por defecto/ automática podrá cambiar - Singer CE-150 Futura | Instruction Manual - Page 32
3.0 2.5 1.5 ~ 3.0 1.5 0 ~ 2.5 CUADRO DE REFERENCIA RAPIDA DE LARGO Y ANCHO DE PUNTADA NEEDLE POSITION POSITION D'AIGUILLE AGUJA POSICIONADA AUTO AUTO AUTO MANUAL MANUEL MANUAL CENTER CENTRE CENTRO IZQUIERDA LEFT GAUCHE - RIGHT - DROIT - DERECHA - WIDTH LARGEUR (mm) ANCHO AUTO AUTO AUTO - Singer CE-150 Futura | Instruction Manual - Page 33
INCLINADO SLANT OVEREDGE SURJET OBLIQUE OVERLOCK INCLINADO BUTTON SEWING POSE DE BOUTONS COSIDO DE BOTÓNES WIDE LENGTH LONGUEUR (mm) LARGO AUTO AUTO AUTO MANUAL MANUEL MANUAL 2.0 1.5 ~ 3.0 2.5 1.5 ~ 3.0 0.5 0.25 ~ 1.5 2.0 1.0 ~ 3.0 2.5 1.5 ~ 3.0 2.5 1.5 ~ 3.0 3.0 - 2.0 1.5 ~ 2.5 - Singer CE-150 Futura | Instruction Manual - Page 34
. 5 4. Turn the hand wheel toward you until the needle enters the fabric. 5. Start the machine. Guide the fabric gently with your hands. When reaching the edge of the material, stop the sewing machine. 6. First turn the handwheel toward you until the needle is in 6 its highest position, then - Singer CE-150 Futura | Instruction Manual - Page 35
cortar el exceso de hilo con el cortador de hilo que está colocado en la parte inferior del cabezal, según está mostrado. POUR GARDER LA COUTURE DROITE Pour piquer une ligne droite, utiliser les lignes de guide sur la plaque à aiguille. Le numéro indiqué est la distance entre l' aiguille au centre - Singer CE-150 Futura | Instruction Manual - Page 36
5/8" (16 mm) from the fabric edge, push the needle stop position selector switch to stop the needle to its lowest position. Start and stop the machine when reaching the cornering guide as shown. Raise the presser foot and turn fabric. 2. New stitching line will align with 5/8" (16 mm) seam - Singer CE-150 Futura | Instruction Manual - Page 37
d'arrêt de l'aiguille pour ce que l'aiguille est à la position basse. Cousez et arrêter quand vous arrivez au guide d'angle comme illustrer. Lever le . Aussi longtemps que vous appuyez sur la touche pendant la couture, la machine continue à entraîner le tissu vers l'arrière. dirección nueva. PUNTADA - Singer CE-150 Futura | Instruction Manual - Page 38
the Stitch Width Control. HAND-LOOK QUILT STITCH This stitch is designed to look like hand sewing for topstitching and quilting. 1. Thread bobbin with desired top stitching color. 2. Thread machine with invisible thread or same color thread, which matches fabric, so it doesn't show. 3. Increase - Singer CE-150 Futura | Instruction Manual - Page 39
l'étoffe. Placez le pied fermeture glissière vers la gauche, de facon à ce que l'aiguille entre dans l'encoche située du côté droit du pied. Suggestion utile desserré, la machine peut s'arrêter au début. Si la machine s'arrête dès le départ, appuyez de nouveau sur l'interrupteur de départ. PUNTADA - Singer CE-150 Futura | Instruction Manual - Page 40
appear on the bottom depending on the thread, fabric, type of stitch and sewing speed, but the bobbin thread must never appear on the top of the width is about 5 mm. is the selection range when setting the value manually. SATIN STITCH This is a closely spaced attractive stitch for appliqué, bar- - Singer CE-150 Futura | Instruction Manual - Page 41
:Control tensión hilo - S - E El hilo superior puede aparecer en la parte inferior, según el hilo, tejido, tipo de puntada y velocidad de costura, point décoratif qui sert pour les applíqués, les brides. Lorsque vous utilisez ce point, pensez à diminuer la tension supérieure. Régler la longueur de - Singer CE-150 Futura | Instruction Manual - Page 42
fold. NOTE: For a narrower or wider blindhem, first manually adjust the length and width controls to your desired length and width. Then adjust the guide on the foot. Sew slowly, guiding the fabric carefully along the edge of the guide. 4. When completed, the stitching is almost invisible on the - Singer CE-150 Futura | Instruction Manual - Page 43
ne devrait percer que le pli du tissu. Si elle ne le fait pas, ajustez le guide (B) du pied invisible (A) de façon à ce que l'aiguille ne perce que le pli du tissu et que le guide repose juste sur le pli. REMARQUE: pour un point invisible plus étroit ou plus large, ajustez - Singer CE-150 Futura | Instruction Manual - Page 44
MULTI-STITCH ZIGZAG SETTINGS :Presser foot - General Purpose Foot :Thread tension control - S - E This is a strong stitch because as its name implies, it makes three short stitches where the normal zig-zag makes only one. For this reason it is highly recommended for overcasting all types of fabrics. - Singer CE-150 Futura | Instruction Manual - Page 45
de chaque extrèmité pour revenir au centre. Pour renforcer votre couture, placez un morceau de tissu sous l'accroc. Vous pouvez aussi utiliser ce point pour la finition des coutures. AJUSTES :Pie prensatelas - Pie universal :Control tensión hilo - S - E Esta es una puntada fuerte, ya que como su - Singer CE-150 Futura | Instruction Manual - Page 46
STRETCH STITCHES SETTINGS :Presser foot - General Purpose Foot :Thread tension control - S - E Stretch stitches are mainly for use on knit, or stretchable fabrics, but can also be used on ordinary woven materials. STRAIGHT STITCH STRETCH Straight stretch stitch is far stronger than an ordinary - Singer CE-150 Futura | Instruction Manual - Page 47
du fil supérieur - S - E Les points extensibles sont généralement utilisés pour les tissus élastiques, mais peuvent ètres utilisès sur tissus tissés. POINT DROIT EXTENSIBLE Ce point est beaucoup plus solide que le point ordinaire, vu qu'il s'exécute en trois fois, une fois en avant, une fois en arri - Singer CE-150 Futura | Instruction Manual - Page 48
stitch is primarily used for drawn thread hemstitching. It can also be used for sewing over thin tape in an opposite or same color. Place the stitch in the thread work, choose a medium to heavy weight linen-type fabric. After sewing, draw the thread out from within the ladder for an open, airy - Singer CE-150 Futura | Instruction Manual - Page 49
tissu de type toile grossier et après la couture, tirez le fil de l'échelle pour obtenir une apparence ouverte et aérée. POINT LANGUETTE Ce point, qui a une apparence décorative a une grande commodité d'utilisation, est utilisé pour les ourlets et pour les appliqués pour une courtepointe. Para - Singer CE-150 Futura | Instruction Manual - Page 50
SLANT PIN STITCH Excellent for hemstitching table and bed covers with an elegant touch. Sew along the raw edge of fabric and trim close to the outside of the stitching. SLANT OVEREDGE STITCH Seams and overcasts in one operation to - Singer CE-150 Futura | Instruction Manual - Page 51
de sport, T-shirts, vêtements de bébé en nylon extensible, tissu en éponge extensible, jersey. Les vêtements en tricot machine ou main peuvent être assemblés avec ce point. Vous pouvez également fixer les bandes d'encolure et les poignets. PUNTADA ELASTICA OVERLOCK Las costuras overlock elásticas - Singer CE-150 Futura | Instruction Manual - Page 52
an ideal decorative stitch for finishing the edges of fabrics, such as those used for table linens or children's clothing. When sewing this stitch on a fabric edge, first sew the stitch with a stabilizer underneath the fabric. Trim the edge of the fabric along the edge of the stitch, being careful - Singer CE-150 Futura | Instruction Manual - Page 53
des vêtements de femmes et d'enfants, et permet aussi d'obtenir des bords plus propres. Lorsque vous utilisez ce motif de points pour obtenir des bords plus propres, coudre d'abord le point puis couper le bord du tissu sesgo y pliegue el borde. Cosa con puntada pirámide la parte de arriba de esta. - Singer CE-150 Futura | Instruction Manual - Page 54
:Thread tension control - S - E The patterns illustrated on the right are continuous patterns. Use whichever pattern suit your needs. SEWING ON A BUTTON SETTINGS :Presser foot - Button sewing foot :Feed dog control Position your fabric and button under the presser foot. Lower presser foot. Turn the - Singer CE-150 Futura | Instruction Manual - Page 55
MOTIFS CONTINUELS RÉGLAGES :Pied presseur - Pied pour point bourdon :Réglage tension du fil supérieur - S - E Ces motifs conviennent parfaitement à la couture des motifs continuels. Utilisez les motifs que vous préférez. PATRONES CONTINUOS AJUSTES :Pie prensatelas - Pie prensatelas para coser en - Singer CE-150 Futura | Instruction Manual - Page 56
the size of the button. It is helpful to remove the extension table when sewing a buttonhole, to avoid hearing the foot make noise when moving across the table one of buttonhole patterns. Tab B Languette B Lengüeta B 3. Replace the presser foot with the buttonhole foot. (Refer to "Changing presser - Singer CE-150 Futura | Instruction Manual - Page 57
CONFECTION DES BOUTONNIÈRES UTILISATION DU PIED BOUTONNIÈRE 1. Introduisez un bouton entre les butées A et B. 2. Les boutonnières peuvent être cousues de manière à correspondre à la taille du bouton. Pour éviter un bruit sourd pendant la couture d'un bouton, retirez le plateau de rallonge. - Singer CE-150 Futura | Instruction Manual - Page 58
Fabric marking Marque Marque du tissu Marca de material Mark Marque Marca 1 -* 2 -* 3 -* 4 -* 5 -* 6 -* 7 Fabric marking Marque Marque du tissu Marca de material 9. When sewing is finished, use a buttonhole opener to open up the fabric in the center of the buttonhole. Be careful not to cut any of - Singer CE-150 Futura | Instruction Manual - Page 59
con la marca en el pie de ojaladora, y luego baje el pie de ojaladora. 8. Tout en tenant le fil supérieur, démarrez la machine. 8. Mientras sostiene el hilo superior, haga funcionar la máquina. * La couture sera complétée automatiquement dans l'ordre indiqué sur l'illustration. * La costura se - Singer CE-150 Futura | Instruction Manual - Page 60
twist) over the spur and pull both ends of the cord forward under the foot and tie off the cord as shown in the illustration. Sew buttonhole so that zigzag stitches cover the cord. When completed, release the cord from foot and snip off extra length. Spur Saliente Tige BUTTONHOLING WITH - Singer CE-150 Futura | Instruction Manual - Page 61
tige du pied pour boutonnière et tirer les deux extrémitès sous le pied vers le devant. Coudre la boutonnière de manière à ce que la zig-zag recouvre le cordonnet. La boutonnière terminée, détacher le cordonnet du pied, tirer les bouts vers l'avant et tailler la longueur - Singer CE-150 Futura | Instruction Manual - Page 62
EMBROIDERY SEWING BEFORE ATTACHING EMBROIDERY UNIT ATTACHING EMBROIDERY FOOT Always be sure to turn off power to machine before changing presser foot. CAUTION ∗ Raise presser foot lifter. Foot holder Support replacing presser foot. Needle clamp Serre-aiguille Abrazadera de aguja Embroidery - Singer CE-150 Futura | Instruction Manual - Page 63
BORDADO Veillez à toujours couper l'alimentation électrique ATTENTION de la machine avant de changer le pied presseur. Asegúrese siempre de vers vous jusqu'à ce que l'aiguille soit à sa position la plus haute. 1. Retirez la vis du pied presseur, le pied presseur et le support du pied presseur. - Singer CE-150 Futura | Instruction Manual - Page 64
23. 1 3 4 Thread take-up Releveur de fil Tria- hilos 2 5 Tab Languette Lengüeta EXTENSION TABLE 1. Turn off power to machine. 2. Slide the extension table to left to remove it from machine. (Refer to page 90 - 91.) FEED DOG CONTROL Lower feed dogs by moving feed dog control toward the direction - Singer CE-150 Futura | Instruction Manual - Page 65
RECOG IDA DEL HILO DE LA CAN ILLA Consulte las páginas 22 - 23. PLATEAU DE RALLONGE 1. Eteindre la machine. 2. Faites glisser la table de rallonge vers la gauche pour la retirer de la machine. (Reportez-vous aux pages 90 - 91.)BASE DE EXTENSION 1. Apague la máquina. 2. Deslice la extensión de la - Singer CE-150 Futura | Instruction Manual - Page 66
power to machine. ∗ Remove embroidery hoop from machine. (Refer to pages 70 - 71.) 1. Holding handle of embroidery unit, carefully slide toward the left while pressing release lever. Note: Do not pull carriage when removing embroidery unit. Handle Poignée Mango 1 2 Release lever Support de cerceau - Singer CE-150 Futura | Instruction Manual - Page 67
broderie sur la machine en engageant les connecteurs de la machine et de l'unité de broderie. Faites glisser bien à fond l'unité de broderie jusqu'à ce qu'elle s' Inserte primero la lengüeta en la parte de debajo de la tapa de conector, y empuje la parte de arriba de la tapa de conector con su - Singer CE-150 Futura | Instruction Manual - Page 68
SECURING MATERIAL IN EMBROIDERY HOOP 1. Loosen hoop adjusting screw on outer frame and remove 1 inner frame. Place material between inner and outer frame. 2. Slightly tighten the hoop adjusting screw and pull material 2 edges to remove slack. Fit the two frames together by pressing down on - Singer CE-150 Futura | Instruction Manual - Page 69
FIXATION DU TISSU DANS LE CERCEAU ASEGURANDO EL MATERIAL EN EL DE BRODERIE ARO DE BORDADO 1. Desserrez la vis de réglage du cerceau sur le cadre extérieur et retirez le cadre intérieur. Placez le tissu entre le cadre intérieur et le cadre extérieur. 1. Afloje el tornillo de ajuste de aro en el - Singer CE-150 Futura | Instruction Manual - Page 70
on which you are embroidering. Always follow the manufacturer's instructions on how to use and apply the stabilizer correctly. Generally, the stabilizer should be larger in size than the hoop with which it is being used. When embroidery is completed, use a fine point scissor to carefully remove - Singer CE-150 Futura | Instruction Manual - Page 71
∗ Ces types de tissus étant trop mous, les points de la broderie risquent de se chevaucher, ce qui à maille sur l'envers, avec un entoilage qui part a l'eau sur l'endroit. ∗ Les tissage laches application correctes de l'entoilage, suivez les instructions du fabricant. Généralement, l'entoilage doit - Singer CE-150 Futura | Instruction Manual - Page 72
which is smaller than the hoop size, or when embroidering close to the edge of material, attach the stabilizer as illustrated. WHEN EMBROIDERING ALONG THE EDGE OF MATERIAL SUCH AS A HANDKERCHIEF WHEN EMBROIDERING A NARROW PIECE OF FABRIC SUCH AS RIBBON TAPE Embroidery surface at material edge - Singer CE-150 Futura | Instruction Manual - Page 73
Si vous effectuez la broderie sur un tissu de taille plus petite que celle du cerceau, ou si vous brodez à proximité du bord du tissu, fixez le stabilisateur comme indiqué sur l'illustration. BRODERIE LE LONG DU BORD D'UN TISSU TEL QU'UN MOUCHOIR Si se está bordando sobre material que es más peque - Singer CE-150 Futura | Instruction Manual - Page 74
PREPARING THE MACHINE BEFORE INSTALLING THE HOOP 1 1. Turn hand wheel toward you until needle comes to its highest position. ATTACHING AND REMOVING EMBROIDERY HOOP 1 (A) 1. Raise presser foot and needle, and push up lever (A) of embroidery foot with your finger and pass embroidery hoop under - Singer CE-150 Futura | Instruction Manual - Page 75
PRÉPARATION DE LA MACHINE AVANT D'INSTALLER LE CERCEAU 1. Tournez le volant jusqu'à ce que l'aiguille soit à sa les rainures dans la plaque de montage du cerceau, en plaçant les extensions (C) sur le support du cerceau dans les trous carrés (B) de la plaque de montage du cerceau. Serrez fermement les - Singer CE-150 Futura | Instruction Manual - Page 76
the FUTURA CD-ROM into the CD-ROM disc receiver in your PC. After some seconds, the Installation procedure of the software will start automatically. In case this will not occur after a short while, you can run the installation procedure manually by going to the "Start" option of Windows, select - Singer CE-150 Futura | Instruction Manual - Page 77
poner en funcionamiento el procedimiento de instalación, de forma manual yendo a la opción de Windows "Empezar", seleccione "Ejecutar", escriba "D:\FuturaStart. .exe" y haga clic en "Aceptar" (OK). Tras unos segundos la instalación del software, paso a paso, comenzará con la ventana de Bienvenida - Singer CE-150 Futura | Instruction Manual - Page 78
" error message. Boot up your computer, but do not open the Futura software. Next attach the embroidery unit to your sewing machine and connect the USB cable between your computer and sewing machine. 1. Turn on your sewing machine. Make sure the needle has been moved to the highest position by - Singer CE-150 Futura | Instruction Manual - Page 79
quelques secondes jusqu'à ce que cela se machine. PROCEDIMIENTOS CORRECTOS PARA COMENZAR A BORDAR Se deberán seguir los siguientes pasos para un correcto inicio. Si no se siguen con precisión, marcará un mensaje de error "Transmisión pendiente". Inicie su computadora pero no abra el software Futura - Singer CE-150 Futura | Instruction Manual - Page 80
one stitch at a time (The hoop moves.), after the embroidery data has been transferred. To reverse embroidery data, after which it will no longer move. LED INDICATOR Green light indicates machine is ready to start. Red light indicates machine is operating. Flashing red light indicates a problem - Singer CE-150 Futura | Instruction Manual - Page 81
problème ou un erreur. ∗ Un clignotement durant 2 - 3 secondes indique qu'une opération incorrecte a été effectuée. ∗ Un clignotement continu indique que la machine ne fonctionne pas normalement. INDICADOR LED ∗ La luz verde indica que la máquina está pronta para comenzar. ∗ La luz roja indica que - Singer CE-150 Futura | Instruction Manual - Page 82
TROUBLESHOOTING SKIPPED STITCHES AND THREAD BREAKAGES OCCUR Needle tip is broken. Thread path is incorrect. Replace needle. Refer to pages 18 - 21. Needle is bent. Replace needle. Needle is not installed correctly. Install the needle correctly. Refer to pages 96 - 97. Upper thread tension is - Singer CE-150 Futura | Instruction Manual - Page 83
DÉPAN NAGE DES POINTS SAUTÉS ET LE FIL SE CASSE LOCALIZACION DE AVERIAS SE SALTAN PUNTADAS Y SE ROMPE EL HILO La pointe de l'aiguille est épointée Le fil est enfilé incorrectement. La punta de la aguja está rota. El hilo está mal pasado. Remplacez l'aiguille. Reportez-vous aux pages 18 - 21. - Singer CE-150 Futura | Instruction Manual - Page 84
IS MIS-ALIGNED MACHINE SIDE HOOP SIDE Embroidering is continuing when thread is tangled. No stabilizer attached when using light or stretch material. If the thread remains tangled, the fabric may pucker and ruin the finished embroidery. Stop embroidering, remove the hoop and untangle the - Singer CE-150 Futura | Instruction Manual - Page 85
MACHINE CÔTÉ CERCEAU La broderie continue lorsque le fil est emmêlé. Aucun entoilage n' est fixé quand vous utilisez un tissu léger ou extensible. Si le fil reste emmêlé, le tissu pourra être plissé, ce bien fixé. Fixez fermement le cerceau sur le support du cerceau à l'aide des vis de montage - Singer CE-150 Futura | Instruction Manual - Page 86
sewing 1. Place the bobbin on the bobbin winder shaft and push the shaft towards the right. 2. Press the start/stop switch to begin winding. (The foot control is inoperable with the embroidery unit attached). 3. Remove the hoop from the machine, (DO NOT REMOVE YOUR FABRIC FROM THE HOOP), replace - Singer CE-150 Futura | Instruction Manual - Page 87
fois. Reculez dans les données jusqu'à ce que la zone vide a été complètement dépassée. 2. Redémarrez la machine à broder et poursuivez la broderie. 1. Si bobine de fil avec le petit appareil de tension et utiliser le guide-fil amovible pour la grande bobine, fournis avec les accessoires. 2. La - Singer CE-150 Futura | Instruction Manual - Page 88
The Futura software will 3-color design that we see as simple has billions of pixels. Common formats recognized by the software: .bmp, .jpg, .tif, .pcx, .pcd, .tga, and . Lines that are too narrow to properly sew out are eliminated by the software when it cleans up the artwork. Vector Art - Singer CE-150 Futura | Instruction Manual - Page 89
programme Futura recalcule composer de millions de couleurs et de ce fait être inutilisable. Clipart propose deux semble simple, se compose de milliard de pixels. Les formats les plus reconnus par le programme : .bmp, .jpg Vector Art y Bitmapped Art. El software es capaz de vectorizar una imagen - Singer CE-150 Futura | Instruction Manual - Page 90
6. Will the density of a design be adjusted when resizing design ? When sizing designs in the Futura software you can resize designs from the Library in the hoop on screen and keep the design integrity. All other formats should be changed in the DESIGN/CHANGE SIZE menu in order to change the stitch - Singer CE-150 Futura | Instruction Manual - Page 91
formats doivent être modifiés dans le menu DESIGN/CHANGE SIZE (motif/ changement de dimension) pour changer le nombre de points. 6.- ¿La densidad del diseño se ajustará al redimensionarlo? Cuando se dimensiona (cambiar tamaño) un diseño con el software Futura clavier. 8.- BORRAR PARTE DE UN DISEÑO - Singer CE-150 Futura | Instruction Manual - Page 92
design at once through the option "Send design" in the machine navigator, 1. Block numbers are indicated with the LED indicators lit button to the right of the row that contains your desired block, while the machine is not running. Stop when the LED indicator above the block is lit. NOTE: - Singer CE-150 Futura | Instruction Manual - Page 93
é. 2. Si vous voulez sélectionner un bloc, poussez le bouton sélecteur de point à droite de la rangée où le bloc se trouve, ceci sans faire fonctionner la machine. Arrêtez quand le témoin au-dessus du bloc est allumé. REMARQUE : il est impossible de retourner aux numéros précédents. 10.- Cuando se - Singer CE-150 Futura | Instruction Manual - Page 94
sewing purposes and lowered for darning, freehand embroidery and monogramming so that you, not the feed dogs, are moving the fabric. CONVERTING TO FREE-ARM SEWING Your machine To replace, slide the extension table back into place until it clicks. With the extension table removed the machine converts - Singer CE-150 Futura | Instruction Manual - Page 95
indiqué sur l'illustration. Pour la remettre en place, faites glisser la table de rallonge à sa place jusqu'à ce qu'elle s'enclenche. Lorsque la table de rallonge est retirée, la machine est transformée en un modèle à bras libre profilé convenant parfaitement à la couture des vêtements pour enfants - Singer CE-150 Futura | Instruction Manual - Page 96
top and bobbin threads. The tension is well balanced when these two threads 'lock' in the middle of layers of fabric you are sewing. If, when you start to sew, you find that the stitching is irregular, you will need to adjust the tension control. Make any adjustments with presser foot 'down - Singer CE-150 Futura | Instruction Manual - Page 97
pied. 2. Placez le pied choisie sur la plaque-aiguille comme illustré. 3. Rabaissez le levier du pied presseur de façon à ce que le pied s'enclenche de lui-même sur son support. CAMBIO DEL PIE PRENSATELAS Asegurarse de que la aguja está en la posición superior. Alzar la palanca del pie prensatelas - Singer CE-150 Futura | Instruction Manual - Page 98
( ) The sewing machine makes 4 tiny tacking stitches to tie off the sewing on all patterns STOP SWITCH This switch works only when sewing embroidery. Tacking stitch function for tie-off of machine is ready to start. Red light indicates machine is operating. Flashing red light indicates a problem - Singer CE-150 Futura | Instruction Manual - Page 99
* Fonction couture arrière pour les points droits et zigzags ( ) La couture arrière avance lorsque l'interrupteur couture arrière reste appuyé. La machine continue la couture en arrière tant que l' interrupteur de couture en arrière est appuyé. INTERRUPTOR DE PUNTADAS HACIA ATRAS ∗ Función de - Singer CE-150 Futura | Instruction Manual - Page 100
The following table is a practical guide to needle and thread selection. Always refer to it before a new sewing project. Generally, the same use on stretch fabrics. * For best sewing results, always use a Singer Branded Needle. Always disconnect the machine from power supply by removing the plug - Singer CE-150 Futura | Instruction Manual - Page 101
de couture, utilisez toujours une aiguille de marque Singer. Débranchez toujours. La machine de l' alimentation électrique en retirant la fiche la aguja nueva en la brida porta-aguja con el lado plano hacia la parte posterior. 5. Empujar la aguja lo más arriba posible. 6. Apretar el tornillo - Singer CE-150 Futura | Instruction Manual - Page 102
PROBLEMS Machine skips stitches. * Needle is not all the way up into needle clamp. - See page 96 - 97. * Needle is bent or blunt. - Replace needle (see page 96 - 97). * Machine breaks. * Fabric is being pulled or pushed against machine feeding action. - Guide it gently. * Needle size is not correct - Singer CE-150 Futura | Instruction Manual - Page 103
aiguille est courbée ou épointée - la changer (voir page 96 - 97). * La machine n'est pas correctement enfilée - Voir page 18 - 21. * Le fil est cassé pas correcte pour le fil et le tissu - Voir page 96 - 97. * La machine n'est pas enfilée correctement - Voir page 18 - 21. * La tension supérieure - Singer CE-150 Futura | Instruction Manual - Page 104
(1). (1) 2 5. Remove the bobbin case (2). 3 7. Clean the feed dogs and hook area with the lint brush. 4 Put one drop of sewing machine oil on the hook race as indicated by the arrows. (A, B) (2) (A) (B) 5. Replace the bobbin case with the projection (3) positioned 5 against the spring - Singer CE-150 Futura | Instruction Manual - Page 105
la fiche de la prise murale. Pour assurer les meilleures conditions de "travail" à votre machine, il est nécessaire de garder les pièces essentielles toujours propres. Toujours débrancher la machine de la prise. Siempre desconecte la máquina de la fuente de alimentación retirando el enchufe - Singer CE-150 Futura | Instruction Manual - Page 106
be oiled periodically. For the machine used after a long interval : It should be oiled before it is used. CAUTION: Always remove the dust and lint before oiling. For best results always use SINGER Brand Sewing 2 Machine Oil. Use of oil other than Sewing Machine Oil will cause damage to your - Singer CE-150 Futura | Instruction Manual - Page 107
ère et les peluches avant le graissage. Pour obtenir les meilleurs résultats, utilisez l'huile pour machine à coudre SINGER. L'utilisation d' une autre marque d'huile peut endommager votre machine. Consejos Útiles: Para la máquina con uso frecuente: Debe aceitarse periódicamente. Para máquinas con - Singer CE-150 Futura | Instruction Manual - Page 108
ACCESSORIES SATIN STITCH FOOT The Satin stitch foot is grooved on the bottom to permit dense stitching to pass under it easily. It is most useful for sewing satin stitches. It can also be used as an alternative to the General Purpose Foot when sewing to your machine. Use of a Singer Brand twin - Singer CE-150 Futura | Instruction Manual - Page 109
viter la formation de fronces. 3 mm marca Singer. Las agujas gemelas guide fil et dans chaque aiguille d'avant en arrière. 2. Tenir les deux fils dans votre main gauche et faire accomplir au volant un tour complet. Tirer les deux fils vers le haut pour faire remonter le fil de la canette. Passer ces - Singer CE-150 Futura | Instruction Manual - Page 110
above stitch pattern numbers on the control panel and/or PC screen. When a message is displayed, fix the problem following the instruction in the message. The message will disappear, once the problem has been fixed. On control panel Sur le panneau de commande En el panel de control On PC screen - Singer CE-150 Futura | Instruction Manual - Page 111
Helpful message reference guide Guide de référence des messages d'aide Guía de referencia de mensajes de ayuda - Singer CE-150 Futura | Instruction Manual - Page 112
PC to the sewing machine with USB cable. eign particle is inserted into cord socket for foot control plug. → Remove foreign particle. broidery unit is installed with small hoop attached. and on power switch. → Remove embroidery unit and small hoop and then re- attach embroidery unit or remove - Singer CE-150 Futura | Instruction Manual - Page 113
de PC.Lorsqu'un message apparaît, résolvez le problème en suivant les instructions du message. Le message disparaît une fois que le problème a été ordinateur à la machine à coudre FUTURA à l'aide du câble USB. El cable USB está desconectado. → Conecte su PC a la máquina de coser FUTURA con el cable - Singer CE-150 Futura | Instruction Manual - Page 114
PC Presser foot is not lowered. → Lower presser foot by lowering presser foot lifter. Buttonhole lever is not lowered or raised. → Lower buttonhole lever when sewing buttonholes. → Raise buttonhole lever when - Singer CE-150 Futura | Instruction Manual - Page 115
forcibly. 4 Turn off power switch and eliminate the problem that caused the machine to stop. Bobbin winder is moved to right (operating position) during sewing. 4 Check bobbin winder and move it to left. Small hoop is attached when design for large hoop is transmitted. 4 Turn off power switch and - Singer CE-150 Futura | Instruction Manual - Page 116
- Singer CE-150 Futura | Instruction Manual - Page 117
117 - Singer CE-150 Futura | Instruction Manual - Page 118
Le pied presseur est levé. 4 Baisser le pied presseur en abaissant le releveur. El prensatelas no está abajo. 4 Bajar la palanca del prensatelas para bajar el pie prensatelas. - Singer CE-150 Futura | Instruction Manual - Page 119
119 - Singer CE-150 Futura | Instruction Manual - Page 120
La tige à boutonnière n'est pas levée ou baissée. 4 Baisser la tige pour réaliser une boutonnière. 4 Lever la tige pour coudre. La palanca del ojalador no se ha bajado o levantado. 4 Bajar la palanca del ojalador al coser ojales. 4 Levantar la palanca del ojalador al coser patrones (puntadas) de - Singer CE-150 Futura | Instruction Manual - Page 121
121 - Singer CE-150 Futura | Instruction Manual - Page 122
est bloquée parcequ'il y a du fil autour du boitier à canettes qui empêche la rotation. 4 Eteindre la machine et éliminer le problème qui cause l' arrêt de la machine. La máquina se encuentra trabada debido a que el hilo se enredó con la caja bobina o a que la rotación se interrumpe abruptamente - Singer CE-150 Futura | Instruction Manual - Page 123
123 - Singer CE-150 Futura | Instruction Manual - Page 124
moverlo hacia la izquierda. Le petit cadre à broder est installé alors que c'est un motif pour le grand cadre qui est transmis. 4 Eteindre la machine et mettre le grand cadre. El bastidor pequeño está colocado al momento de transmitir un diseño para bastidor grande. 4 Apagar la máquina y cambiar el - Singer CE-150 Futura | Instruction Manual - Page 125
125 - Singer CE-150 Futura | Instruction Manual - Page 126
Vérifiez le câble et l'interrupteur d'alimentation. 4 Vérifiez si le câble USB est bien branché et si l'interrupteur d'alimentation est bien allumé. Verifique el cable e interruptor de alimentación. 4 Verifique que el cable USB está conectado y el interruptor principal está conectado. Le bobineur - Singer CE-150 Futura | Instruction Manual - Page 127
ENGLISH / FRANÇAIS / ESPAÑOL © Part No. 82076 4/07
-
 1
1 -
 2
2 -
 3
3 -
 4
4 -
 5
5 -
 6
6 -
 7
7 -
8
-
9
-
10
-
11
-
12
-
13
-
14
-
15
-
16
-
17
-
18
-
19
-
20
-
21
-
22
-
23
-
24
-
25
-
26
-
27
-
28
-
29
-
30
-
31
-
32
-
33
-
34
-
35
-
36
-
37
-
38
-
39
-
40
-
41
-
42
-
43
-
44
-
45
-
46
-
47
-
48
-
49
-
50
-
51
-
52
-
53
-
54
-
55
-
56
-
57
-
58
-
59
-
60
-
61
-
62
-
63
-
64
-
65
-
66
-
67
-
68
-
69
-
70
-
71
-
72
-
73
-
74
-
75
-
76
-
77
-
78
-
79
-
80
-
81
-
82
-
83
-
84
-
85
-
86
-
87
-
88
-
89
-
90
-
91
-
92
-
93
-
94
-
95
-
96
-
97
-
98
-
99
-
100
-
101
-
102
-
103
-
104
-
105
-
106
-
107
-
108
-
109
-
110
-
111
-
112
-
113
-
114
-
115
-
116
-
117
-
118
-
119
-
120
-
121
-
122
-
123
-
124
-
125
-
126
-
127
 |
 |
CE-150
INSTRUCTION MANUAL