Sony DVP-NS700P Operating Instructions - Page 16
Step 3: TV Hookups - formats
 |
View all Sony DVP-NS700P manuals
Add to My Manuals
Save this manual to your list of manuals |
Page 16 highlights
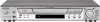
Step 3: TV Hookups Connect the supplied audio/video cord and power cord in the order (1~3) shown below. Be sure to connect the power cord last. 1 Audio/video cord (supplied) to video input to LINE OUT L/R (AUDIO) 1 to audio input to LINE OUT (VIDEO) 1 INPUT VIDEO (yellow) L (white) AUDIO R (red) TV R- AUDIO 1 - L VIDEO 1 R- AUDIO 2 - L VIDEO 2 LINE OUT CD/DVD Player 2 Power source COAXIAL OPTICAL PCM/DTS/ DOLBY DIGITAL DIGITAL OUT R- AUDIO 1 - L VIDEO 1 1 2 R- AUDIO 2 - L VIDEO 2 Y PROGRESSIVE PB INTERLACE SELECTABLE PR LINE OUT S VIDEO COMPONENT VIDEO OUT OUT VIDEO OUT SCAN SELECT l: Signal flow 3 Power source When connecting to a wide screen TV Depending on the disc, the image may not fit your TV screen. If you want to change the aspect ratio, please refer to page 69. When connecting to a TV that accepts progressive (480p) format signals You need to use the COMPONENT VIDEO OUT jacks to view progressive signals. Hook up your TV using pattern C on page 18, and then run Quick Setup on page 25. 16
-
 1
1 -
2
-
3
-
4
-
5
-
6
-
7
-
8
-
9
-
10
-
 11
11 -
 12
12 -
 13
13 -
 14
14 -
 15
15 -
 16
16 -
 17
17 -
 18
18 -
 19
19 -
 20
20 -
 21
21 -
22
-
23
-
24
-
25
-
26
-
27
-
28
-
29
-
30
-
31
-
32
-
33
-
34
-
35
-
36
-
37
-
38
-
39
-
40
-
41
-
42
-
43
-
44
-
45
-
46
-
47
-
48
-
49
-
50
-
51
-
52
-
53
-
54
-
55
-
56
-
57
-
58
-
59
-
60
-
61
-
62
-
63
-
64
-
65
-
66
-
67
-
68
-
69
-
70
-
71
-
72
-
73
-
74
-
75
-
76
-
77
-
78
-
79
-
80
-
81
-
82
-
83
-
84
-
85
-
86
-
87
-
88
 |
 |
