Sony ICD-PX312 Operating Instructions - Page 69
Dividing a file at all the track mark positions, To cancel dividing
 |
UPC - 027242809529
View all Sony ICD-PX312 manuals
Add to My Manuals
Save this manual to your list of manuals |
Page 69 highlights
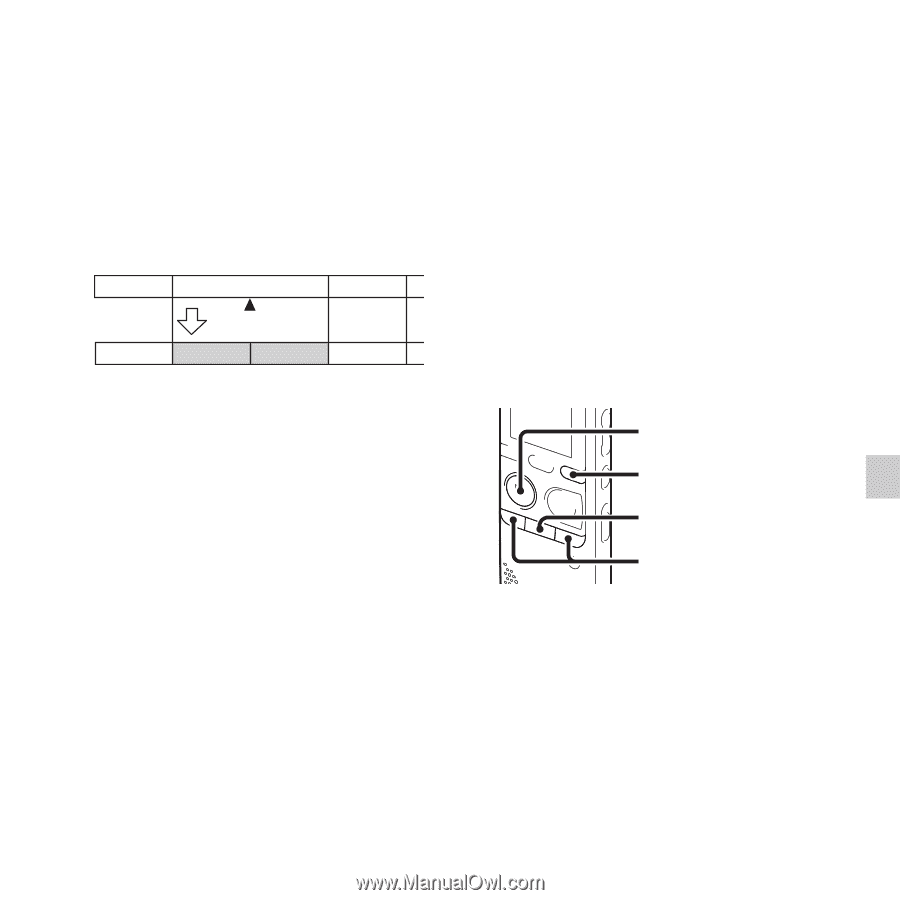
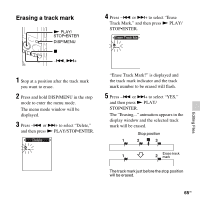
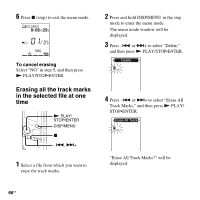
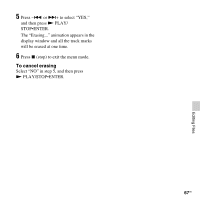
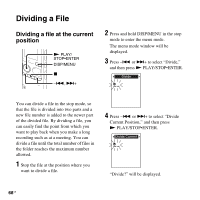
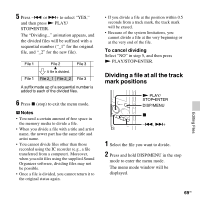
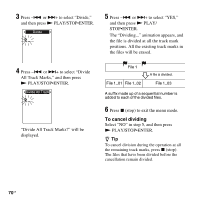
5 Press -. or >+ to select "YES," and then press N PLAY/ STOP•ENTER. The "Dividing..." animation appears, and the divided files will be suffixed with a sequential number ("_1" for the original file, and "_2" for the new file). File 1 File 2 File 3 A file is divided. File 1 File 2_1 File 2_2 File 3 A suffix made up of a sequential number is added to each of the divided files. 6 Press x (stop) to exit the menu mode. P Notes • You need a certain amount of free space in the memory media to divide a file. • When you divide a file with a title and artist name, the newer part has the same title and artist name. • You cannot divide files other than those recorded using the IC recorder (e.g., a file transferred from a computer). Moreover, when you edit files using the supplied Sound Organizer software, dividing files may not be possible. • Once a file is divided, you cannot return it to the original status again. • If you divide a file at the position within 0.5 seconds from a track mark, the track mark will be erased. • Because of the system limitations, you cannot divide a file at the very beginning or at the very end of the file. To cancel dividing Select "NO" in step 5, and then press N PLAY/STOP•ENTER. Dividing a file at all the track mark positions N PLAY/ STOP•ENTER DISP/MENU x -., >+ 1 Select the file you want to divide. 2 Press and hold DISP/MENU in the stop mode to enter the menu mode. The menu mode window will be displayed. Editing Files 69GB
-
 1
1 -
2
-
3
-
4
-
5
-
6
-
7
-
8
-
9
-
10
-
11
-
12
-
13
-
14
-
15
-
16
-
17
-
18
-
19
-
20
-
21
-
22
-
23
-
24
-
25
-
26
-
27
-
28
-
29
-
30
-
31
-
32
-
33
-
34
-
35
-
36
-
37
-
38
-
39
-
40
-
41
-
42
-
43
-
44
-
45
-
46
-
47
-
48
-
49
-
50
-
51
-
52
-
53
-
54
-
55
-
56
-
57
-
58
-
59
-
60
-
61
-
62
-
63
-
 64
64 -
 65
65 -
 66
66 -
 67
67 -
 68
68 -
 69
69 -
 70
70 -
 71
71 -
 72
72 -
 73
73 -
 74
74 -
75
-
76
-
77
-
78
-
79
-
80
-
81
-
82
-
83
-
84
-
85
-
86
-
87
-
88
-
89
-
90
-
91
-
92
-
93
-
94
-
95
-
96
-
97
-
98
-
99
-
100
-
101
-
102
-
103
-
104
-
105
-
106
-
107
-
108
-
109
-
110
-
111
-
112
-
113
-
114
-
115
-
116
-
117
-
118
-
119
-
120
-
121
-
122
-
123
-
124
-
125
-
126
-
127
-
128
-
129
-
130
-
131
-
132
 |
 |