Sony LBT-GTZ4i Operating Instructions
Sony LBT-GTZ4i - CD Changer Mini Shelf System Manual
 |
UPC - 027242752221
View all Sony LBT-GTZ4i manuals
Add to My Manuals
Save this manual to your list of manuals |
Sony LBT-GTZ4i manual content summary:
- Sony LBT-GTZ4i | Operating Instructions - Page 1
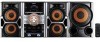
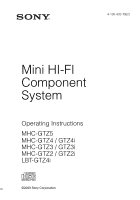
4-130-433-13(2) Mini HI-FI Component System Operating Instructions MHC-GTZ5 MHC-GTZ4 / GTZ4i MHC-GTZ3 / GTZ3i MHC-GTZ2 / GTZ2i LBT-GTZ4i ©2009 Sony Corporation - Sony LBT-GTZ4i | Operating Instructions - Page 2
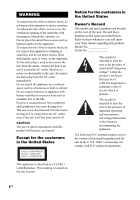
the space provided below. Refer to them whenever you call upon your Sony dealer regarding this product. Model No. Serial No. This symbol is intended user to the presence of important operating and maintenance (servicing) instructions in the literature accompanying the appliance. The following FCC - Sony LBT-GTZ4i | Operating Instructions - Page 3
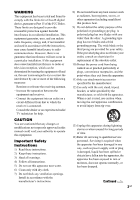
tested manual could void your authority to operate this equipment. Important Safety Instructions 1) Read these instructions. 2) Keep these instructions. 3) Heed all warnings. 4) Follow all instructions . 14) Refer all servicing to qualified service personnel. Servicing is required when the apparatus - Sony LBT-GTZ4i | Operating Instructions - Page 4
Sony Deutschland GmbH, Hedelfinger Strasse 61, 70327 Stuttgart, Germany. For any service or guarantee matters please refer to the addresses given in separate service the European Union and other European countries with separate collection systems) This symbol on the battery or on the packaging - Sony LBT-GTZ4i | Operating Instructions - Page 5
in the European Union and other European countries with separate collection systems) Note on DualDiscs A DualDisc is a two sided disc and "WALKMAN" logo are registered trademarks of Sony Corporation. MICROVAULT is a trademark of Sony Corporation. MPEG Layer-3 audio coding technology and patents - Sony LBT-GTZ4i | Operating Instructions - Page 6
this manual The instructions in this manual are for models MHC-GTZ5, MHC-GTZ4 / GTZ4i, MHC-GTZ3 / GTZ3i, MHC-GTZ2 / GTZ2i and LBT-GTZ4i. In this manual, the MHC-GTZ5 is used for illustration purposes unless stated otherwise. The MHC-GTZ5 consists of: - Unit HCD-GTZ5 - Speaker System • Front - Sony LBT-GTZ4i | Operating Instructions - Page 7
Playing the iPod 28 (MHC-GTZ4i/GTZ3i/GTZ2i and LBT-GTZ4i only) Using optional audio components 30 Adjusting the sound 30 Changing the display 31 Other Operations Creating your own program ...... 33 - Program Play Presetting radio stations 34 Using the Radio Data System (RDS 35 (European model - Sony LBT-GTZ4i | Operating Instructions - Page 8
Guide to parts and controls This manual mainly explains operations using the unit, but the same operations can also be performed 2 wg 3 wf wd 4 ws wa 5 6 6 7 7 w; 8 ql 9 *qk q; qg qa qj qs qd qh qg qf 9 * MHC-GTZ5, MHC-GTZ4 / GTZ4i, MHC-GTZ3 / GTZ3i and LBT-GTZ4i only. 8GB - Sony LBT-GTZ4i | Operating Instructions - Page 9
1 "/1 (on/standby) (pages 16, 39, 45) Press to turn on the system. The STANDBY indicator lights up when the system is turned off. B Display (page 31) C REC TIMER (page 38) Press to set select a disc. Press to switch to the CD function from other function. Continued l 9GB Guide to parts and controls - Sony LBT-GTZ4i | Operating Instructions - Page 10
/EX-CHANGE (pages 16, 18) Press to select a disc during CD tray open. Press to exchange other discs during playback. R MHC-GTZ5, MHC-GTZ4 / GTZ4i, MHC-GTZ3 / GTZ3i and LBT-GTZ4i only SUBWOOFER (page 30) Press to turn on and off the subwoofer. The SUBWOOFER indicator lights up when the subwoofer is - Sony LBT-GTZ4i | Operating Instructions - Page 11
Remote RM-AMU054 (MHC-GTZ4i / GTZ3i / GTZ2i and LBT-GTZ4i only) qg qf qd qs qa q; 1 2 3 4 5 6 7 9 8 1 "/1 (on/standby) (page 16) Press to turn on the system. B EQ (page 30, 35) Press to select a preset EQ pages 17, 19, 22, 26) Press to stop playback. Continued l 11GB Guide to parts and controls - Sony LBT-GTZ4i | Operating Instructions - Page 12
has a tactile dot. Use the tactile dot as a reference when operating the system. J O RETURN (pages 18, 26) Press to return to the parent folder 7 8 8 9 1 "/1 (on/standby) (pages 16, 37) Press to turn on the system. B CLOCK/TIMER SELECT (pages 38, 45) CLOCK/TIMER SET (pages 16, 37) Press to - Sony LBT-GTZ4i | Operating Instructions - Page 13
to adjust the volume. * The VOLUME + button has a tactile dot. Use the tactile dot as a reference when operating the system. J EQ (page 30, 35) Press to select a preset EQ effect. K CLEAR (page 34) Press to delete the . O SLEEP (page 36) Press to set the Sleep Timer. 13GB Guide to parts and controls - Sony LBT-GTZ4i | Operating Instructions - Page 14
antenna 2 To FM lead antenna 3 To subwoofer 4 To front speaker (left) 5 To front speaker (right) 14GB a) The FM 75 Ω COAXIAL jack varies according to models. b) MHC-GTZ5, MHC-GTZ4 / GTZ4i, MHC-GTZ3 / GTZ3i and LBT-GTZ4i only. c) The VOLTAGE SELECTOR varies according to models. - Sony LBT-GTZ4i | Operating Instructions - Page 15
the audio output of the optional audio component to these jacks. You can then output audio through this system. C Subwoofer (MHC-GTZ5, MHC-GTZ4 / GTZ4i, MHC-GTZ3 / GTZ3i and LBT-GTZ4i only) Be sure to insert the connector straight into the terminals. SUBWOOFER Purple E VOLTAGE SELECTOR For models - Sony LBT-GTZ4i | Operating Instructions - Page 16
the clock You cannot set the clock in Power Saving Mode. Use the buttons on the remote for this operation. 1 Press "/1 to turn on the system. 2 Press CLOCK/TIMER SET (RM-AMU053) or TIMER MENU (RM-AMU054). If "PLAY SET" appears on the display, press ./> (RM-AMU053) or V/v (RM-AMU054) repeatedly - Sony LBT-GTZ4i | Operating Instructions - Page 17
forcibly push the disc tray to close it as this may damage the unit. CAUTION DO NOT place a disc here, as it may cause the system to malfunction. The disc tray cannot be opened during USB transferring and erasing. 3 Press N to start playback. 4 Turn MASTER VOLUME (or press VOLUME +/- on the - Sony LBT-GTZ4i | Operating Instructions - Page 18
your own program" on (page 33)). * Each time you perform Shuffle Play, the playing order may differ. If you turn off the system in shuffle play mode, the system changes the play mode back to normal play mode. Notes on playing discs • The following discs/situations can increase the time it takes - Sony LBT-GTZ4i | Operating Instructions - Page 19
may not play at all. • The disc will not play if it has not been correctly finalized. • CD-TEXT information is not supported. Notes on playing multisession discs • This system can play back Multi Session discs when an MP3 file is contained in the first session. Any subsequent MP3 files recorded in - Sony LBT-GTZ4i | Operating Instructions - Page 20
, the file size is the same as the original file. See "Compatible USB devices with this system" (page 52) for a list of USB devices that can be connected to this system. (MHC-GTZ4i / GTZ3i / GTZ2i and LBT-GTZ4i only) You cannot transfer the music to the iPod which is connected to the B port. USB - Sony LBT-GTZ4i | Operating Instructions - Page 21
When the USB cable connection is necessary, connect the USB cable supplied with the USB device to be connected. Refer to the operating instructions supplied with the USB device to be connected for details on the operation method. 2 Press CD, then load the disc you want to transfer. 3 Press - Sony LBT-GTZ4i | Operating Instructions - Page 22
4 Press ENTER. Transferring starts when "DON'T REMOVE" appears in the display. 5 Start playback the source. To stop transferring Press x. To create a new MP3 file Press REC TO USB . "NEW TRACK" appears in the display. If you press REC TO USB again after a few seconds, a new MP3 file cannot be - Sony LBT-GTZ4i | Operating Instructions - Page 23
is completed, the audio file continues to play. Note (MHC-GTZ4i / GTZ3i / GTZ2i and LBT-GTZ4i only) You cannot transfer the audio files from the iPod which ) When listening to music from a Sony Ericsson mobile phone or when transferring music from this system to the mobile phone, you can select - Sony LBT-GTZ4i | Operating Instructions - Page 24
is transferred in the "REC1-CD" or "REC1-MP3" folder each time REC1-CD or REC1-MP3 Transferring is performed. Notes • Do not connect the system and the USB device through an USB hub. • When transferring from an AUDIO CD, the tracks are transferred as 128 kbps MP3 files. When transferring - Sony LBT-GTZ4i | Operating Instructions - Page 25
runs out of space during transferring. - the number of audio files and folders on the USB device reaches the limit for the number that the system can recognize. - the function or tuner band is changed. • The maximum number of audio files and folders may vary depending on the audio file and - Sony LBT-GTZ4i | Operating Instructions - Page 26
To erase audio files or folders from the USB device You can erase audio files or folders from the USB device. 1 Connect a transferable USB device to the A or B port on the unit. 2 Press USB and select USB A or USB B (Press USB (RM-AMU053) or press FUNCTION +/- (RM-AMU054) repeatedly on the remote) - Sony LBT-GTZ4i | Operating Instructions - Page 27
an operation is performed, there may be a delay before it is performed by this system. • This system does not necessarily support all the functions provided in a connected USB device. • The playback order for the system may differ from the playback order of the connected digital music player. • Be - Sony LBT-GTZ4i | Operating Instructions - Page 28
erased. Playing the iPod (MHC-GTZ4i/GTZ3i/GTZ2i and LBT-GTZ4i only) You can listen to audio contents stored in the iPod on this system. 1 Connect the iPod to • To use an iPod, refer to the operating instructions of your iPod. • Sony cannot accept responsibility in the event that data recorded to - Sony LBT-GTZ4i | Operating Instructions - Page 29
as a battery charger You can use the system as a battery charger for the iPod when the system is on. The charging begins when the iPod is connected to the USB ports. The charging status appears in the iPod screen. For details, see the operating instructions of your iPod. To stop charging the iPod - Sony LBT-GTZ4i | Operating Instructions - Page 30
function. 3) "BOOSTER" lights up in the display when the MP3 BOOSTER+ effect is activated. To turn on the subwoofer (MHC-GTZ5, MHC-GTZ4 / GTZ4i, MHC-GTZ3 / GTZ3i and LBT-GTZ4i only) Press SUBWOOFER repeatedly until the SUBWOOFER indicator on the unit lights up. If you later disconnect the subwoofer - Sony LBT-GTZ4i | Operating Instructions - Page 31
display. The clock display automatically turns to Power Save Mode after a few seconds. Changing information in the display Press DISPLAY repeatedly when the system is turned on. You can view the elapsed playing time and remaining playing time during playback and total playing time during stop mode - Sony LBT-GTZ4i | Operating Instructions - Page 32
Notes on the display information • Characters that cannot be displayed appear as "_". • The following are not display correctly: - elapsed playing time of an audio file encoded using a VBR (variable bit rate). - folder and file names that do not follow either the ISO9660 Level 1, Level 2 or Joliet - Sony LBT-GTZ4i | Operating Instructions - Page 33
Other Operations Creating your own program - Program Play 1 Select the function you want. CD function Press CD to select CD function. (Press CD (RM-AMU053) or press FUNCTION +/- (RM-AMU054) repeatedly to select the CD function on the remote.) USB function Press USB to select USB function. (Press USB - Sony LBT-GTZ4i | Operating Instructions - Page 34
the erase operation. - remove the USB device from the A port or B port. - switch the USB memory select. Tips • The program you made remains in the system's memory even after it has been played back. Press N to play back the same program again. • If "--.--" appears instead of the total playing time - Sony LBT-GTZ4i | Operating Instructions - Page 35
or if the signal is weak. * Not all FM stations provide RDS service, nor do they provide the same type of services. If you are not familiar with the RDS system, check with your local radio stations for details on RDS services in your area. Receiving RDS broadcasts Simply select a station from the FM - Sony LBT-GTZ4i | Operating Instructions - Page 36
, or change the direction of the microphone. After you have finished, disconnect the microphone from the MIC jack on the unit. Using the Timers The system offers three timer functions. You cannot activate both the Play Timer and the Recording Timer at the same time. If you use either with the - Sony LBT-GTZ4i | Operating Instructions - Page 37
timer settings. Recording Timer Connect a transferable USB device to the B port on the unit. The display shows the timer settings. 7 Press "/1 to turn off the system. Continued l 37GB - Sony LBT-GTZ4i | Operating Instructions - Page 38
. 6 Press "/1 to turn off the system. To activate or check the timer again system is turned on at the preset time or if "STANDBY" flashes in the display, the Play Timer and the Recording Timer will not play or transfer. • The Play Timer setting remains as long as the setting is not canceled manually - Sony LBT-GTZ4i | Operating Instructions - Page 39
Troubleshooting Should you encounter a problem with your system, do the following: 1 Make sure the power cord and speaker cords are correctly and firmly connected. 2 Find your problem in the checklist below, and take the indicated corrective action. If the problem persists, contact your nearest Sony - Sony LBT-GTZ4i | Operating Instructions - Page 40
"LOCKED" appears in the display. • Consult your nearest Sony dealer or local authorized Sony service facility. The disc tray does not close. • Load Remove the disc and wipe away the moisture on the disc, then leave the system turned on for a few hours until the moisture evaporates. • Press N to - Sony LBT-GTZ4i | Operating Instructions - Page 41
You cannot start transferring to an USB device. • The following problems may have occurred. - The USB device is full. - system" (page 52) for the supported device types. • The USB device is not formatted correctly. Refer to the USB device operating instruction on how to format. • Turn off the system - Sony LBT-GTZ4i | Operating Instructions - Page 42
Refer to the USB device operating instruction on how to deal with this problem. Are you using a supported USB device? • If you connect an unsupported USB device, the following problems may occur. See "Compatible USB devices with this system" (page 52) for the supported device types. - The USB device - Sony LBT-GTZ4i | Operating Instructions - Page 43
USB device does not work properly. Refer to the USB device operating instruction on how to deal with this problem. Play does not start. • Turn off the system and reconnect the USB device, then turn on the system. • Connect the supported USB device (page 52). • Press N to start play. Play does not - Sony LBT-GTZ4i | Operating Instructions - Page 44
. • Connect a commercially available external antenna. • Consult your nearest Sony dealer if the supplied AM antenna has come off the plastic stand. item "There is no sound." (page 42) and check the condition of the system. • Connect the component properly (page 14) while checking: - if the cords - Sony LBT-GTZ4i | Operating Instructions - Page 45
Timer LOCKED: The disc tray does not open. Contact your nearest Sony dealer. NO DISC: There is no disc on the disc tray or you tried to perform an operation that can be performed only when the system is stopped. READING: The system is reading information of the disc. Some buttons are not available - Sony LBT-GTZ4i | Operating Instructions - Page 46
: All of the programmed steps have been erased. NO TRACK: No playable file is loaded in the system. NOT IN USE: You tried to perform a specific operation under conditions where that operation is prohibited. NOT SUPPORTED: An unsupported USB device is connected, or the USB device is connected to this - Sony LBT-GTZ4i | Operating Instructions - Page 47
have it checked by qualified personnel before operating it again. • AC power cord must be changed only at the qualified service shop. On placement • Do not place the system in an inclined position or in locations that are extremely hot, cold, dusty, dirty, or humid or lacking adequate ventilation - Sony LBT-GTZ4i | Operating Instructions - Page 48
SPECIFICATION POWER OUTPUT AND TOTAL HARMONIC DISTORTION: (LBT-GTZ4i only) With 6 ohm loads, both channels % THD) Subwoofer RMS output power (reference): 200 W (at 6 Ω, 100 Hz, 10% THD) MHC-GTZ4 / GTZ4i Brazilian model only The following are measured at AC 127 or 220 V 60 Hz Front speaker RMS output - Sony LBT-GTZ4i | Operating Instructions - Page 49
of 6 Ω SUBWOOFER (MHC-GTZ5, MHC-GTZ4 / GTZ4i, MHC-GTZ3 / GTZ3i and LBT-GTZ4i only): accepts impedance of 6 Ω USB section Supported bit rate MP3 (MPEG -Speed Supported USB device Mass Storage Class Maximum current 500 mA Disc player section System Compact disc and digital audio system Laser Diode - Sony LBT-GTZ4i | Operating Instructions - Page 50
Rated impedance: 6 ohms Dimensions (w/h/d) (Approx.): 318 × 391 × 340 mm Mass (Approx.): 7.9 kg MHC-GTZ4 / GTZ4i • Front speaker (European model only) (SS-GTZ4M) Front speaker (Other models) (SS-GTZ4) Speaker system: 3-way, 3-unit, bass reflex Speaker unit: Subwoofer: 130 mm, cone type Woofer: 130 - Sony LBT-GTZ4i | Operating Instructions - Page 51
SS-WGZ4: 5.7 kg MHC-GTZ2 / GTZ2i • Front speaker (European model only) (SS-GTZ3M) Front speaker (Other models) (SS-GTZ3) Speaker system: 2-way, 2-unit, 210 mm Mass (Approx.): 2.9 kg per speaker LBT-GTZ4i • Front speaker (SS-GTZ4A) Speaker system: 3-way, 3-unit, bass reflex Speaker unit: Subwoofer - Sony LBT-GTZ4i | Operating Instructions - Page 52
/ LBT-GTZ4i (12), and MHC-GTZ2 / GTZ2i (8) Design and specifications are subject to change without notice. • Standby power consumption: 0.5 W • Halogenated flame retardants are not used in the certain printed wiring boards. Compatible USB devices with this system You can use the following Sony USB - Sony LBT-GTZ4i | Operating Instructions - Page 53
(Mass Storage). For details, refer to the operating instruction supplied with the mobile phone. • Use the USB cable supplied with the mobile phone when connecting to the system. • Some audio files supported by the mobile phone are not surpported by this system. • In the case that the song which is - Sony LBT-GTZ4i | Operating Instructions - Page 54
following iPod models on this system. Update your iPod with the latest software before using it. iPod classic iPod touch iPod touch 2nd generation iPod nano 2nd generation (aluminum) iPod nano 3rd generation (video) iPod nano 4th generation (video) Notes • Sony can not accept responsibility - Sony LBT-GTZ4i | Operating Instructions - Page 55
- Sony LBT-GTZ4i | Operating Instructions - Page 56
(2) Printed in Malaysia
-
 1
1 -
 2
2 -
 3
3 -
 4
4 -
 5
5 -
 6
6 -
 7
7 -
8
-
9
-
10
-
11
-
12
-
13
-
14
-
15
-
16
-
17
-
18
-
19
-
20
-
21
-
22
-
23
-
24
-
25
-
26
-
27
-
28
-
29
-
30
-
31
-
32
-
33
-
34
-
35
-
36
-
37
-
38
-
39
-
40
-
41
-
42
-
43
-
44
-
45
-
46
-
47
-
48
-
49
-
50
-
51
-
52
-
53
-
54
-
55
-
56
 |
 |
©2009 Sony Corporation
4-130-433-
13
(2)
Mini HI-FI
Component
System
Operating Instructions
MHC-GTZ5
MHC-GTZ4 / GTZ4i
MHC-GTZ3 / GTZ3i
MHC-GTZ2 / GTZ2i
LBT-GTZ4i