Sony NWZ-E438F Operation Guide - Page 27
Transferring Data, Connect the player to your computer using the supplied USB cable. - problems
 |
View all Sony NWZ-E438F manuals
Add to My Manuals
Save this manual to your list of manuals |
Page 27 highlights
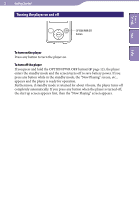
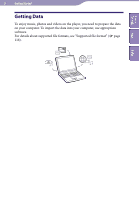
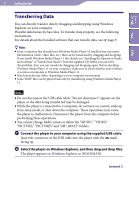
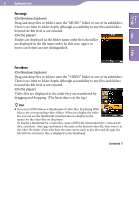
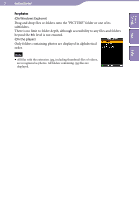
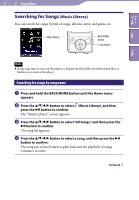
Table of Contents Menu Index 27 Getting Started Transferring Data You can directly transfer data by dragging and dropping using Windows Explorer on your computer. Playable data hierarchy has rules. To transfer data properly, see the following instructions. For details about the bundled software that can transfer data, see page 9. Hints Some computers that already have Windows Media Player 10 installed may encounter file limitation (AAC, video files, etc.) that can be transferred by dragging and dropping. If you install Windows Media Player 11 (for details, see "Installing the Operation Guide and software" of "Quick Start Guide") from the supplied CD-ROM, you can solve this problem, then you can transfer by dragging and dropping again. Before installing Windows Media Player 11 on your computer, make sure to check whether your software or service corresponds to Windows Media Player 11. Data hierarchy may differ, depending on your computer environment. Some WMV files can be played back only by transferring using Windows Media Player 11. Notes Do not disconnect the USB cable while "Do not disconnect." appears on the player or the data being transferred may be damaged. While the player is connected to a computer, do not turn on, restart, wake up from sleep mode, or shut down the computer. These operations may cause the player to malfunction. Disconnect the player from the computer before performing these operations. You cannot change folder names or delete the "MUSIC," "VIDEO," "PICTURE," "PICTURES" and "MP_ROOT" folders. Connect the player to your computer using the supplied USB cable. Insert the connector of the USB cable into the player with the mark facing up. Select the player on Windows Explorer, and then drag and drop files. The player appears on Windows Explorer as [WALKMAN]. Continued
-
 1
1 -
2
-
3
-
4
-
5
-
6
-
7
-
8
-
9
-
10
-
11
-
12
-
13
-
14
-
15
-
16
-
17
-
18
-
19
-
20
-
21
-
 22
22 -
 23
23 -
 24
24 -
 25
25 -
 26
26 -
 27
27 -
 28
28 -
 29
29 -
 30
30 -
 31
31 -
 32
32 -
33
-
34
-
35
-
36
-
37
-
38
-
39
-
40
-
41
-
42
-
43
-
44
-
45
-
46
-
47
-
48
-
49
-
50
-
51
-
52
-
53
-
54
-
55
-
56
-
57
-
58
-
59
-
60
-
61
-
62
-
63
-
64
-
65
-
66
-
67
-
68
-
69
-
70
-
71
-
72
-
73
-
74
-
75
-
76
-
77
-
78
-
79
-
80
-
81
-
82
-
83
-
84
-
85
-
86
-
87
-
88
-
89
-
90
-
91
-
92
-
93
-
94
-
95
-
96
-
97
-
98
-
99
-
100
-
101
-
102
-
103
-
104
-
105
-
106
-
107
-
108
-
109
-
110
-
111
-
112
-
113
-
114
-
115
-
116
-
117
-
118
-
119
-
120
-
121
-
122
-
123
-
124
-
125
-
126
 |
 |