Sony STR-K670P Operating Instructions (HT-DDW670) - Page 28
Advanced Adjustments and Settings, Switching the audio input mode for digital components - setup
 |
View all Sony STR-K670P manuals
Add to My Manuals
Save this manual to your list of manuals |
Page 28 highlights
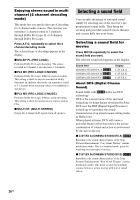
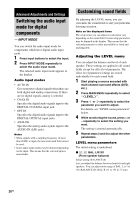
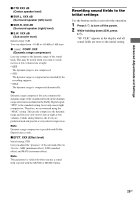
Advanced Adjustments and Settings Switching the audio input mode for digital components - INPUT MODE You can switch the audio input mode for components which have digital audio input jacks. 1 Press input buttons to select the input. 2 Press INPUT MODE repeatedly to select the audio input mode. The selected audio input mode appears in the display. Audio input modes • AUTO IN Gives priority to digital signals when there are both digital and analog connections. If there are no digital signals, analog is selected. • COAX IN Specifies the digital audio signals input to the DIGITAL COAXIAL input jack. • OPT IN Specifies the digital audio signals input to the DIGITAL OPTICAL input jacks. • ANALOG Specifies the analog audio signals input to the AUDIO IN (L/R) jacks. Notes • When signals with a sampling frequency of more than 48 kHz is input, the tone and sound field cannot be used. • Some audio input modes may be dimmed depending on the input. This means that the selected input is unavailable. Customizing sound fields By adjusting the LEVEL menu, you can customize the sound fields to suit your particular listening situation. Note on the displayed items The setup items you can adjust in each menu vary depending on the sound field. Certain setup parameters may be dimmed in the display. This means that the selected parameter is either unavailable or fixed and unchangeable. Adjusting the LEVEL menu You can adjust the balance and level of each speaker. These settings are applied to all sound fields except for effect level parameter. The effect level parameter settings are stored individually for each sound field. 1 Start playing a source encoded with multi channel surround effects (DVD, etc.). 2 Press MAIN MENU repeatedly to select " LEVEL ". 3 Press or repeatedly to select the parameter you want to adjust. For details, see "LEVEL menu parameters" below. 4 While monitoring the sound, press + or - repeatedly to select the setting you want. The setting is entered automatically. 5 Repeat steps 3 and 4 to adjust the other parameters. LEVEL menu parameters The initial setting is underlined. x L R BAL. L/R XX (Front speaker balance) Initial setting: BALANCE (0) Lets you adjust the balance between front left and right speakers. You can adjust in the range of BAL. L (+1 to +8), BALANCE (0), BAL. R (+1 to +8) in 17 steps. 28GB
-
 1
1 -
2
-
3
-
4
-
5
-
6
-
7
-
8
-
9
-
10
-
11
-
12
-
13
-
14
-
15
-
16
-
17
-
18
-
19
-
20
-
21
-
22
-
 23
23 -
 24
24 -
 25
25 -
 26
26 -
 27
27 -
 28
28 -
 29
29 -
 30
30 -
 31
31 -
 32
32 -
 33
33 -
34
-
35
-
36
-
37
-
38
-
39
-
40
-
41
-
42
-
43
-
44
 |
 |