Toshiba RS-TX20 User Manual
Toshiba RS-TX20 Manual
 |
View all Toshiba RS-TX20 manuals
Add to My Manuals
Save this manual to your list of manuals |
Toshiba RS-TX20 manual content summary:
- Toshiba RS-TX20 | User Manual - Page 1
Toshiba Digital Media Server Viewer's Guide Viewer's Guide Setting up your Toshiba Digital Media Server Enjoying the TiVo® service The On-Screen Menus and the Remote Control Arrow Buttons Select Select To navigate the Digital Media Server's on-screen menus, use the arrow buttons on the remote - Toshiba RS-TX20 | User Manual - Page 2
TV brand. Press the TiVo button on the remote control to go to TiVo Central®. Select Messages & Setup, then Settings, then Remote Control & DMS Front, then Remote Control - TV (power, volume, mute). 2. Prepare the remote control. Point the remote away from your Digital Media Server (DMS) and cover - Toshiba RS-TX20 | User Manual - Page 3
Welcome! - Toshiba RS-TX20 | User Manual - Page 4
without written permission is prohibited. Printed in USA. TOSHIBA is a registered trademark of Toshiba Corporation. TiVo, the TiVo logo, TiVo Central, TiVolution, the TiVo are trademarks of TiVo Inc., 2160 Gold Street, P.O. Box 2160, Alviso, CA 95002-2160. Product and service are covered by owners. ii - Toshiba RS-TX20 | User Manual - Page 5
TV. Your new Toshiba Digital Media Server with TiVo® service combines a TiVo® Digital Video Recorder (DVR) with a DVD recorder. It comes with TiVo BasicTM service, so you can immediately enjoy: • Digital recording. Because it's all-digital, TiVo saves your recorded programs on a hard drive and lists - Toshiba RS-TX20 | User Manual - Page 6
Using This Guide vi Chapter 1: Connecting Your Digital Media Server 1 Getting Started 2 Cables and Accessories 3 Choosing a Setup Example 9 Watching One Channel & Recording Another 18 Chapter 2: Guided Setup 21 Completing Guided Setup 22 TiVo Central 26 Chapter 3: TiVo BasicTM Service in - Toshiba RS-TX20 | User Manual - Page 7
67 Remote Control & DMS Front Lights 76 Phone & Network Setup 82 System Information 87 Troubleshooting 88 Restart or Reset System 89 Standby 90 Chapter 7: Features of TiVo PlusTM Service 91 Chapter 8: Connecting to a Home Network for Home Media Features 111 Chapter 9: Troubleshooting 129 - Toshiba RS-TX20 | User Manual - Page 8
for an easy overview of the features. Basic terms. These are terms used in this guide when we talk about the rest of the service: DMS. The Toshiba Digital Media Server with TiVo® service combines a TiVo® Digital Video Recorder (DVR) with a DVD recorder. This guide uses "DMS" to refer to it. Live - Toshiba RS-TX20 | User Manual - Page 9
CHAPTER 1 Connecting Your Digital Media Server Getting Started 2 Cables and Accessories 3 Choosing a Setup Example 9 Watching One Channel & Recording Another 18 Another (Antenna or Cable) - Toshiba RS-TX20 | User Manual - Page 10
a VCR, a DVD player, and a game system connected to your TV, in addition to your Toshiba Digital Media Server with TiVo® service (DMS). However, one thing has remained the same: you still need to get audio and video (sound and pictures) from their source (an antenna, or a cable or satellite box) to - Toshiba RS-TX20 | User Manual - Page 11
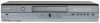
will find your new Digital Media Server (DMS), the Remote Control, and two bags of cables (contents listed below), along with this Viewer's Guide and the Start Here poster. DMS T T t u TV Power Live TV Guide V Inpu DVD Info Angle Select Vol Mute Chan Page Record Play Slow op Men - Toshiba RS-TX20 | User Manual - Page 12
audio, and connect a separate cable for video (see below). (yellow) ᕢ S-Video cable & jack (video only) The Digital Media Server's back panel also has jacks for S-Video (ᕢ). S-Video provides a higher quality video signal than composite. If you have equipment that supports this connection, you can - Toshiba RS-TX20 | User Manual - Page 13
Accessories Choosing a Channel Changing Cable If you don't have a cable or satellite box, your Digital Media Server does not need a channel changing cable. Skip to "Connecting to a Phone Line" on page 8. Your DMS needs to be able to change channels in order to record programs and display live TV - Toshiba RS-TX20 | User Manual - Page 14
magazine, a towel, or a dark cloth over the front of cable or satellite box, including the IR emitters. (See the diagram on page 7.) Do not block the Digital Media Server's IR window. Try changing channels several times with the TiVo remote. If channels change more reliably this way, you may want to - Toshiba RS-TX20 | User Manual - Page 15
guide you. ᕡ Cover the area around the IR emitters and the cable or satellite box's controls, nor will you be able to control the cable or satellite box with its remote. However, we recommend using only your TiVo remote to change the channel. If you still need to access your cable or satellite box - Toshiba RS-TX20 | User Manual - Page 16
into the splitter. 8 Connecting Your DMS Connecting to a Phone Line During Guided Setup, the Digital Media Server uses a standard phone line to connect to the TiVo® service (see Chapter 2). After Guided Setup, your DMS needs to make regular connections to the TiVo service, using either a phone - Toshiba RS-TX20 | User Manual - Page 17
examples for connecting your Digital Media Server to your program source (antenna, cable, or satellite) and your TV. From the list below, choose a setup based on your program source. Setups with more than one program source are only available with TiVo PlusTM service. After you get your basic system - Toshiba RS-TX20 | User Manual - Page 18
of A/V equipment, such as a DVD player or game console, do ® not connect to your DMS. You should connect your other devices to additional inputs on your TV or A/V receiver. Connecting Your DMS Setup 1: Antenna or Cable (No Cable Box) Digital Media Server ® 1 4 3 2 Television INPUT R L VIDEO - Toshiba RS-TX20 | User Manual - Page 19
the phone cord (see page 8). After you complete Guided Setup, you can connect your DMS to a home network and use a broadband Internet connection instead of a phone line to connect to the TiVo service. See Chapter 8. ᕤ Plug in all power cords and turn on your TV. Set your TV to display video - Toshiba RS-TX20 | User Manual - Page 20
your DMS. You should connect your other devices to additional inputs on your TV or A/V receiver. Connecting Your DMS Setup 2: Cable or Satellite Box Cable or Satellite Box RF In RF Out Serial Phone 1 AUDIO/VIDEO OUT Digital Media Server ® 2 6 6 4 3 Television INPUT R L VIDEO Antenna - Toshiba RS-TX20 | User Manual - Page 21
8). After you complete Guided Setup, you can connector on the cable or connect your DMS to a home network and use a broadband Internet connection instead satellite box. Plug the other of a phone line to connect to the TiVo service. See Chapter 8. end into the Control Out-Serial connector (the - Toshiba RS-TX20 | User Manual - Page 22
or A/V receiver. Connecting Your DMS Setup 3: Satellite Box & RF Program Source (Antenna or Cable)* Satellite Box SAT In RF Out Serial Phone 1 AUDIO/VIDEO OUT Digital Media Server ® 2 7 3 7 5 4 Television INPUT R L VIDEO Antenna In *TiVo Plus service required. Setups with more than - Toshiba RS-TX20 | User Manual - Page 23
see the Welcome screen, you're ready to complete Guided Setup. If you need 1.5 inches directly in front of the IR sensor. Use the help, see Chapter 2. provided adhesive strips to hold the emitters in place. Cable or Satellite Box c b Digital Media Server ® IR Control cable connection a 15 - Toshiba RS-TX20 | User Manual - Page 24
. Connecting Your DMS Setup 4: Cable Box and Satellite Box* Satellite Box SAT In RF Out Serial Phone 1 AUDIO/VIDEO OUT Digital Media Server ® 7 5 2 7 Cable Box RF Out RF In Serial AUDIO/VIDEO Phone OUT 3 4 1 7 Television INPUT R L VIDEO Antenna In *TiVo Plus service required - Toshiba RS-TX20 | User Manual - Page 25
the phone cord (see page 8). After you complete Guided Setup, you can connect your DMS to a home network and use a broadband Internet connection instead of a phone line to connect to the TiVo service. See Chapter 8. ᕦ Channel changing cables: First, see page 5 to check whether you can use the - Toshiba RS-TX20 | User Manual - Page 26
/Video button on your TV's remote until you see TiVo Central. 18 Connecting Your DMS Watching One Channel & Recording Another Antenna or Cable with No Cable Box Digital Media Server ® 1 5 4 3 2 Television INPUT R L VIDEO Antenna In ᕡ Connect the Coaxial RF cable coming from the wall to - Toshiba RS-TX20 | User Manual - Page 27
Watching One Channel & Recording Another Cable with a Cable Box Cable Box Serial Phone AUDIO/VIDEO OUT RF Out RF In Digital Media Server ® 6 5 6 3 4 Television INPUT R L VIDEO Antenna In 2 2 1 OUT IN OUT RF Splitter (not included) ᕡ Connect the cable from the wall to the input jack of - Toshiba RS-TX20 | User Manual - Page 28
no TiVo service functionality (so you can't pause or rewind live TV). • To watch video from the DMS again, press the TiVo button on the DMS remote, then press the Input, Source, or TV/Video button on your TV remote or TV until you see TiVo Central®. b Digital Media Server ® a IR Control cable - Toshiba RS-TX20 | User Manual - Page 29
CHAPTER 2 Guided Setup Completing Guided Setup 22 TiVo Central® 26 - Toshiba RS-TX20 | User Manual - Page 30
8. After completing Guided Setup, you can watch live TV, play DVDs and CDs, record DVDs, and use TiVo BasicTM service features to control live TV. You will have to wait a few hours while the DMS organizes information before you can schedule recordings. Guided Setup Tips and Troubleshooting ZIP Code - Toshiba RS-TX20 | User Manual - Page 31
of cable or satellite providers for your ZIP code. After hanging up, the DMS will take 5 to 15 minutes to organize the information. If the call doesn't succeed, see page 132 for troubleshooting steps. Dial-In Number. The DMS uses the number you choose for phone connections to the TiVo service. Press - Toshiba RS-TX20 | User Manual - Page 32
and Chapter 1 of this guide. After Guided Setup, if your channels don't change, see troubleshooting steps on page 136. Connection to DMS Screens. Use the UP/DOWN arrows until the picture of the DMS matches the cable connection you used to connect your satellite or cable box. When the video status - Toshiba RS-TX20 | User Manual - Page 33
the scenes for about four to eight hours to organize program information for the first time. After that, you'll be able to set up recordings and view information in the program guide. Press the TiVo button on the DMS remote to go to TiVo Central® and begin enjoying the TiVo Basic service. 25 - Toshiba RS-TX20 | User Manual - Page 34
of TiVo Central. 26 Guided Setup TiVo Central® Almost everything you do with the TiVo service starts from TiVo Central. You can schedule recordings, watch live TV or recorded programs, play DVDs or CDs, and more. To get to TiVo Central, press the TiVo button on your remote control. Occasionally - Toshiba RS-TX20 | User Manual - Page 35
CHAPTER 3 TiVo BasicTM Service in Five Short Tours Tour One: Play with Live TV 28 Tour Two: Find and Record Programs 30 Tour Three: Now Playing and Save To DVD 32 Tour Four: Playing a DVD or CD 34 Tour Five: Finding New Programs 36 Cool Things You Can Do 37 - Toshiba RS-TX20 | User Manual - Page 36
CHAN UP or CHAN DOWN buttons to surf one channel at a time. 28 TiVo Basic Service in Five Short Tours Tour One: Play with Live TV In this tour, you'll learn how to control live TV. So turn on your TV and grab your Digital Media Server remote! To watch live TV, select Watch Live TV from - Toshiba RS-TX20 | User Manual - Page 37
the status bar visible. It shows a one-hour period. The green segment is the portion of the current hour that has been saved by your DMS. Look the right side. Each symbol represents a useful feature, like recording or Parental Controls. Press the UP and DOWN arrows to highlight different icons. - Toshiba RS-TX20 | User Manual - Page 38
of it has already been saved. The Program Guide Your Digital Media Server's program guide lets you see what's on up to three days in advance, change channels, schedule recordings, and more-all while you're watching live TV. Press the GUIDE button to see the program guide. On the left side of the - Toshiba RS-TX20 | User Manual - Page 39
from live TV, from the program guide, and by creating a manual recording. Now wouldn't it be useful to know how to watch those recordings? That, and more, is explained in the very next tour. Get More with TiVo Plus™ service! With TiVo Plus service you can search for programs by title, actor - Toshiba RS-TX20 | User Manual - Page 40
Chapter 3 32 TiVo Basic Service in Five Short Tours Tour Three: Now Playing and Save To DVD The last tour showed you how to find and record programs. Once a program has started recording, it appears in Now Playing-a list of all the programs stored on your Digital Media Server. To view your Now - Toshiba RS-TX20 | User Manual - Page 41
Tour Three: Now Playing and Save To DVD Saving a Program from Now Playing to a DVD Your Digital Media Server not only records programs to Now Playing, it can also save recordings from Now Playing to a recordable DVD. The rest of this tour shows you how. If you don't want to create a disc with the - Toshiba RS-TX20 | User Manual - Page 42
34 TiVo Basic Service in Five Short Tours Tour Four: Playing a DVD or CD You must complete Guided Setup before you can play CDs, and play or record DVDs. For instructions, see "Completing Guided Setup" on page 22. Playing a DVD or CD in the Digital Media Server does not interfere with recording TV - Toshiba RS-TX20 | User Manual - Page 43
DVD-RW discs that contain video. It can also play audio CDs and most CD-R and CD-RW discs that contain MP3 files, and data CDs that contain photo 3 files. Playback control (such as FORWARD, REWIND and INSTANT REPLAY) is not available for MP3 files larger than 10 megabytes that were recorded - Toshiba RS-TX20 | User Manual - Page 44
If you get the channel on which the program airs, you can set up a recording here-it's that easy! Showcases and TiVolution Magazine are updated during your Digital Media Server's regular connection to the TiVo service. Feel free to watch some programs from Now Playing-but come back for "Cool Things - Toshiba RS-TX20 | User Manual - Page 45
have to remember when it's on-it will be recorded! (If you accidentally fast-forwarded past the Ipreview icon, rewind until it's visible again.) • Reduce remote control clutter. You can program your Digital Media Server's remote to control power, volume, mute, and input selection on your TV. That - Toshiba RS-TX20 | User Manual - Page 46
3 38 TiVo Basic Service in Five Short Tours Upgrade to TiVo Plus™ service Things get even cooler when you upgrade to TiVo Plus. Here's just some of what you get: • Skip reruns with a Season PassTM recording. A Season Pass automatically records every episode of a series on a specific channel, even - Toshiba RS-TX20 | User Manual - Page 47
CHAPTER 4 Recording Programs and DVDs Recording Programs 40 To Do List 42 Record from a Video Camera or VCR 43 Recording a DVD 45 Compatibility and Copy Protected Material 48 - Toshiba RS-TX20 | User Manual - Page 48
a TV program with TiVo BasicTM service. (If you upgrade to TiVo PlusTM service, you'll have even more ways to find and record programs. See Chapter 7 for details.) Recording From Live TV You can always record the program you're watching by pressing the RECORD button on your remote control. On the - Toshiba RS-TX20 | User Manual - Page 49
Recording Programs Manually Record by Time/Channel With TiVo BasicTM service, you can schedule a manual recording on a specific channel at a specific time (just as you would with a VCR). You can also create a manual repeating recording here by setting the recording to repeat every week, every day, - Toshiba RS-TX20 | User Manual - Page 50
off.) Selecting a title will take you to a screen that tells you why the program will not be recorded. Get More with TiVo Plus! If you upgrade to TiVo PlusTM service, you'll have access to Recording Options, which allow you to View Upcoming Episodes. When a conflict occurs, use this feature to find - Toshiba RS-TX20 | User Manual - Page 51
or VCR In addition to recording your favorite TV programs, your Digital Media Server can also record from a video camera or VCR-the first step in transferring your old home movies to DVD. These recordings appear on the Now Playing List, with titles you choose. Recordings you make from a video camera - Toshiba RS-TX20 | User Manual - Page 52
" to proceed. 4. Select the front panel input you used to connect your video camera or VCR. If you used both S-Video and Composite A/V (for audio), select S-Video. 5. Choose a name for your recording. Use the arrow buttons on the remote to highlight a character, and press SELECT to enter it. You - Toshiba RS-TX20 | User Manual - Page 53
Recording a DVD Your Digital Media Server can save programs from the Now Playing list to a recordable DVD. Some content may not be saved due to copy protection rights over the material. For more details, See "Copy Protected Material" on page 48. Saving to DVD does not interfere with recording TV - Toshiba RS-TX20 | User Manual - Page 54
multiple DVDs. 46 Recording Programs and DVDs 3. Choose the programs you want to save to the DVD. Programs in Now Playing that can be saved have an empty box next name for the DVD. You can use that name or choose to enter a name. To name the DVD, use the arrow buttons on the remote to highlight a - Toshiba RS-TX20 | User Manual - Page 55
Parental Controls are set to block all DVDs. See page 71. • The closed captioning of the original program is maintained. After the DVD is finalized, you're done! To play your new DVD, press the DVD button on your remote, then press PLAY. For more about playing DVDs, see page 56. Recording a DVD - Toshiba RS-TX20 | User Manual - Page 56
is the use of the DVD-Video format for recording on DVD-R and DVD-RW discs. DVD discs saved using this Digital Media Server can be played on regular DVD players, including computer DVD drives compatible with DVD-Video format. However, support for playback of DVD-R and DVD-RW discs is optional for - Toshiba RS-TX20 | User Manual - Page 57
CHAPTER 5 Watching Programs and Playing Discs Using the Control Buttons 50 The Status Bar 51 The Channel Banner 52 Watching Live TV 53 Watching Programs from Now Playing 55 Playing a DVD or CD 56 Disc Compatibility 63 - Toshiba RS-TX20 | User Manual - Page 58
fun of watching programs with the Digital Media Server is the ability to control what you're watching. The best part is-the pause, instant replay, slow motion, and other control features work whether you're watching live TV, recorded programs or DVDs. RECORD. Records a program when you're watching - Toshiba RS-TX20 | User Manual - Page 59
status bar represents one hour and the white tick marks are 15 minutes apart. In recorded programs and DVDs, the bar shows the guide, the channel banner, and anything else that is not part of the program. 5 Tick marks Status Bar for a twohour recording or DVD. This symbol shows you are controlling - Toshiba RS-TX20 | User Manual - Page 60
at the top of the screen when you change channels, or press the INFO button or RIGHT arrow on your remote. This works when you're watching live TV, recorded programs or DVDs, or listening to a CD. The banner disappears after a few seconds. You can also hide the channel banner by pressing CLEAR - Toshiba RS-TX20 | User Manual - Page 61
're looking for, such as cooking shows or comedy movies. For more about Guide Options available with TiVo Plus service, see page 98. Watching Live TV 5 You can use your Digital Media ® Server's remote to control the power, volume, mute, and TV input settings on your TV. For information on setting - Toshiba RS-TX20 | User Manual - Page 62
Chapter 5 While the highlight is on the left ® side of the guide, press the FORWARD and BACK buttons to change the time in half-hour increments. While the highlight is on the right side, press the FORWARD and BACK buttons to change the selected channel. Use CHAN UP/DOWN to - Toshiba RS-TX20 | User Manual - Page 63
from Now Playing Watching Programs from Now Playing Programs you record with the DMS are listed in Now Playing. To go to Now Playing, press the TiVo button twice, or select Now Playing List from TiVo Central®. As soon as a recording starts, the program's title appears in Now Playing. You can - Toshiba RS-TX20 | User Manual - Page 64
you can play CDs, and play or record DVDs. For instructions, see "Completing Guided Setup" on page 22. If you finished "Tour Four: Playing a DVD or CD" on page 34, then you already know the basics of playing a DVD or CD with your Digital Media Server. This section provides a bit more detail and - Toshiba RS-TX20 | User Manual - Page 65
DMS automatically detects the video format used on a particular DVD. If the picture looks jagged, select this icon to change the method used to detect the DVD's format. If you have turned on Parental ® Controls for DVDs, you may need to enter a password to watch some DVDs. (See page 71 for details - Toshiba RS-TX20 | User Manual - Page 66
or a specific chapter or time within a title, go to TiVo Central, select DVD, then select "Go to title, chapter, or time." From the Search Disc screen, select a title number, a title and chapter number, or a title number and time. Press SELECT when done. Search Via Remote Control. • DVD. Press the - Toshiba RS-TX20 | User Manual - Page 67
don't want to see the angle indicator icon when watching DVDs, you can turn this feature off. See page 70 for details. Control Buttons The remote's control buttons control DVDs and CDs much the same way they control live TV and recorded programs. Some exceptions are listed below. For more on using - Toshiba RS-TX20 | User Manual - Page 68
TiVo sound effects when playing an audio CD. 60 Watching Programs and Playing Discs MP3, WMA, and Audio CD Information and Playback Settings The DMS can play audio CDs as well as MP3 and WMA music files. It can also read music playlists that are in the most common format on the remote or the front - Toshiba RS-TX20 | User Manual - Page 69
CD Playing a Photo CD You can use your Digital Media Server to view digital photos in JPEG format from a CD. Browsing a Photo Disc. When you insert a photo CD, highlight "View photos" on the DVD screen and press SELECT to browse the contents of the disc. Photos and folders are displayed in a grid - Toshiba RS-TX20 | User Manual - Page 70
Chapter 5 Watching Programs and Playing Discs Slide Show Options. Highlight any photo and press SELECT to view details about that photo. Highlight "Play slide show," then "Options," and press SELECT. • Slide delay. This option sets the time each photo is displayed before going to the next. • - Toshiba RS-TX20 | User Manual - Page 71
unplayable depends on many factors, this should not be an issue for most discs created on a PC. Some discs recorded using a ® different DVD recorder, CD recorder, or personal computer may not be playable in the Digital Media Server even though they were made with software that is compatible with - Toshiba RS-TX20 | User Manual - Page 72
Windows operating system. Watching Programs and Playing Discs DVD Regions. DVDs and DVD players are manufactured for different regions of the world 9660 Level 1 or 2 compliant, and the CDs must be created using physical format Mode1, or Mode2 XA Form1. The DMS is compatible with both Romeo and - Toshiba RS-TX20 | User Manual - Page 73
CHAPTER 6 Messages & Setup Messages 66 Settings 67 Remote Control & DMS Front Lights 76 Phone & Network Setup 82 System Information 87 Troubleshooting 88 Restart or Reset System 89 Standby 90 - Toshiba RS-TX20 | User Manual - Page 74
read any messages from the TiVo service or internal alerts from your Digital Media Server. When you receive a new message, TiVo Central® will show the option, "Read New Messages & Setup." To read the messages: 1. Go to TiVo Central, then select Read New Messages & Setup. 2. Select Read New Messages - Toshiba RS-TX20 | User Manual - Page 75
Media Server work more to your liking. Use these screens to set your default preferences for recording quality, Parental Controls, and more. Audio Settings Your DMS can send an analog or digital audio signal to your TV or A/V receiver. To enjoy multichannel surround sound, you will need to connect - Toshiba RS-TX20 | User Manual - Page 76
buttons on the remote control). The default setting is Medium. Television Audio. This option lets you select the Digital Media Server's default audio output option. You can choose to have the default audio in stereo or mono, or have a secondary audio program (SAP) recorded when one is available - Toshiba RS-TX20 | User Manual - Page 77
Changing Cable" on page 5), • your cable or satellite box is replaced by a new make or model, • or if you are having trouble with channel changing (see page 136 for troubleshooting.) Channels You Receive. The Channels You Receive list starts with all the channels included in your service package - Toshiba RS-TX20 | User Manual - Page 78
not want to see the angle indicator, select "Off." Language & Subtitles. You can select the preferred audio and DVD menu languages (default is English). If that language is available on a DVD, the DMS will use it instead of any others. You can also change the subtitle settings: • Subtitle language - Toshiba RS-TX20 | User Manual - Page 79
number buttons on the remote control to enter a four-digit password, then enter the same password again for confirmation. To turn off Parental Controls ( ): Select "Turn off Parental Controls," enter the password, and press SELECT. When Parental Controls are turned off, the password is deleted and - Toshiba RS-TX20 | User Manual - Page 80
-enter the new password to confirm. Auto Re-lock Option. When Parental Controls are temporarily turned off, they re-lock automatically after four hours if you don't use your remote. Parental Controls won't relock in the middle of a show. By default, the Auto Re-lock option is on. DVD Country Setting - Toshiba RS-TX20 | User Manual - Page 81
choose how the Digital Media Server's Parental Controls will treat unrated movies and TV programs. DVD Rating Limit. You can block playback of DVDs that exceed the rating limit you set using this screen. Channel Lock for Live TV ( ). You can lock individual channels so that a password is required - Toshiba RS-TX20 | User Manual - Page 82
Chapter 6 One hour of Best Quality equals ® about 3 hours of Basic Quality, 2 hours of Medium Quality, and 1.5 hours of High Quality. 74 Messages & Setup Recording Settings Recording Quality. You can increase the available recording time on your DMS by selecting a recording quality appropriate - Toshiba RS-TX20 | User Manual - Page 83
is connected to your DMS with a Component Video cable (not supplied; see without shrinking. Settings If you change video sources, for ® example, by changing from cable to satellite service, you should repeat Guided Setup (go to Messages & Setup, then Restart or Reset System, then Repeat Guided Setup - Toshiba RS-TX20 | User Manual - Page 84
& Setup Remote Control & DMS Front Lights To change the settings of the lights on the Digital Media Server's front panel, see page 81. For information about the individual buttons on the TiVo remote control, please refer to the Remote Control Tips on the inside front cover of this guide. Before - Toshiba RS-TX20 | User Manual - Page 85
, and TV INPUT Buttons 1. Go to the Remote Control screen. Press the TiVo button to go to TiVo Central®. Select Messages & Setup, then Settings, then Remote Control & DMS Front. Choose which device and/or functions you want to control: To Control: TV power, volume, and TV input mute A/V receiver - Toshiba RS-TX20 | User Manual - Page 86
light at the end of the remote lights up and stays lit when you release the buttons). To Control: Press the: TV power, volume, and mute TV POWER and TiVo buttons TV input TV INPUT and TiVo buttons A/V receiver power, volume, and mute TV POWER and TiVo buttons A/V receiver volume and mute only - Toshiba RS-TX20 | User Manual - Page 87
. Unfortunately, due to the great variety of TVs and A/V receivers, some makes and models are not compatible with your Digital Media Server's remote control. If you reach the end of the available codes without finding a code that works with your device, you will need to use your TV or A/V receiver - Toshiba RS-TX20 | User Manual - Page 88
becoming accidentally "locked out" of controlling your TiVo DVRs. Remote Address 80 Messages & Setup Setting the Remote Address If you have more than one Digital Media Server in your home, or if you have another model of TiVo DVR in addition to your Digital Media Server, you can match a particular - Toshiba RS-TX20 | User Manual - Page 89
and hold the TV POWER button and TiVo button simultaneously until the red light at the end of the remote control comes on, remains steady, then stays on when you release the buttons. Front Panel Lights You can change the settings of the lights on the Digital Media Server's front panel. 6 DMS - Toshiba RS-TX20 | User Manual - Page 90
your warranty. See Chapter 10 for warranty information. Messages & Setup Phone & Network Setup The Digital Media Server makes regular connections to the TiVo service to get updates to the TiVo service, program information for the program guide, and updates to Showcases and TiVolution® Magazine. The - Toshiba RS-TX20 | User Manual - Page 91
Phone & Network Setup • Connect to the TiVo service now. Normally, you do not need to connect to the TiVo service manually. However, for troubleshooting or other unusual circumstances, you may wish to use this option. After you start the connection, the status indicator reads "Starting Up" and will - Toshiba RS-TX20 | User Manual - Page 92
telephone charges. 84 Messages & Setup Phone Dialing Options Change Dialing Options remote to set the area code, then press SELECT. If you change the area code, or if the DMS has not made a daily call in the last twentyfour hours, the Update Numbers screen appears and the DMS calls the TiVo service - Toshiba RS-TX20 | User Manual - Page 93
Network Setup completes to dial "9" to get an outside line). Use the number keys on the remote control to enter the prefix. Press the PAUSE button after you have entered the prefix if the DMS attempts to call the TiVo service. If you have a standard dial tone, and 'Phone Avail.' Detection is off - Toshiba RS-TX20 | User Manual - Page 94
happen to be talking on the phone when the DVR tries to call you will hear the modem dial and try to connect to the TiVo service. Messages & Setup If you are experiencing "Failed, Line unavailable" continue past this screen without making a test phone call, select "Restore previous options." 86 - Toshiba RS-TX20 | User Manual - Page 95
The System Information screen provides general information about your Digital Media Server, including its service number, manufacturer, model number, software version used, storage capacity, and information about recent connections to the TiVo® service. You'll need some of this information if you - Toshiba RS-TX20 | User Manual - Page 96
tips in Chapter 9 and at www.tivo.com/support. • Network Troubleshooting provides tips to help you with your Digital Media Server's network connection. See Chapter 8 for more information. • Transfer Troubleshooting appears when you upgrade to TiVo PlusTM service. See Chapter 8 for more about Multi - Toshiba RS-TX20 | User Manual - Page 97
the Digital Media Server. Shuts down the DMS and starts it up again. It will not affect recordings in Now Playing, upcoming Season PassTM recordings, WishListTM searches, or TiVo Suggestions. Any recording in progress will be interrupted. Repeat Guided Setup. You will have to repeat Guided Setup if - Toshiba RS-TX20 | User Manual - Page 98
or are scheduled to record will still be recorded. (If a program is being recorded, the red light will turn on.) • Any antenna or cable signal connected to the Digital Media Server's RF In jack will continue to be passed through to the RF Out jack. There is no TiVo service functionality on any - Toshiba RS-TX20 | User Manual - Page 99
CHAPTER 7 Features of TiVo PlusTM Service Introduction 92 Season Pass, Recording Options, To Do List 93 Find Your Favorite Programs 98 Find Programs That Match Your Interests 103 Finding New Programs 108 Sorting & Grouping Programs 109 Save to VCR 110 - Toshiba RS-TX20 | User Manual - Page 100
How do I upgrade to TiVo Plus service? Visit the TiVo web site (www.tivo.com/upgrade) or call TiVo Customer Support at 1-877-367-8486. To upgrade to TiVo Plus service, you will need your TiVo service number, found on the System Information screen. Go to TiVo Central and select Messages & Setup, then - Toshiba RS-TX20 | User Manual - Page 101
List Season Pass, Recording Options, To Do List The TiVo PlusTM service gives you smart recording capabilities that can detect program (in the program guide, or search results) and choose "Get a Season Pass." • Manual Repeating Recording. Records on a specific channel at a specific time, just as you - Toshiba RS-TX20 | User Manual - Page 102
are kept in Now Playing. You can change this setting; see page 95. • Resolving conflicts. The TiVo service resolves scheduling conflicts between repeating recordings by comparing recording priorities. You can change recording priorities with the Season Pass Manager. (See page 95 for more details - Toshiba RS-TX20 | User Manual - Page 103
for a repeating recording.) Keep At Least. You can set the minimum amount of time the DVR keeps a recording. The default recording starts.) Stop Recording. You can set a recording to continue-for a few minutes or up to three hours-after it's scheduled to end. For example, you can extend a recording - Toshiba RS-TX20 | User Manual - Page 104
Chapter 7 96 Features of TiVo Plus Service Season Pass Manager Say you have a Season Pass to ER and an auto-recording WishList for movies with Julia Roberts. What if a Julia Roberts movie happens to air at the same time as ER? The DVR will check the priorities in the Season Pass Manager to decide - Toshiba RS-TX20 | User Manual - Page 105
TiVo Plus, the To Do List still has Recording History and lists all scheduled recordings in one place. You can also use it to change Recording Options (even for individual episodes of a repeating recording Pass and manual repeat recordings have a double checkmark ( ), and auto-recording WishList - Toshiba RS-TX20 | User Manual - Page 106
the future (instead of the three days you get with TiVo Basic). You can also quickly set up recordings, rate any program with a Thumbs Up or Thumbs Down, and customize the channels and types of programs shown in the guide. The guide has options that let you quickly change what programs and channels - Toshiba RS-TX20 | User Manual - Page 107
Save your changes by pressing SELECT or GUIDE. To cancel your changes, press CLEAR You can use the remote for some functions too. The CLEAR button on the remote erases everything; BACK set up a Season Pass, or record an individual showing. When using Search by Title, replace hyphens ( - ), slashes ( - Toshiba RS-TX20 | User Manual - Page 108
Plus Service apostrophes ( ' ), asterisks ( * ) and ampersands ( & ) are ignored. For example, you would use 6 OCLOCK NEWS to search for the title "6 O'Clock News." Using Online Scheduling to Find Programs (TiVo Central Online) With TiVo Plus, you can schedule recordings on your Digital Media Server - Toshiba RS-TX20 | User Manual - Page 109
DOWN arrows to select a time. 5. Press SELECT to show the list of programs without leaving the time selector, or press RIGHT arrow to bring up the list of programs same time. 6. When you find a program you want to record, highlight it, and press SELECT to bring up the Program Information screen. Then - Toshiba RS-TX20 | User Manual - Page 110
Chapter 7 Features of TiVo Plus Service Browse by Channel Browse by Channel lets you You can also use the number buttons on the remote control to type in a channel, then press ENTER.) 4. Press SELECT to bring up the list of programs without leaving the channel selector, or press RIGHT arrow to - Toshiba RS-TX20 | User Manual - Page 111
The list is updated each time your DVR connects to the TiVo service. • You could search for something more specific by creating an Actor WishList for Sean Search? Yes it can! You can set a WishList to auto-record, and it will record every program the WishList finds, on any channel you receive. For - Toshiba RS-TX20 | User Manual - Page 112
104 Features of TiVo Plus Service Creating a WishList the person's last name using the arrow buttons to move the selection box around the grid; press SELECT to enter a highlighted letter. As that is not on the list, enter the name in the format: LAST NAME, FIRST NAME. You must match the spelling of - Toshiba RS-TX20 | User Manual - Page 113
very similarly, but the TiVo service only searches program and (*) as a special symbol that replaces the endings of words. For example the SLOW ( Slow ) 7 button on the remote. The asterisk can be helpful when you're • When using this symbol, be as specific as possible. For example, do not use - Toshiba RS-TX20 | User Manual - Page 114
the category "Arts" and the SubCategory "Music." Features of TiVo Plus Service Tips for entering keywords: • To specify an exact phrase in a space by selecting SP on the grid of letters or by pressing FORWARD ( ). • Replace hyphens ( - ), slashes ( / ) and periods ( . ) with spaces. For example - Toshiba RS-TX20 | User Manual - Page 115
, or to add a category or subcategory to narrow the results. Just select the WishList, then select "Edit WishList." 7 If you set up an auto-recording ® WishList for sports, consider using the Overtime Scheduler (described on page 95) to make sure you don't miss the most exciting part of the game - Toshiba RS-TX20 | User Manual - Page 116
.com/privacy. 108 Features of TiVo Plus Service Finding New Programs TiVo Suggestions TiVo Suggestions is a personalized list of shows selected to match your preferences. How is this magic possible? Any time you watch programs, live or pre-recorded, or browse programs with the Program Guide - Toshiba RS-TX20 | User Manual - Page 117
Groups, a folder appears in Now Playing for: • Each television series with more than one recorded episode; • Each auto-recording WishListTM with a recorded program; • TiVo Suggestions (if you have auto-recording of TiVo Suggestions turned on). A program may fit in any or all of these categories, so - Toshiba RS-TX20 | User Manual - Page 118
can fast forward through the boring parts! The VCR will record the video exactly as it appears, including the status bar, channel banner, and any icons on the screen. Using Save to VCR: 1. Connect a Composite A/V cable from the Digital Media Server's A/V Output jacks to the A/V Input jacks your VCR - Toshiba RS-TX20 | User Manual - Page 119
CHAPTER 8 Connecting to a Home Network for Home Media Features Introduction to Home Media Features 112 Home Networks 116 Connecting to a Home Network Using a Wireless Network Adapter 117 Connecting to a Home Network Using Wired (Ethernet) 119 Completing the Network Settings 121 - Toshiba RS-TX20 | User Manual - Page 120
113. If you don't have a home network, you can connect two Series2TM DVRs to each other for Multi-Room Viewing. (Your Digital Media Server is also a Series2 DVR.) This setup is described in the Home Media Features guide, available online at www.tivo.com/guides. • Digital Music Player - Use the home - Toshiba RS-TX20 | User Manual - Page 121
need at least two Series2 DVRs (or Digital Media Servers), and: • Each DVR must have active TiVo service (or TiVo PlusTM service), and Multi-Room Viewing enabled at www.tivo.com/manage. • The DVRs must be on the same TiVo service account. (The TiVo service subscription for each DVR must be owned by - Toshiba RS-TX20 | User Manual - Page 122
Chapter 8 For more details about using these ® features, download the Home Media Features Guide at www.tivo.com/guides. 114 Connecting to a Home Network Digital Music & Photos The Digital Music Player and Digital Photo Viewer let you use your DMS to play MP3 music files and playlists, and view - Toshiba RS-TX20 | User Manual - Page 123
seconds, the music plays. Viewing photos on the DMS. On your computer, use the TiVo Desktop application to "publish" photos that you want to access through your DMS. (Publishing is a process that 8 makes digital music and photos available to your DMS. It is usually as simple as selecting photos - Toshiba RS-TX20 | User Manual - Page 124
check www.tivo.com/adapters for the latest information. Connecting to a Home Network Home Networks When we refer to a "home network," we mean two or more devices (probably computers), connected to a router. USB Ports, Wireless and Wired Network Adapters On the back of your Digital Media Server, you - Toshiba RS-TX20 | User Manual - Page 125
. If it is not already attached, connect one end of the USB cable that came with your wireless network adapter to the port located on the back of the adapter. 2. Connect to the DMS. Connect the other end of the USB cable to the USB port on the DMS. The power light on the wireless adapter may - Toshiba RS-TX20 | User Manual - Page 126
not disconnect the network adapter wires or the power to the DMS. Either action might damage the adapter. 5. Important message. The first time you press the TiVo button after connecting a network adapter, you will see an Important Message. Review it, then press SELECT on the remote control to go to - Toshiba RS-TX20 | User Manual - Page 127
the USB end of the Ethernet adapter to the USB port on the DMS. 2. Connect Ethernet to the adapter. Plug one end of an Ethernet cable into the Ethernet adapter. 3. Connect Ethernet to the hub or router. Plug the other end of the Ethernet cable into your home network's hub or router. EthUeSrBn-et - Toshiba RS-TX20 | User Manual - Page 128
message. The first time you press the TiVo button after connecting a network adapter, you will see an Important Message. Review it, then press SELECT on the remote control to go to TiVo Central. 5. Next Step. If your home network has DHCP, wait for a few minutes for your DMS to automatically - Toshiba RS-TX20 | User Manual - Page 129
need to provide a password format or password. When you are ready to continue, press SELECT on your remote control. Wireless Connection and Wireless Network Name. You must now provide the name of your wireless network. Wireless networks have a network name (sometimes called an SSID for service set - Toshiba RS-TX20 | User Manual - Page 130
names by pressing CHAN DOWN to scroll down the screen.) Otherwise, select "Connect to a closed wireless network": On the Wireless Network Name screen, enter the name of your network using the arrow buttons on your remote to highlight a character. Then press SELECT. You must use capital and lowercase - Toshiba RS-TX20 | User Manual - Page 131
. Choose a format or select "The wireless network doesn't use a password." If you select "The wireless network doesn't use a password," you will . Some hexadecimal passwords contain only numbers. • Alphanumeric. Enter an alphanumeric password using the arrow buttons on your remote to highlight a - Toshiba RS-TX20 | User Manual - Page 132
correct. For steps you can take to troubleshoot issues with your wireless connection, see "Questions About Networking" on page 149. Change Connection Type. You see this screen if you are not using a shared Internet connection to connect to the TiVo service. If your network has access to an always-on - Toshiba RS-TX20 | User Manual - Page 133
TCP/IP Concepts This section describes a few basic TCP/IP concepts. If you are familiar with home networking, you can skip to "Begin TCP/IP Settings" on page 126. • IP Address. TCP/IP settings are used to manage IP addresses on a network. An IP address is a number that identifies a single device - Toshiba RS-TX20 | User Manual - Page 134
Settings To get to TCP/IP Settings: press the TiVo button on the remote control to go to TiVo Central, then select Messages & Setup, then Settings, then Phone & Network Setup, then "Edit phone or network settings," then TCP/IP Settings. TCP/IP Connection. On the first screen in TCP/IP Settings you - Toshiba RS-TX20 | User Manual - Page 135
(If you are having trouble getting this information, contact your Internet service provider.) In addition, you can use your computer's IP address to help create an IP address for your DMS. For example, if your computer's IP address is '192.168.1.2' then your Digital Media Server's IP address should - Toshiba RS-TX20 | User Manual - Page 136
! For steps you can take to troubleshoot issues with your TCP/IP Settings, see "Questions About Networking" on page 149. Change Connection Type. You see this screen if you are not using a shared Internet connection to connect to the TiVo service. If your network has access to an always-on broadband - Toshiba RS-TX20 | User Manual - Page 137
CHAPTER 9 Troubleshooting Customer Support 130 Troubleshooting 131 - Toshiba RS-TX20 | User Manual - Page 138
lists • Phone calls and connecting to the TiVo service • Your TiVo service account and billing issues • Audio and video, channel changing, and the remote control • Online scheduling and Home Media Features www.tacp.toshiba.com/service 130 1-800-631-3811 www.tivo.com/support 1-877-367-8486 - Toshiba RS-TX20 | User Manual - Page 139
Guided Setup, you can connect your DMS to a home network and use a broadband Internet connection instead of 9 a phone line to connect to the TiVo service. See Chapter 8 for details. My TiVo remote control doesn't control my TV's power, volume, etc. • You can program the TiVo remote control - Toshiba RS-TX20 | User Manual - Page 140
Chapter 9 Troubleshooting My TiVo remote control doesn't work with my DMS. • Be sure you are using the TiVo remote, and that you hold it so that the TiVo button points toward the DMS. • Press any button on the remote. Does the red light above the TiVo button on the remote flash? If the red light - Toshiba RS-TX20 | User Manual - Page 141
will not interfere with other needs for the phone line, and periodic connections will keep the Digital Media Server's program information fully up to date. • You can also use a broadband Internet connection to connect to the TiVo service instead of a phone line. See Chapter 8 for details. The phone - Toshiba RS-TX20 | User Manual - Page 142
Internet connection to provide the TiVo service, and is available as a local call in most areas. In some areas, however, local and long distance toll charges may apply. You are responsible for any phone charges. Questions About DVDs and CDs I cannot play DVDs or CDs on the Digital Media Server - Toshiba RS-TX20 | User Manual - Page 143
"Compatibility and Copy Protected Material" on page 48. • Check that there wasn't a power outage during the recording. I can't play a DVD disc that I recorded using my Digital Media Server in another DVD player. • Not all DVD players will play all discs, even if the disc has been finalized. 135 - Toshiba RS-TX20 | User Manual - Page 144
can always watch any program from the Now Playing list while the DMS is recording a program. I can't get the channel to change. If you use cable with no cable box: • Be sure that you are using the TiVo remote and that you hold it so the TiVo button points toward the DMS. • Press any button on the - Toshiba RS-TX20 | User Manual - Page 145
IR code you chose during Guided Setup. See page 6 for more on choosing an IR code. • Try using the cable or satellite box's remote to change the channel. If it doesn't work, contact the manufacturer or service provider. If you have a Motorola/General Instruments DCT2000 series cable box or a DIRECTV - Toshiba RS-TX20 | User Manual - Page 146
TiVo Central, select Messages & Setup, then Restart or Reset System, then Repeat Guided Setup. Press THUMBS DOWN three times, and then press ENTER. You may need to check all of the available selections to find the right one since cable providers often change their lineups. For complete instructions - Toshiba RS-TX20 | User Manual - Page 147
the Phone & Network Setup screen (from TiVo Central, select Messages & Setup, then Settings, then Phone & Network Setup) for the time of the last successful connection to the TiVo service. If it was more than 36 hours ago, your DMS may be having trouble connecting to the TiVo service. Select "Test - Toshiba RS-TX20 | User Manual - Page 148
a connection to the TiVo service. To do this, go to TiVo Central, then select Messages & Setup, then Settings, then Phone & Network Setup, then "Connect to the TiVo service now." What happens if a sports event I have scheduled to record goes into overtime? • TiVo Plus only: The TiVo service cannot - Toshiba RS-TX20 | User Manual - Page 149
time zone, change your DMS's time settings by repeating Guided Setup. To connect to the TiVo service at any time, go to TiVo Central, then select Messages & Setup, then Settings, then Phone & Network Setup, then "Connect to the TiVo service now." • TiVo Plus only: If you are missing the beginning or - Toshiba RS-TX20 | User Manual - Page 150
9 Troubleshooting • channel changing problem. See "Questions About Channels" on page 136. Questions About Recording Conflicts Can I record multiple programs of the rest of the repeating recording. • TiVo Plus only: The DMS gives each repeating recording a priority. You can resolve some - Toshiba RS-TX20 | User Manual - Page 151
drive, or any other computer storage media? • The TiVo Series2 DMS does not save or archive recordings to any device other than a VCR or its internal DVD recorder . The amount of space required for each show you record affects the total hours of recording capacity in your DMS. How can I fit more - Toshiba RS-TX20 | User Manual - Page 152
still can't tune to the channel I want. • If your cable or satellite box has a feature like Parental Controls, make sure you have disabled them with the satellite or cable box's remote. See your cable or satellite box's owner's manual for instructions. • You may be using a channel list that does not - Toshiba RS-TX20 | User Manual - Page 153
remote control. • Press the TiVo button to go to TiVo Central, then press the LIVE TV button to return to live TV. • You can also try restarting your DMS. From TiVo Central, select Messages & Setup, then Restart or Reset TiVo button or the LIVE TV button. (On some remotes, there is a POWER button - Toshiba RS-TX20 | User Manual - Page 154
with your cable connections, see the Start Here booklet and Chapter 1 of this guide. My audio system is set up to play in stereo, but it is only playing mono. • Make sure that "Main Audio Program (stereo)" is selected on the Television Audio screen (TiVo Central and select Messages & Setup, then - Toshiba RS-TX20 | User Manual - Page 155
Digital Media Server? • No. The Digital Media Server comes with TiVo BasicTM service included. TiVo Basic does not require any subscription fee. What is TiVo Basic service? • TiVo Basic service allows you to control live TV (pause, fast forward, instant replay), and record programs from a specific - Toshiba RS-TX20 | User Manual - Page 156
schedule recordings from an on-screen guide that includes detailed program information, including show summaries and ratings, for up to 14 days of programming. • More smart features. TiVo Plus skips reruns, tracks schedule changes, and more! Will the Digital Media Server work without TiVo service - Toshiba RS-TX20 | User Manual - Page 157
Phone & Network Setup, then "Change connection type." • If your DMS is having trouble connecting via a broadband Internet connection: • Check that the Internet connection is available, then troubleshoot. There are two links in the chain between your DMS and the Internet: your Digital Media Server - Toshiba RS-TX20 | User Manual - Page 158
If your DMS is having trouble connecting over a regular phone line: • Use broadband. If you have a home network with a broadband Internet connection, try allowing your DMS to use it to connect to the TiVo service over the Internet. Doing this eliminates the Digital Media Server's need to use a phone - Toshiba RS-TX20 | User Manual - Page 159
TiVo button on the remote control to go to TiVo Central, then select Messages & Setup, then Restart or Reset System, then Restart the DMS. Press THUMBS DOWN three times, then press ENTER. 4. Check physical connections. Ensure that all network equipment is receiving power and all cable connections - Toshiba RS-TX20 | User Manual - Page 160
Network Setup screen (from TiVo Central, select Messages & Setup, then Settings, then Phone & Network Setup), check the wireless signal strength. The following tips may improve wireless signal strength: • Make sure the wireless adapter is placed well away from the Digital Media Server's power supply - Toshiba RS-TX20 | User Manual - Page 161
CHAPTER 10 Privacy, Service, Warranty, and Licenses TiVo Privacy Policy 154 TiVo BasicTM Service Agreement 162 TiVo PlusTM Service Agreement 164 Toshiba Digital Media Server Limited Warranty 172 FCC Information 174 Safety Instructions 175 GNU General Public License 177 Linux and - Toshiba RS-TX20 | User Manual - Page 162
defined below) from your TiVo DVR without your prior consent. Absent your consent, TiVo has no way of 154 knowing what shows you-as an individual or household-have watched, recorded, or rated with "Thumbs Up" or "Thumbs Down." NOTE: If your TiVo DVR is receiving the TiVo Basic service, you may not - Toshiba RS-TX20 | User Manual - Page 163
(digital or analog) and level of TiVo service (TiVo Basic, TiVo Plus, premium services, etc.), privacy preferences, and the cable or satellite box model that you use. You provide us with this information when (a) you set up your TiVo DVR with TiVo Basic service or (b) when you register as a user of - Toshiba RS-TX20 | User Manual - Page 164
TiVo DVR is receiving the TiVo Basic service, you may not opt out of TiVo's collection of Anonymous Viewing Information from that TiVo DVR. 1.4 "Diagnostic Information" means a log file containing detailed information about the operation of your TiVo DVR, such as memory consumption, user interface - Toshiba RS-TX20 | User Manual - Page 165
excluding any Contact Information) to generate demographic profiles of our users as a whole to assist us to, for example, identify future users of the TiVo service or other services. NOTE: If your TiVo DVR is receiving the TiVo Basic service, and you choose to provide us with Contact Information - Toshiba RS-TX20 | User Manual - Page 166
the TiVo Plus service is terminated. NOTE: Your TiVo DVR may not be eligible to receive the TiVo Basic service. Consult your User's Guide to determine if your TiVo DVR is eligible to receive the TiVo Basic service. 2.9 TiVo Customers with Multiple TiVo DVRs. TiVo will cause all of the TiVo DVRs on - Toshiba RS-TX20 | User Manual - Page 167
Depending on your level of TiVo service and the model of your TiVo DVR, such features may not be available to you. 3.6 Factors Beyond Our Control. Your privacy is very important to us. Due to factors beyond our control, however, we cannot fully ensure that your User Information will not be disclosed - Toshiba RS-TX20 | User Manual - Page 168
receiving the TiVo Basic service. In such a case, TiVo may maintain your TiVo Plus service Account Information until such time as your TiVo Basic service is terminated. Consult your User's Guide to If you are a TiVo Plus customer and you would like to change your determine if your TiVo DVR is - Toshiba RS-TX20 | User Manual - Page 169
address is TiVo Inc., ATTN: Privacy Policy, 2160 Gold Street, P.O. Box 2160, Alviso CA 95002-2160. 8.4 Entire Agreement. The term "including" in this Privacy Policy shall mean "including without limitation." This Privacy Policy supplements and is incorporated into the TiVo Basic Service 10 161 - Toshiba RS-TX20 | User Manual - Page 170
("Agreement"). THE TIVO BASIC SERVICE AND THE PRIVACY POLICY 1 Terms of Service. The TiVo logo on your Pioneer DVD Recorder with TiVo and Toshiba Digital Media Server (referred to in this TiVo Basic Service Agreement as your "TiVo DVR") means that it can receive the TiVo Basic service offered and - Toshiba RS-TX20 | User Manual - Page 171
transfer the TiVo Basic service to another DVR. By using the TiVo Basic service, you agree to receive all software updates and upgrades that TiVo sends to your TiVo DVR. If your TiVo DVR accesses the TiVo Basic service, you acknowledge and agree that you are a user of the TiVo Basic service and are - Toshiba RS-TX20 | User Manual - Page 172
THE TIVO PLUS SERVICE AND THE PRIVACY POLICY 1 Terms of Service. The TiVo logo on your Pioneer DVD Recorder with TiVo and Toshiba Digital Media Server (referred to in this TiVo Plus Service Agreement as your "TiVo DVR") means that it can receive the TiVo Plus service offered and provided by TiVo for - Toshiba RS-TX20 | User Manual - Page 173
among one another due to incompatibility issues among manufacturers or copy protection mechanisms. Please visit our TiVo Home Media Features FAQs at www.tivo.com/mediafaq for details. The TiVo Plus service enables you to schedule recordings on your network-enabled TiVo DVR by using the Internet. The - Toshiba RS-TX20 | User Manual - Page 174
Viewing or listening to media from third party sources could subject your DVR and/or home computer to harm and may infringe the copyrights of third parties. 3.4 Note About Privacy and TiVo Desktop Application. Please review TiVo's Privacy Policy located at www.tivo.com/privacy, which is incorporated - Toshiba RS-TX20 | User Manual - Page 175
to terminate the accounts of users of any TiVo software who infringe the copyrights of others. 6 Changes to Your TiVo Plus Service. TiVo may at its discretion and from time to time change, add, or remove features and functionality of the TiVo Plus service or the TiVo DVR without notice. If you are - Toshiba RS-TX20 | User Manual - Page 176
of this Agreement. standing. TiVo may, as necessary, extend the expiration date of your 12 Advertising and Promotions. The TiVo Plus service is advertiser 168 credit card in order to ensure continued service. TiVo may, at its supported. The hard disk drive of your TiVo DVR contains reserved - Toshiba RS-TX20 | User Manual - Page 177
shall apply. NOTE: Your TiVo DVR may not be eligible to receive the TiVo Basic service, in which case only Section 14 ("Termination of Service") applies to you and this section does not. Consult your User's Guide to determine if your TiVo DVR is eligible to receive the TiVo Basic service. 10 169 - Toshiba RS-TX20 | User Manual - Page 178
THIRD PARTY CONTENT), THAT ANY DEFECTS IN THE TIVO PLUS SERVICE WILL BE CORRECTED OR THAT THE TIVO DVR OR TIVO PLUS SERVICE WILL BE COMPATIBLE WITH ANY OTHER SPECIFIC HARDWARE OR SERVICE. FURTHER, TIVO DOES NOT WARRANT THAT THE TIVO PLUS SERVICE OR THE TIVO SERVERS THAT PROVIDE YOU WITH DATA AND - Toshiba RS-TX20 | User Manual - Page 179
FOR ANY LOST PROFITS, USE OF USER INFORMATION, LOSS OF DATA, BUSINESS INTERRUPTION, OR OTHER INDIRECT, CONSEQUENTIAL, SPECIAL, OR INCIDENTAL DAMAGES OF ANY NATURE ARISING FROM OR RELATING TO YOUR USE OF THE TIVO PLUS SERVICE OR USE OF THE TIVO PLUS SERVICE THROUGH YOUR ACCOUNT BY ANYONE ELSE, EVEN - Toshiba RS-TX20 | User Manual - Page 180
ALL THE TERMS OF THIS AGREEMENT AS STATED ABOVE. TiVo Plus Service Agreement v20040608 Toshiba Digital Media Server Limited Warranty LIMITED UNITED STATES WARRANTY FOR TOSHIBA RS-TX20/60 DIGITAL MEDIA SERVER Toshiba America Consumer Products, L.L.C. ("TACP") makes the following limited warranties - Toshiba RS-TX20 | User Manual - Page 181
Toshiba Digital Media Server Limited Warranty COMMERCIAL UNITS DMS units sold and used for commercial use have a limited warranty for all parts and labor, which limited warranty begins on the date of original retail purchase and ends ninety (90) days thereafter. OWNER'S MANUAL AND PRODUCT - Toshiba RS-TX20 | User Manual - Page 182
the REN without the decimal point (e.g., 03 is a REN of 0.3). For earlier products, the REN is separately shown on the label. If your Toshiba Digital Media Server causes harm to the telephone network, the telephone company will notify you in advance that temporary discontinuance of service may be - Toshiba RS-TX20 | User Manual - Page 183
until the problem is resolved. DO NOT DISASSEMBLE THIS EQUIPMENT. It does not contain any user serviceable components. We recommend the installation of an AC surge arrester in the AC outlet to which this equipment is connected. Telephone companies report that Safety Instructions electrical surges - Toshiba RS-TX20 | User Manual - Page 184
by qualified service personnel when: A. THE POWER SUPPLY CORD OR PLUG IS DAMAGED OR FRAYED; B. LIQUID HAS SPILLED INTO THE PRODUCT; C. THE PRODUCT HAS BEEN EXPOSED TO RAIN OR WATER; D. THE PRODUCT DOES NOT OPERATE NORMALLY WHEN YOU FOLLOW THE OPERATING INSTRUCTIONS (ADJUST ONLY THOSE CONTROLS THAT - Toshiba RS-TX20 | User Manual - Page 185
make sure the software is free for all its users. This General Public License applies to most of copies of free software (and charge for this service if you wish), that you receive source code they have is not the original, so that any problems introduced by others will not reflect on the original - Toshiba RS-TX20 | User Manual - Page 186
Privacy, Service, you provide a warranty) and that users may redistribute the program under these conditions, and telling the user how to view a copy of this by you; rather, the intent is to exercise the right to control the distribution of derivative or collective works based on the Program. - Toshiba RS-TX20 | User Manual - Page 187
any associated interface definition files, plus the scripts used to control compilation and installation of the executable. However, as a allegation of patent infringement or for any other reason (not limited to patent issues), conditions are imposed on you (whether by court order, agreement or - Toshiba RS-TX20 | User Manual - Page 188
, but may differ in detail to address new problems or concerns. Each version is given a distinguishing exceptions for this. Our decision will be guided by the two goals of preserving the defective, you assume the cost of all necessary servicing, repair or correction. 12. In no event unless required - Toshiba RS-TX20 | User Manual - Page 189
the License, or (at your option) any later version. This program is distributed in the hope that it will be useful, but WITHOUT ANY WARRANTY; without even the implied warranty of MERCHANTABILITY or FITNESS FOR A PARTICULAR PURPOSE. See the GNU General Public License for more details. You should have - Toshiba RS-TX20 | User Manual - Page 190
, Service, Warranty, and Licenses Linux and Other Important Information LINUX SOURCE NOTICE TiVo Digital Video Recorders (DVRs) are powered by the Linux operating system. The machine-readable copy of the corresponding source code is available for the cost of distribution. Please visit www.tivo.com - Toshiba RS-TX20 | User Manual - Page 191
APPENDIX A Front and Back Panel Reference & Specifications Front Panel Reference 184 Back Panel Reference 186 Specifications 188 - Toshiba RS-TX20 | User Manual - Page 192
Specifications ᕡ 184 ᕢ ᕡ ON/STANDBY. Use this button to put the Digital Media Server into Standby mode, or to take it out of Standby mode. See page 90 for more information about Standby. ᕢ SELECT. This button corresponds to the directional arrows and SELECT button on the DMS remote - Toshiba RS-TX20 | User Manual - Page 193
watching live TV or recorded programs, the current time is displayed. You can change the brightness of the display, or turn it off. See "Front Panel Lights" on page 81. Ƹ PLAY. Press PLAY to play a DVD or CD. You don't need to set the Digital ® Media Server's clock-the TiVo service does it for you - Toshiba RS-TX20 | User Manual - Page 194
~ In. (Connects to A/C power.) Use only the power cord supplied with your Digital Media Server. ᕢ Phone Jack. (Connects to phone cord.) The DMS uses the phone line to get program information and other data from the TiVo service. ᕣ Control Out/Serial. Connects to cable or satellite box; not available - Toshiba RS-TX20 | User Manual - Page 195
. (A phone line is still required for Guided Setup.) See "Home Networks" on page 116. ᕦ Component Video Output. (Connects to TV.) This is the Digital Media Server's highest quality video output. Use a Component Video cable (not supplied). ᕧ Composite A/V Output. (Connects to TV or VCR.) The yellow - Toshiba RS-TX20 | User Manual - Page 196
of ® programming being recorded. 188 Specifications Specifications Video In: Video Out: Audio Line In: Audio Line Out: RF In: RF Bypass Out: Expansion Port: Telephone: Control Out: Power: Ambient (external) Operating Temperature: Operating Humidity: Dimensions: Remote Control: Storage: S-Video - Toshiba RS-TX20 | User Manual - Page 197
Index - Toshiba RS-TX20 | User Manual - Page 198
about 142 connection to DMS setting 75 control buttons using the 50 creating a manual recording 41 custom channel list 69 Customer Support 130 D DHCP Client ID 126 dial prefix setting 86 dial tone detection setting 87 dial-in number changing 85 Guided Setup and 23 Digital Media Server (DMS) back - Toshiba RS-TX20 | User Manual - Page 199
Setup cable lineup and 23 cable providers and 23 Channels You Receive and 24 choosing IR code and 6 dial-in number and 23 dialing format and 23 introduction to 22 IR Test screen and 6 repeating 89 satellite providers and 23 setup call and 23 tips and troubleshooting 22 H home network connecting - Toshiba RS-TX20 | User Manual - Page 200
73 movies and TV shows with no rating 73 repeating recordings and 93 troubleshooting 144 turning on and off 71 Parental Controls screen 71 PAUSE button 50 PCM output, setting 67 performing a code search 79, 82 Phone & Network Setup 83 phone avail. detection setting 86 phone dialing options 85 - Toshiba RS-TX20 | User Manual - Page 201
about 147 TiVo Service Agreement 162, 164 TiVo Suggestions 108 TiVolution® Magazine 36 To Do List 42 tone/pulse setting 86 troubleshooting screens 88 TV aspect ratio 76 TV INPUT button, programming 78 TV POWER button, programming 78 troubleshooting 145 Video Recording Quality Recording Options and - Toshiba RS-TX20 | User Manual - Page 202
from TiVo. Select to display or turn on Parental Controls. Indicates a playable DVD or photo CD is inserted. Select to read new messages. Indicates a playable music CD is inserted. (Orange with black border) Indicates a DVD is currently recording. Save to VCR Appears as a warning if a remote - Toshiba RS-TX20 | User Manual - Page 203
with red dot - for any group that includes a program that is currently recording or transferring. Folder with blue star - contains one or more programs recorded by a WishListTM search. Folder with Thumbs UpTM - contains all programs recorded as TiVo Suggestions. DVR - for a DVR on your network. - Toshiba RS-TX20 | User Manual - Page 204
Toshiba support site or the TiVo support site: Toshiba Customer Support • Using TiVo BasicTM service features • Connecting your DMS to your TV & other equipment • Recording DVDs or playing DVDs and CDs • Audio and video, channel changing, remote control www.tacp.toshiba.com/service TiVo Customer
-
 1
1 -
 2
2 -
 3
3 -
 4
4 -
 5
5 -
 6
6 -
 7
7 -
8
-
9
-
10
-
11
-
12
-
13
-
14
-
15
-
16
-
17
-
18
-
19
-
20
-
21
-
22
-
23
-
24
-
25
-
26
-
27
-
28
-
29
-
30
-
31
-
32
-
33
-
34
-
35
-
36
-
37
-
38
-
39
-
40
-
41
-
42
-
43
-
44
-
45
-
46
-
47
-
48
-
49
-
50
-
51
-
52
-
53
-
54
-
55
-
56
-
57
-
58
-
59
-
60
-
61
-
62
-
63
-
64
-
65
-
66
-
67
-
68
-
69
-
70
-
71
-
72
-
73
-
74
-
75
-
76
-
77
-
78
-
79
-
80
-
81
-
82
-
83
-
84
-
85
-
86
-
87
-
88
-
89
-
90
-
91
-
92
-
93
-
94
-
95
-
96
-
97
-
98
-
99
-
100
-
101
-
102
-
103
-
104
-
105
-
106
-
107
-
108
-
109
-
110
-
111
-
112
-
113
-
114
-
115
-
116
-
117
-
118
-
119
-
120
-
121
-
122
-
123
-
124
-
125
-
126
-
127
-
128
-
129
-
130
-
131
-
132
-
133
-
134
-
135
-
136
-
137
-
138
-
139
-
140
-
141
-
142
-
143
-
144
-
145
-
146
-
147
-
148
-
149
-
150
-
151
-
152
-
153
-
154
-
155
-
156
-
157
-
158
-
159
-
160
-
161
-
162
-
163
-
164
-
165
-
166
-
167
-
168
-
169
-
170
-
171
-
172
-
173
-
174
-
175
-
176
-
177
-
178
-
179
-
180
-
181
-
182
-
183
-
184
-
185
-
186
-
187
-
188
-
189
-
190
-
191
-
192
-
193
-
194
-
195
-
196
-
197
-
198
-
199
-
200
-
201
-
202
-
203
-
204
 |
 |

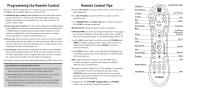
To navigate the Digital Media Server
’
s on-screen
menus, use the arrow buttons on the remote to move
the highlight bar onto an option, then press SELECT.
The LEFT arrow button often takes you to the previous
screen.
S
e
l
e
c
t
Select
Arrow Buttons
Two Types of On-Screen Arrows
The On-Screen Menus and the Remote Control
The arrows that appear beside or near
the highlight bar show possible
directions. For example, on this screen,
you could press the RIGHT arrow to
highlight Options or the DOWN arrow to
highlight
“
Edit Category WishList.
”
Highlight Bar
Arrows Near
Highlight Bar
When you see page up or
page down arrows at the
top or bottom of the screen
(or a list), press the
CHAN/PAGE button to jump
an entire page at a time.
Page Up
Arrow
Page Down
Arrow
CHAN/PAGE
button
Chan
Page
Toshiba Digital Media Server Viewer’s Guide
Viewer’s Guide
Setting up your Toshiba Digital Media Server
Enjoying the TiVo
®
service