Toshiba RS-TX20 User Manual - Page 32
Channels You Receive., Channel Changing., Connection to DMS Screens. - stuck
 |
View all Toshiba RS-TX20 manuals
Add to My Manuals
Save this manual to your list of manuals |
Page 32 highlights
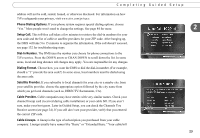
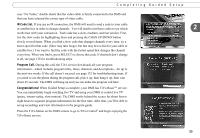
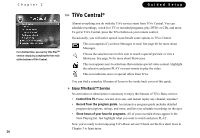
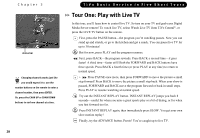
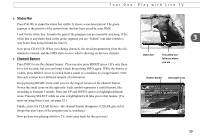
Chapter 2 Use the CHAN UP/DOWN button as a ® shortcut to go up or down a whole screen at a time. If you upgrade to TiVo Plus service, ® you'll be able to use more than one program source with your DMS (such as satellite and cable together). 24 Guided Setup may have this information. If you still aren't sure, make your best guess. Later in Guided Setup, you can check your guess on the Channels You Receive screen (see page 24). You may also see names like "Rebuild Basic" or "Rebuild Extended Basic." "Rebuild" is a term used to refer to a revised lineup. If your best guess at a lineup choice was not correct, and a rebuild lineup with a similar name is available, try that one instead. If you have a cable A/B system, you must pick either A or B to watch with your DMS. Channels You Receive. First, if you had to make a guess about your provider or lineup, verify that the channel numbers match the networks on this list. (For example, if you had the lineup pictured on the left, is channel 2 actually KTVU?) If you aren't sure, refer to the channel guide or quick-reference card from your cable or satellite company. Next, add or remove check marks-so that the list reflects the channels you actually subscribe to-by highlighting a channel and pressing SELECT. (Some types of satellite boxes will get stuck on channels you don't receive if those channels are selected here, so be sure to de-select channels you don't receive.) Finally, highlight Done Selecting Channels and press SELECT to continue. If you change your mind, you can easily make changes after you finish Guided Setup. (See page 68.) Channel Changing. If you have a cable or satellite box, your DMS needs to send it a signal to change channels using an IR (infrared) or serial connection. Choose the type of cable you used to connect your cable or satellite box to your DMS. For help, see the Start Here poster and Chapter 1 of this guide. After Guided Setup, if your channels don't change, see troubleshooting steps on page 136. Connection to DMS Screens. Use the UP/DOWN arrows until the picture of the DMS matches the cable connection you used to connect your satellite or cable box. When the video status below the picture says "Video OK," press SELECT to continue. If the status
-
 1
1 -
2
-
3
-
4
-
5
-
6
-
7
-
8
-
9
-
10
-
11
-
12
-
13
-
14
-
15
-
16
-
17
-
18
-
19
-
20
-
21
-
22
-
23
-
24
-
25
-
26
-
 27
27 -
 28
28 -
 29
29 -
 30
30 -
 31
31 -
 32
32 -
 33
33 -
 34
34 -
 35
35 -
 36
36 -
 37
37 -
38
-
39
-
40
-
41
-
42
-
43
-
44
-
45
-
46
-
47
-
48
-
49
-
50
-
51
-
52
-
53
-
54
-
55
-
56
-
57
-
58
-
59
-
60
-
61
-
62
-
63
-
64
-
65
-
66
-
67
-
68
-
69
-
70
-
71
-
72
-
73
-
74
-
75
-
76
-
77
-
78
-
79
-
80
-
81
-
82
-
83
-
84
-
85
-
86
-
87
-
88
-
89
-
90
-
91
-
92
-
93
-
94
-
95
-
96
-
97
-
98
-
99
-
100
-
101
-
102
-
103
-
104
-
105
-
106
-
107
-
108
-
109
-
110
-
111
-
112
-
113
-
114
-
115
-
116
-
117
-
118
-
119
-
120
-
121
-
122
-
123
-
124
-
125
-
126
-
127
-
128
-
129
-
130
-
131
-
132
-
133
-
134
-
135
-
136
-
137
-
138
-
139
-
140
-
141
-
142
-
143
-
144
-
145
-
146
-
147
-
148
-
149
-
150
-
151
-
152
-
153
-
154
-
155
-
156
-
157
-
158
-
159
-
160
-
161
-
162
-
163
-
164
-
165
-
166
-
167
-
168
-
169
-
170
-
171
-
172
-
173
-
174
-
175
-
176
-
177
-
178
-
179
-
180
-
181
-
182
-
183
-
184
-
185
-
186
-
187
-
188
-
189
-
190
-
191
-
192
-
193
-
194
-
195
-
196
-
197
-
198
-
199
-
200
-
201
-
202
-
203
-
204
 |
 |
