Vivitar DVR 560 Camera Manual - Page 36
Photo Playback Mode - review
 |
View all Vivitar DVR 560 manuals
Add to My Manuals
Save this manual to your list of manuals |
Page 36 highlights
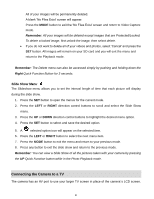
If you would like to proceed with the reset, select „Yes‟ and press the SET button to confirm. The settings will be reset. You will automatically exit the menu and return to the previous mode with the digital video recorder settings set to the Factory Default Settings. If you would like to exit the format, select „Cancel and press the SET button. You will automatically exit the menu and return to the previous mode. Note: After RESETTING to the Factory settings and turning your digital video recorder off then on again, you will be prompted to select a system Language and ViviLink for Videos and Photos. Photo Playback Mode When you first turn on the camera, the camera will be in Video Capture mode by default. Press the MODE button twice to open the Playback Mode. The Playback mode will allow you to review and edit photos and videos that you‟ve already taken with you camera. Viewing Photos on Your Digital Video Recorder 1. Select your Photo: Once in Playback mode, press LEFT or RIGHT direction buttons to scroll through the images on your digital video recorder‟s memory card until you find the image you would like to view. Each captured image (videos and photos) will display on the LCD screen. Photos will appear with a „JPG icon on the top left of the LCD screen. 2. Zooming In/Out of your selected Photo: Press the T / Zoom In button to Zoom In and magnify the selected photo. Use the UP / DOWN / LEFT / RIGHT direction buttons to navigate around the photo. Press the W/Zoom Out button to Zoom Out of the selected photo. Use the UP / DOWN / LEFT / RIGHT direction buttons to navigate around the photo. 35
-
 1
1 -
2
-
3
-
4
-
5
-
6
-
7
-
8
-
9
-
10
-
11
-
12
-
13
-
14
-
15
-
16
-
17
-
18
-
19
-
20
-
21
-
22
-
23
-
24
-
25
-
26
-
27
-
28
-
29
-
30
-
 31
31 -
 32
32 -
 33
33 -
 34
34 -
 35
35 -
 36
36 -
 37
37 -
 38
38 -
 39
39 -
 40
40 -
 41
41 -
42
-
43
-
44
-
45
-
46
-
47
-
48
 |
 |