Weider Pro 9655 English Manual - Page 28
Replacement
 |
View all Weider Pro 9655 manuals
Add to My Manuals
Save this manual to your list of manuals |
Page 28 highlights
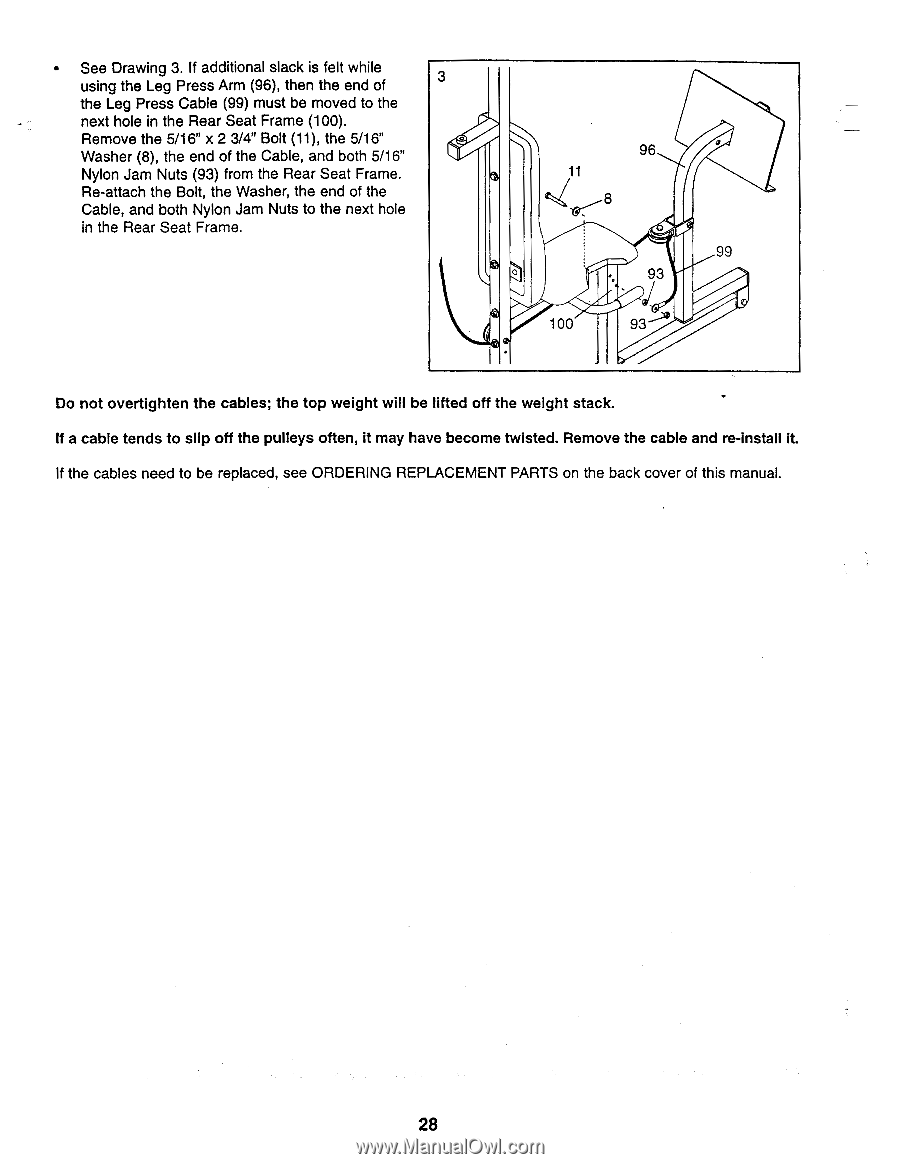
• See Drawing 3. If additional slack is felt while using the Leg Press Arm (96), then the end of 3 the Leg Press Cable (99) must be moved to the next hole in the Rear Seat Frame (100). Remove the 5/16" x 2 3/4" Bolt (11), the 5/16" Washer (8), the end of the Cable, and both 5/16" Nylon Jam Nuts (93) from the Rear Seat Frame. Re-attach the Bolt, the Washer, the end of the Cable, and both Nylon Jam Nuts to the next hole in the Rear Seat Frame. 96 o 11 8 99 0 93 -J 100 93--. Do not overtighten the cables; the top weight will be lifted off the weight stack. If a cable tends to slip off the pulleys often, it may have become twisted. Remove the cable and re-install it. If the cables need to be replaced, see ORDERING REPLACEMENT PARTS on the back cover of this manual. 28
-
 1
1 -
2
-
3
-
4
-
5
-
6
-
7
-
8
-
9
-
10
-
11
-
12
-
13
-
14
-
15
-
16
-
17
-
18
-
19
-
20
-
21
-
22
-
 23
23 -
 24
24 -
 25
25 -
 26
26 -
 27
27 -
 28
28 -
 29
29 -
 30
30 -
 31
31 -
 32
32 -
 33
33 -
34
-
35
-
36
-
37
-
38
-
39
-
40
 |
 |