Weider Pro 9655 English Manual - Page 7
Weider Pro 9655 Manual
 |
View all Weider Pro 9655 manuals
Add to My Manuals
Save this manual to your list of manuals |
Page 7 highlights
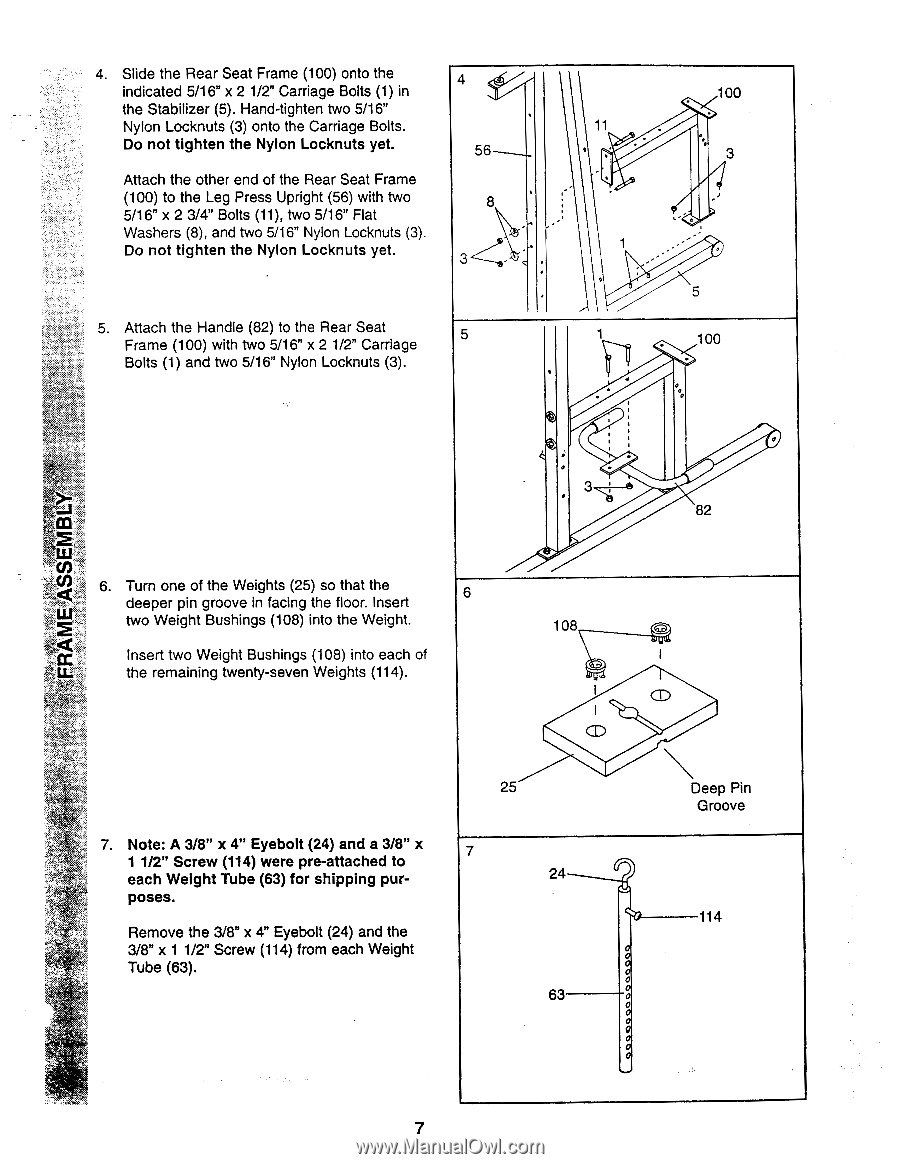
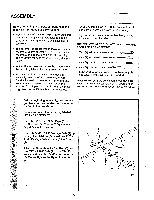
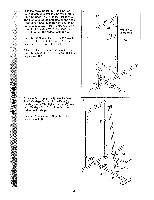
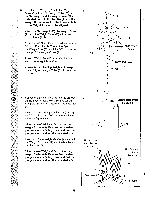
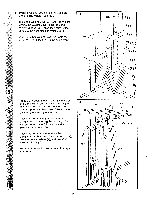
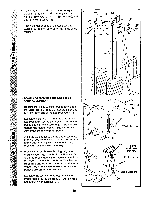
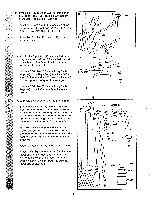
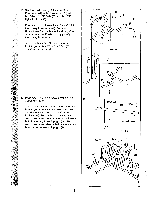
4. Slide the Rear Seat Frame (100) onto the indicated 5/16" x 2 1/2" Carriage Bolts (1) in the Stabilizer (5). Hand-tighten two 5/16" Nylon Locknuts (3) onto the Carriage Bolts. Do not tighten the Nylon Locknuts yet. Attach the other end of the Rear Seat Frame (100) to the Leg Press Upright (56) with two 5/16" x 2 3/4" Bolts (11), two 5/16" Flat Washers (8), and two 5/16" Nylon Locknuts (3). Do not tighten the Nylon Locknuts yet. 5. Attach the Handle (82) to the Rear Seat Frame (100) with two 5/16" x 2 1/2" Carriage Bolts (1) and two 5/16" Nylon Locknuts (3). 4 56 8 . 11 • , .- • ,- . 100 . . 3 , 3 -. 5 1 • ' a . - 5 1 100 % ,, . • , 3-4---6 82 6. Turn one of the Weights (25) so that the deeper pin groove in facing the floor. Insert 6 two Weight Bushings (108) into the Weight. Insert two Weight Bushings (108) into each of the remaining twenty-seven Weights (114). 108 'a) I I 25 Deep Pin Groove 7. Note: A 3/8" x 4" Eyebolt (24) and a 3/8" x 7 1 1/2" Screw (114) were pre-attached to each Weight Tube (63) for shipping pur- poses. Remove the 3/8" x 4" Eyebolt (24) and the 3/8" x 1 1/2" Screw (114) from each Weight Tube (63). 24 114 0 63 7
-
 1
1 -
 2
2 -
 3
3 -
 4
4 -
 5
5 -
 6
6 -
 7
7 -
 8
8 -
 9
9 -
 10
10 -
 11
11 -
 12
12 -
13
-
14
-
15
-
16
-
17
-
18
-
19
-
20
-
21
-
22
-
23
-
24
-
25
-
26
-
27
-
28
-
29
-
30
-
31
-
32
-
33
-
34
-
35
-
36
-
37
-
38
-
39
-
40
 |
 |