Western Digital WD20000H2Q-00 User Manual - Page 27
Connect the interface cable. The WD Drive Manager Status displays see WD
 |
View all Western Digital WD20000H2Q-00 manuals
Add to My Manuals
Save this manual to your list of manuals |
Page 27 highlights
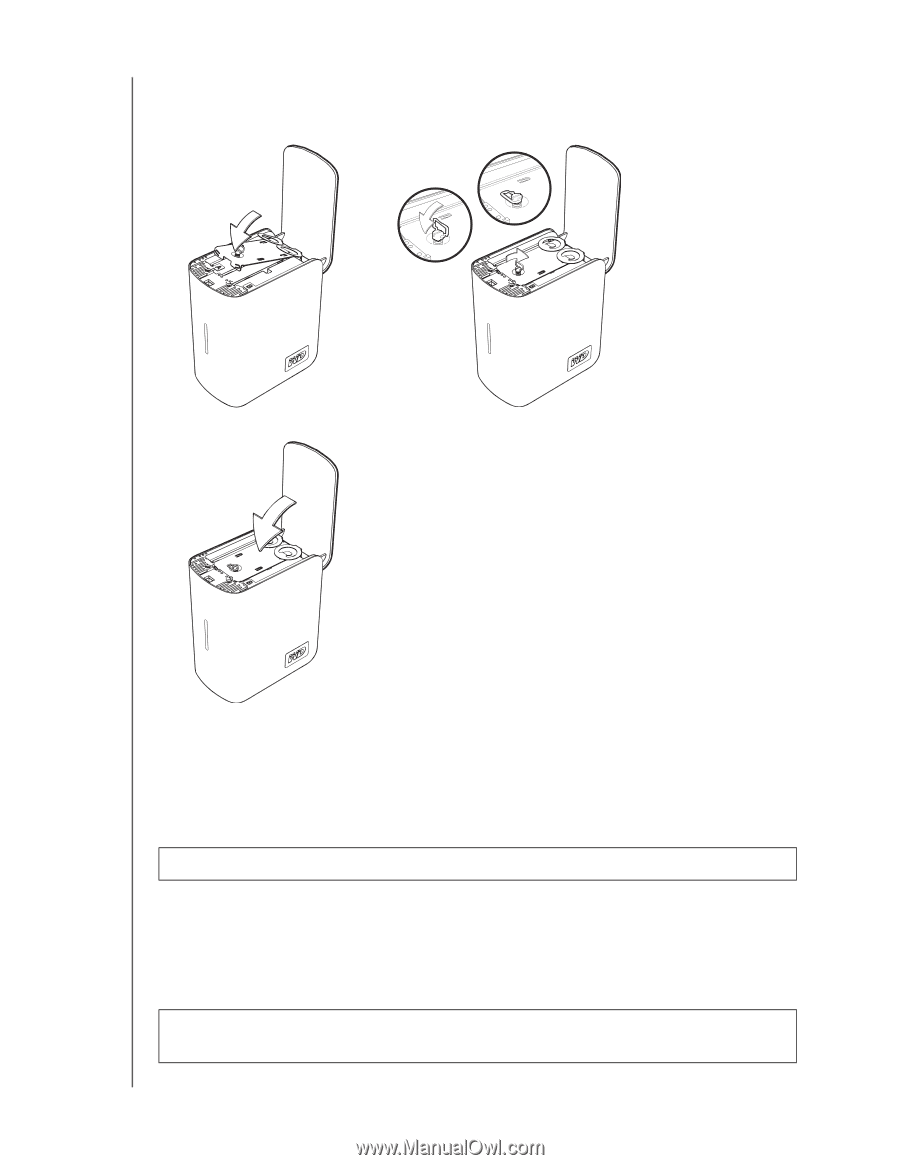
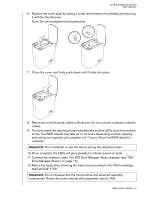
MY BOOK MIRROR EDITION USER MANUAL 6. Replace the cover plate by sliding it under and between the pulltabs and securing it with the thumbscrew. Note: Do not overtighten the thumbscrew. 7. Close the cover and firmly push down until it locks into place. 8. Reconnect only the power cable to the device. Do not connect computer interface cables. 9. The drive starts the rebuild process automatically and the LEDs cycle from bottom to top. The RAID rebuild may take up to 12 hours depending on drive capacity and activity, but typically will complete in 5-7 hours. Allow the RAID rebuild to complete. Important: Do not attempt to use the device during the rebuild process. 10. Once complete, the LEDs will glow steadily to indicate power-on state. 11. Connect the interface cable. The WD Drive Manager Status displays (see "WD Drive Manager Status" on page 12). 12. Return the faulty drive following the instructions provided in the WD knowledge base article# 1709. Important: Do not disassemble the internal drive and attached assembly components. Return the entire internal drive assembly intact to WD. REPLACING A DRIVE - 24
-
 1
1 -
2
-
3
-
4
-
5
-
6
-
7
-
8
-
9
-
10
-
11
-
12
-
13
-
14
-
15
-
16
-
17
-
18
-
19
-
20
-
21
-
 22
22 -
 23
23 -
 24
24 -
 25
25 -
 26
26 -
 27
27 -
 28
28 -
 29
29 -
 30
30 -
 31
31
 |
 |