Western Digital WDBY8L0015BBK WD SmartWare User Manual - Page 46
Registering the Drive, Sleep Timer, Turn off Drive, Settings, Set Up Drive, Registration
 |
View all Western Digital WDBY8L0015BBK manuals
Add to My Manuals
Save this manual to your list of manuals |
Page 46 highlights
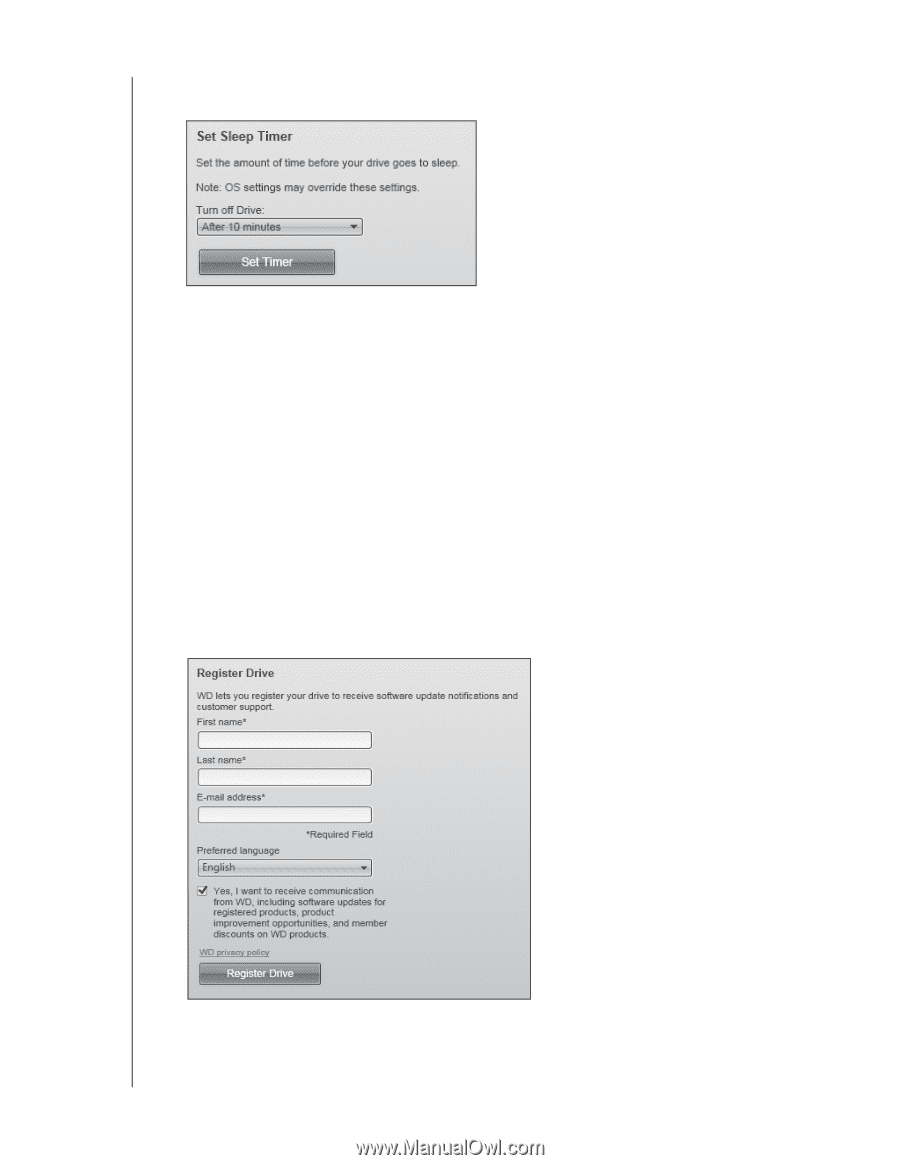
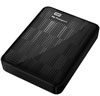
WD SMARTWARE SOFTWARE USER MANUAL 3. On the Drive Settings screen, click Sleep Timer to display the Set Sleep Timer dialog: 4. On the Set Sleep Timer dialog: a. In the Turn off Drive box, select the inactivity time interval at which you want to turn off the drive. b. Click Set Timer. Registering the Drive The WD SmartWare software uses your computer's Internet connection to register your drive. To register your drive to receive free technical support during the warranty period and be kept up-to-date on the latest WD products: 1. Make sure that your computer is connected to the Internet. 2. Click the Settings tab to display either the WD SmartWare Settings tab display or the drive management Drive Settings screen (see Figure 4 on page 13). 3. If you opened the WD SmartWare Settings tab display, click Set Up Drive to display the WD SmartWare Drive Settings screen. 4. On the Drive Settings screen, click Registration to display the Register Drive dialog: MANAGING AND CUSTOMIZING THE DRIVE - 42
-
 1
1 -
2
-
3
-
4
-
5
-
6
-
7
-
8
-
9
-
10
-
11
-
12
-
13
-
14
-
15
-
16
-
17
-
18
-
19
-
20
-
21
-
22
-
23
-
24
-
25
-
26
-
27
-
28
-
29
-
30
-
31
-
32
-
33
-
34
-
35
-
36
-
37
-
38
-
39
-
40
-
 41
41 -
 42
42 -
 43
43 -
 44
44 -
 45
45 -
 46
46 -
 47
47 -
 48
48 -
 49
49 -
 50
50 -
 51
51 -
52
-
53
-
54
-
55
-
56
-
57
-
58
-
59
 |
 |