Xerox 4260X Quick Use Guide
Xerox 4260X - WorkCentre B/W Laser Manual
 |
UPC - 095205743005
View all Xerox 4260X manuals
Add to My Manuals
Save this manual to your list of manuals |
Xerox 4260X manual content summary:
- Xerox 4260X | Quick Use Guide - Page 1
WorkCentre® 4250/4260 Series Quick Use Guide Version 4.0 05.01.09 - Xerox 4260X | Quick Use Guide - Page 2
- Xerox 4260X | Quick Use Guide - Page 3
WorkCentre® 4250/4260 Series Quick Use Guide - Xerox 4260X | Quick Use Guide - Page 4
- Xerox 4260X | Quick Use Guide - Page 5
Setup ...15 Installing Option Kits 16 Making Copies ...18 Additional Copy Features 19 Printing a Document 20 Sending a Fax ...22 Network Scanning 25 Sending an E-mail 28 Enhance your WorkCentre's productivity 30 Troubleshooting...33 Help ...35 Greenwich Mean Time Offset 37 quick use guide - Xerox 4260X | Quick Use Guide - Page 6
on your device, please refer to the User Guide and the System Administration CD. For product support and information about ordering consumables and print media go to the Xerox website www.xerox.com/support. Prepared and translated by: Xerox GKLS European Operations Bessemer Road Welwyn Garden City - Xerox 4260X | Quick Use Guide - Page 7
Features WorkCentre 4250 WorkCentre 4250S/ 4260S WorkCentre 4250X/ 4260X WorkCentre 4250XF/ 4260XF Digital Copying Standard Standard Standard Standard Direct/Network - Printing Standard Standard Standard Scan - E-mail - Standard Standard Standard Standard Standard Standard Fax - Xerox 4260X | Quick Use Guide - Page 8
CD • Print Driver CD (Not supplied with the WorkCentre 4250 copier only machine) • Nuance CD (Not supplied with the WorkCentre 4250 copier only machine) • Quick Use Guide (this book) • Toner Cartridge • Control Panel Labels • Product Enablement Key • Telephone Cable (WorkCentre 4250/4260 Series - Xerox 4260X | Quick Use Guide - Page 9
Reader slot Green LED 5 The Language Default screen will be displayed. Select your chosen language and then select Save. 6 The Installation Wizard screen will be displayed. Select Next. 7 The Product Enablement Settings screen will be displayed. Follow the instructions on the screen. NOTE: When the - Xerox 4260X | Quick Use Guide - Page 10
the machine applies the configuration settings. When this is complete the machine will display the Basic Copying screen. Your machine is now ready for you to use. 14 If the Fax feature is installed, the Fax installation Wizard screen is displayed.Refer to Fax Setup on page 15. 6 quick use guide - Xerox 4260X | Quick Use Guide - Page 11
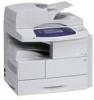
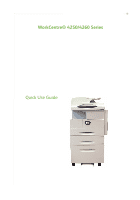
Your WorkCentre 4250/4260 1 Control Panel: Touch Screen and Numeric Keypad 2 3 1 3 Output Tray: Collects output 5 5 Paper Trays: Tray 2 and HCF are standard on the WorkCentre 4250/4260XF and are optional on other configurations. 2 Document Feeder: Used for scanning multiple documents. The - Xerox 4260X | Quick Use Guide - Page 12
Control Panel Overview Job Status Services Services Home Help Log In/Out Interrupt Printing Clear All Power Machine Status Language Display and Touch Screen Numeric Keypad Cancel Entry Stop Start Item Services Home Services Job Status Machine Status Display and Touch Screen Help Language - Xerox 4260X | Quick Use Guide - Page 13
close the tray, the Paper Settings screen will display. Input the size, type and color of the paper you have loaded and select Confirm. Loading Documents Documents can be loaded either into Guides the Document Feeder or onto the Document Glass. 1 Load documents to be copied face up in the input tray - Xerox 4260X | Quick Use Guide - Page 14
DNS Server address must be entered manually. 1 Connect the Ethernet cable to the RJ45 connector on the back of the machine. NOTE: The Ethernet cable is not supplied by Xerox. 2 To setup the address using DHCP, see Network Setup Using DHCP on page 10. If you want to set a static IP address, skip to - Xerox 4260X | Quick Use Guide - Page 15
Address 1 Press the Log In/Out button on the Control Panel, enter the Administrator's Password [1111] and select Enter. 2 Press the Machine Status button then select Tools > Connectivity and Network Setup > Advanced > Network Setting > Network Setup > TCP/IP Options. 3 Select HTTP and Enable. Select - Xerox 4260X | Quick Use Guide - Page 16
the scan drivers. To install Print Drivers use the instructions below. 4 Click Install Drivers. 5 Click Install Print Drivers. NOTE: The PCL6 Driver is installed by default. 6 To install the PCL 5 or PS Print Drivers, click Option and check the boxes for the drivers required. 7 Enter the Printer - Xerox 4260X | Quick Use Guide - Page 17
want to setup this service at this time continue on to Fax Setup on page 15. NOTE: If you do not see the E-mail button on the Services Home screen, enable E-mail in the Tools Pathway. (Press Log In/Out > Password [1111] > Enter > Machine Status > Tools > User Interface > Service Enablements > E-mail - Xerox 4260X | Quick Use Guide - Page 18
9 Enter the Login Name and Password. 10 Click Apply to confirm your settings. 11 From the Properties menu, click Services > E-mail Settings > Defaults. 12 To amend the settings on the E-mail Setup screen, click Edit for each options group. NOTE: A From: address is required to send e-mails from the - Xerox 4260X | Quick Use Guide - Page 19
up the Fax Kit 1 Set up the Fax Kit using the instructions in the Kit. 2 Connect the telephone line to the Line connector on the device. 3 If you wish to attach a handset to the device, connect the handset to the Ext. connector. 4 Press the Log In/Out button on the Control Panel, enter the - Xerox 4260X | Quick Use Guide - Page 20
kit. Refer to Installing Option Kits on page 16. Enable Network Accounting 1 Press the Log In/Out button on the Control Panel, enter the Administrator's Password [1111] and select Enter. 2 Press the Machine Status button then select Tools > Accounting > Accounting Enablement > Authentication Mode - Xerox 4260X | Quick Use Guide - Page 21
/Out button on the Control Panel, enter the Administrator's Password [1111] and select Enter. 3 Press the Machine Status button then select Tools > User Interface > Service Enablements > Server Fax. 4 Select Enable. 5 Select Save. 6 Press the Log In/Out button and select Confirm to logout and close - Xerox 4260X | Quick Use Guide - Page 22
the edges of the image Page-layout Prints several images on 1 page Store Job Save job to the device 4 Enter the number of copies required, using the numeric keypad and then press Start. NOTE: To confirm the Copy job, press the Job Status button on the Control Panel to display the Job Status - Xerox 4260X | Quick Use Guide - Page 23
preset reduce/enlarge ratios or select More to access custom settings. Image quality adjustment You can enhance the copy quality of the output based on the type and quality of the original being scanned. To use this option, select the Image Quality tab. Original Type: Select the type of document to - Xerox 4260X | Quick Use Guide - Page 24
the Xerox website at www.xerox.com/support. 2 Open the document to be printed. Click File > Print and select the Xerox WorkCentre 4250/4260 Series from the list of printers displayed. 3 To change the default printing properties click Properties. The print driver has various tabs that contain options - Xerox 4260X | Quick Use Guide - Page 25
the Paper/Output tab, click Save Settings down arrow. Select Save As to save current settings or select a previously saved setting. Toner Saver If you are printing draft documents you can reduce the toner (dry ink) used by using the Draft Mode feature. The image will be lighter than normal but will - Xerox 4260X | Quick Use Guide - Page 26
quality of image Image Quality Layout Adjustment Lighten / Darken Lighten or darken the output Original Size Set size of original Background Suppression Automatically reduce or elimate a dark background Color Mode Black and white or color scan Fax Options Store for Polling Save the fax on the - Xerox 4260X | Quick Use Guide - Page 27
at the start of the fax transmission Fax Reports Select the fax confirmation or error report 4 Press Start to transmit your fax. NOTE: To confirm the Fax job, press the Job Status button on the Control Panel to display the Job Status screen. The queued job will be displayed. quick use guide 23 - Xerox 4260X | Quick Use Guide - Page 28
details. Dialing Groups can also be set up comprising several Individual entries. Fax Reports Numerous fax reports can be printed. To access the fax report options, select the Fax Options tab, then select Fax Reports. Select the desired fax report. Alternatively, press the Machine Status button and - Xerox 4260X | Quick Use Guide - Page 29
the Services Home button on the Control Panel. Select the Network Scanning option. This displays the Network Scanning screen. 3 Select the Scanning Template you require from the list. 4 If required, modify the template settings from the options on the Network Scanning, Advanced Settings, Layout - Xerox 4260X | Quick Use Guide - Page 30
Advanced Settings Update Templates Use a recently created or updated template before the system automatically adds it to the template list Layout Adjustment Filing Options 5 Press Start to scan your documents. NOTE: To confirm the scan job, press the Job Status button on the Control Panel to - Xerox 4260X | Quick Use Guide - Page 31
used in network scanning to define the destination and scan settings for your scan job. Your workflow will be more efficient if you create specific templates for your most frequent scanning jobs. New templates are based on the settings configured for the Default Template or you can copy and modify - Xerox 4260X | Quick Use Guide - Page 32
PDF, TIF or JPEG Reply To Set E-mail address Message Enter message contents 7 Press Start to scan your document and send it as an attachment to an E-mail. NOTE: To confirm the job, press the Job Status button on the Control Panel. The job will be displayed in the job queue. 28 quick use guide - Xerox 4260X | Quick Use Guide - Page 33
color image to your email in a JPEG format. This format is a better compression format for color bitmaps. To enable Color scan to E-mail select the E-mail tab and choose the Output Color option. Select Full Color. NOTE: The maximum image resolution for color images is 300x300 dpi. quick use guide - Xerox 4260X | Quick Use Guide - Page 34
Enhance your WorkCentre's productivity The WorkCentre 4250/4260 Series is a powerful multi function device with many digital functions integrated into one sleek system. It is designed to support large workgroups in different production environments. You can do more with less and streamline your - Xerox 4260X | Quick Use Guide - Page 35
as speed dial codes. If configured, your machine is able to support both company (LDAP) and Local Address books. Local address books can be imported from a .csv file in Internet Services > Properties > Services > E-mail Settings. Remote Administration Your multi function machine contains its own - Xerox 4260X | Quick Use Guide - Page 36
Toner Cartridge and Staple Cartridge are customer replaceable, meaning you can replace the consumable without having to call out a Xerox service representative. This enables you to reduce down time. Powerful Documents The machine is not just any ordinary printer, you can use your machine to print - Xerox 4260X | Quick Use Guide - Page 37
the Document Feeder The machine will not print from a workstation Cannot send an E-mail Paper jams Cannot fax a document Solution • Check to see that the machine is not in Low Power Mode as indicated by the green light on the Control Panel. Touch the User Interface screen to re-activate. • Check to - Xerox 4260X | Quick Use Guide - Page 38
. p • Follow the instructions on the display to clear model and configuration. Finisher Area Jam Fuser Area Document jams 1b 1a 1c The display will indicate when a document jam has occurred. • Follow the instructions Feed Assembly cover Feeder cover • When instructed to do so, re-order the - Xerox 4260X | Quick Use Guide - Page 39
answers to your questions will be provided by the documentation that is supplied on CDs with the WorkCentre 4250/ 4260 Series. Alternatively you can access the documents from www.xerox.com/support. • User Guide - contains instructions and information about all the features on the device. • System - Xerox 4260X | Quick Use Guide - Page 40
On CentreWare Internet Services Click Index to view the contents of the Internet Services site. Click Help to take you to the Xerox on-line support web site. 36 quick use guide - Xerox 4260X | Quick Use Guide - Page 41
Country International Date Line West Midway Island Samoa Hawaii Alaska Pacific Time (US, Canada) Tijuana Mountain Time (US, Canada) Central America -12.0 -11.0 -11 +11.0 +5.0 Fiji +12.0 +5.0 Kamchatka +12.0 +5.0 Marshall Islands +12.0 +5.0 Nuku'alofa +13.0 quick use guide 37 - Xerox 4260X | Quick Use Guide - Page 42
38 quick use guide
-
 1
1 -
 2
2 -
 3
3 -
 4
4 -
 5
5 -
 6
6 -
 7
7 -
8
-
9
-
10
-
11
-
12
-
13
-
14
-
15
-
16
-
17
-
18
-
19
-
20
-
21
-
22
-
23
-
24
-
25
-
26
-
27
-
28
-
29
-
30
-
31
-
32
-
33
-
34
-
35
-
36
-
37
-
38
-
39
-
40
-
41
-
42
 |
 |

WorkCentre
®
4250/4260 Series
Quick Use Guide
Version 4.0 05.01.09