Xerox 4260X Quick Use Guide - Page 29
Network Scanning, Scan to Edge - pdf
 |
UPC - 095205743005
View all Xerox 4260X manuals
Add to My Manuals
Save this manual to your list of manuals |
Page 29 highlights
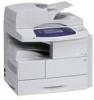
Network Scanning Network Scanning enables you to scan your hard copy documents and store them as electronic files. 1 Load the documents to be scanned either face down on the Document Glass or face up into the Document Feeder. 2 Press the Services Home button on the Control Panel. Select the Network Scanning option. This displays the Network Scanning screen. 3 Select the Scanning Template you require from the list. 4 If required, modify the template settings from the options on the Network Scanning, Advanced Settings, Layout Adjustment and Filing Options tabs. Network Scanning Advanced Settings Layout Adjustment Filing Options Output Color Black and white, grayscale, or color scan Lighten / Darken Lighten or darken the output 2-Sided Scanning Original can be 1 or 2 sided, second side can be rotated Background Suppression Automatically reduce or elimate a dark background Original Type Text, photo or text and photo Resolution From 72x72 to 600x600 dpi Resolution Sets the scan settings to suit how the scanned image will be used Quality/File Size Optimum quality versus file size Original Size Set size of original File Name If file name already exists Scan to Edge Scan the complete page Document Management Fields Enter index information about your document Add File Destinations Add additional file destinations to any template File format PDF, TIF or JPEG quick use guide 25
-
 1
1 -
2
-
3
-
4
-
5
-
6
-
7
-
8
-
9
-
10
-
11
-
12
-
13
-
14
-
15
-
16
-
17
-
18
-
19
-
20
-
21
-
22
-
23
-
 24
24 -
 25
25 -
 26
26 -
 27
27 -
 28
28 -
 29
29 -
 30
30 -
 31
31 -
 32
32 -
 33
33 -
 34
34 -
35
-
36
-
37
-
38
-
39
-
40
-
41
-
42
 |
 |
