Xerox 7300N Troubleshooting Guide - Page 17
Xerox 7300N - Phaser Color Laser Printer Manual
 |
View all Xerox 7300N manuals
Add to My Manuals
Save this manual to your list of manuals |
Page 17 highlights
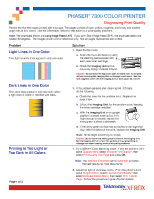
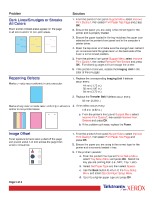
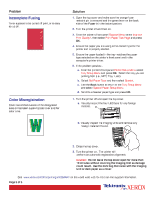
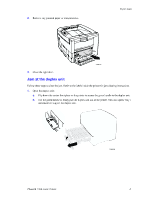
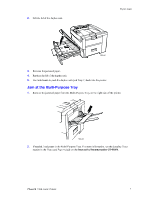
Problem Solution 1. Open the top cover and make sure the orange fuser restraint pin is removed and the green lever on the back side of the Fuser is in the locked positon. 2. Turn the printer off and then on. 3. From the printer's front panel Support Menu select Improve Print Quality?, then select Print Paper Tips Page and press OK. 4. Ensure the paper you are using is the correct type for the printer and is properly loaded. 5. Ensure the paper loaded in the tray matches the paper type selected on the printer's front panel and in the computer's printer driver. 6. If the problem persists: . a. From the printer's front panel Printer Setup Menu select Tray Setup Menu and press OK. Select the tray you are printing from (i.e., MPT, Tray 1, etc). b. Select Set Paper Type and then select Special. c. Use the Back button to return to the Tray Setup Menu and select Special Paper Setup Menu. d. Scroll to a heavier paper type and press OK. Incomplete Fusing Toner appears to be pulled off print, or is easy to rub off. Color Misregistration Color has shifted outside of the designated area or has been superimposed over another color area. 1. Turn the printer off and open the top cover. a. Visually inspect the four LED bars for any foreign material. a b. Visually inspect the Imaging Units and remove any foreign material if found. 2. Close the top cover. 3. Turn the printer on. The printer will perform an automatic registration alignment. Caution: Do not leave the top cover open for more than 10 minutes without covering the Imaging Unit as damage could result. Use the dark bag that came with the Imaging Unit or dark paper as a cover. See www.xerox.com/officeprinting/infoSMART on the world wide web for more on-line support information. Page 3 of 3
-
 1
1 -
2
-
3
-
4
-
5
-
6
-
7
-
8
-
9
-
10
-
11
-
 12
12 -
 13
13 -
 14
14 -
 15
15 -
 16
16 -
 17
17 -
 18
18 -
 19
19 -
 20
20 -
 21
21 -
 22
22 -
23
-
24
-
25
-
26
-
27
-
28
-
29
-
30
-
31
-
32
-
33
-
34
-
35
-
36
-
37
-
38
-
39
-
40
 |
 |
